As much as I love drivel, and I know you crave it, today’s post is full of holes…
Next week we will introduce the DJ-1 Universal Jaws and the capabilities are amazing, pics below.
I would also like to extend a big thank you to all who helped perfect this accessory with a special thanks to Roger Savateri and Rutager West.
Pricing and availability will be announced next week.
If you currently do not own a DJ-1, we are taking names for the next batch.
–John
……………………………………………………………………………………………………………………………………………………………
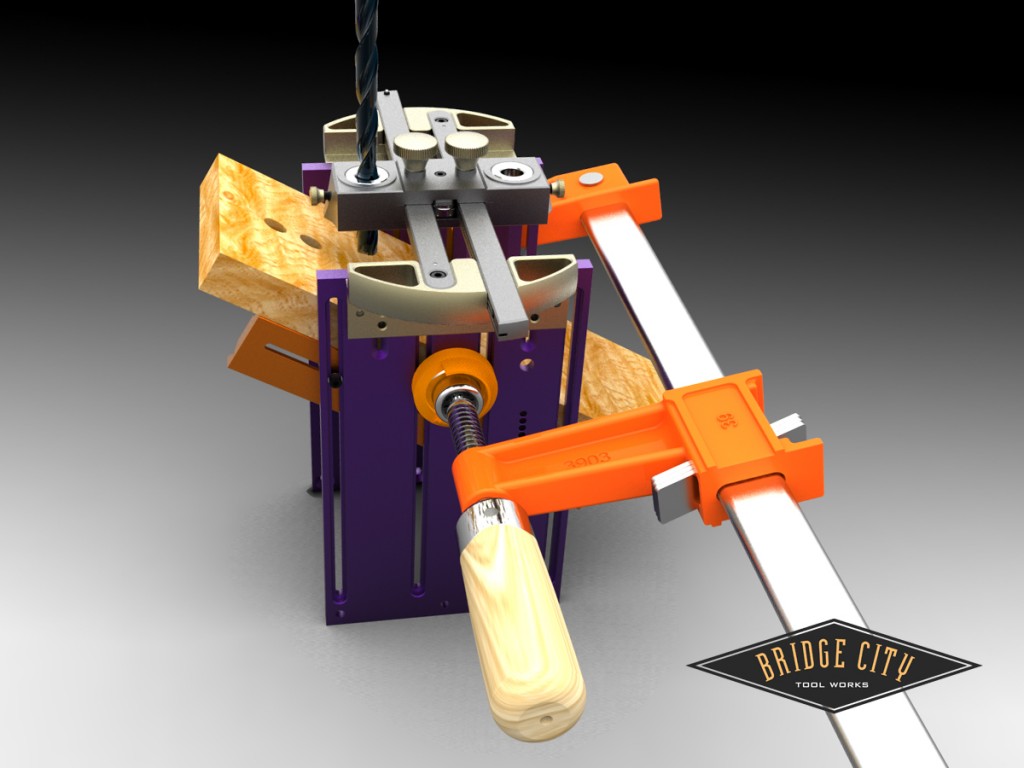
To drill angled holes at any angle, set one of the orange jaws to your angle of choice with a t-bevel. The second jaw is aligned to the first by clamping them together with a piece of dowel in the “V” grooves and tightening the second jaw–the dowel will automatically align the loose jaw to the fixed jaw. You will want to position your stock as close to the bottom of the DJ-1 body for both maximizing drill depth and accuracy.
…………………………………………………………………………………………………………………………………………………………..
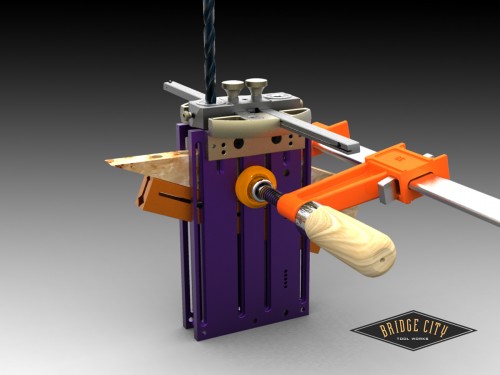
Drilling dowel holes in miters are easy, set your jaw angle and you are ready to go. The DJ-1 Universal Jaws now feature viewing ports so you can see your center-line if it extends down either face.
………………………………………………………………………………………………………………………………………………………….
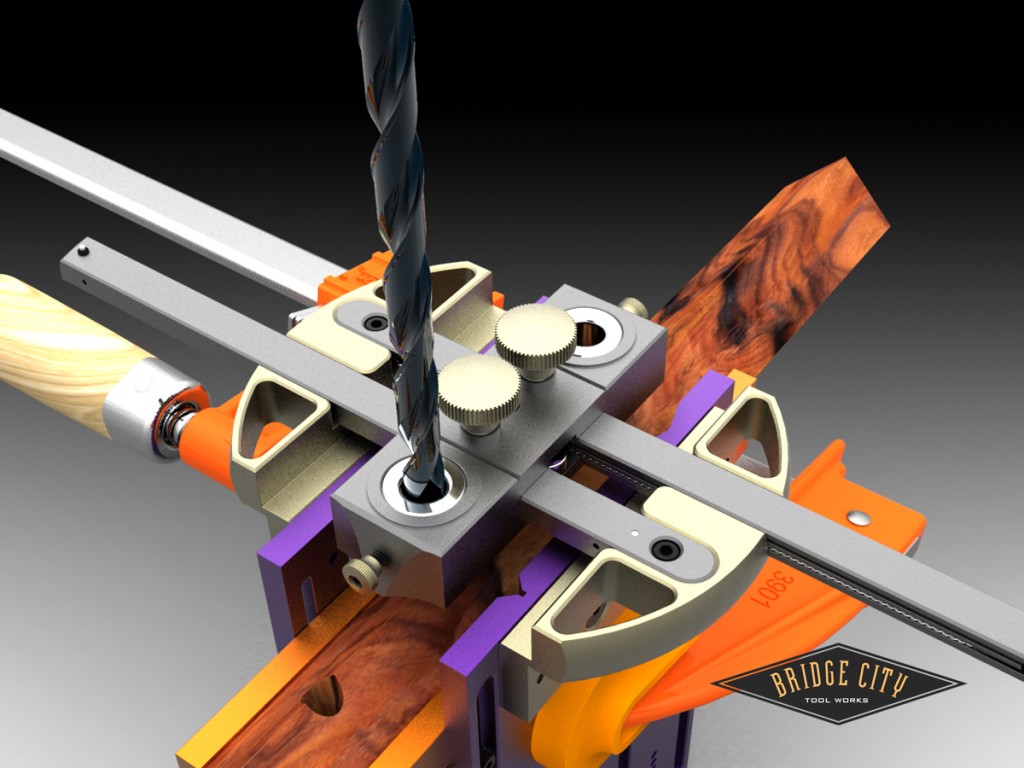
Drilling on the “bias” is ridiculously easy and really only doable through a drill bushing. If your stock is square, the hole will enter straight down the corner.
.
…………………………………………………………………………………………………………………………………………………………..
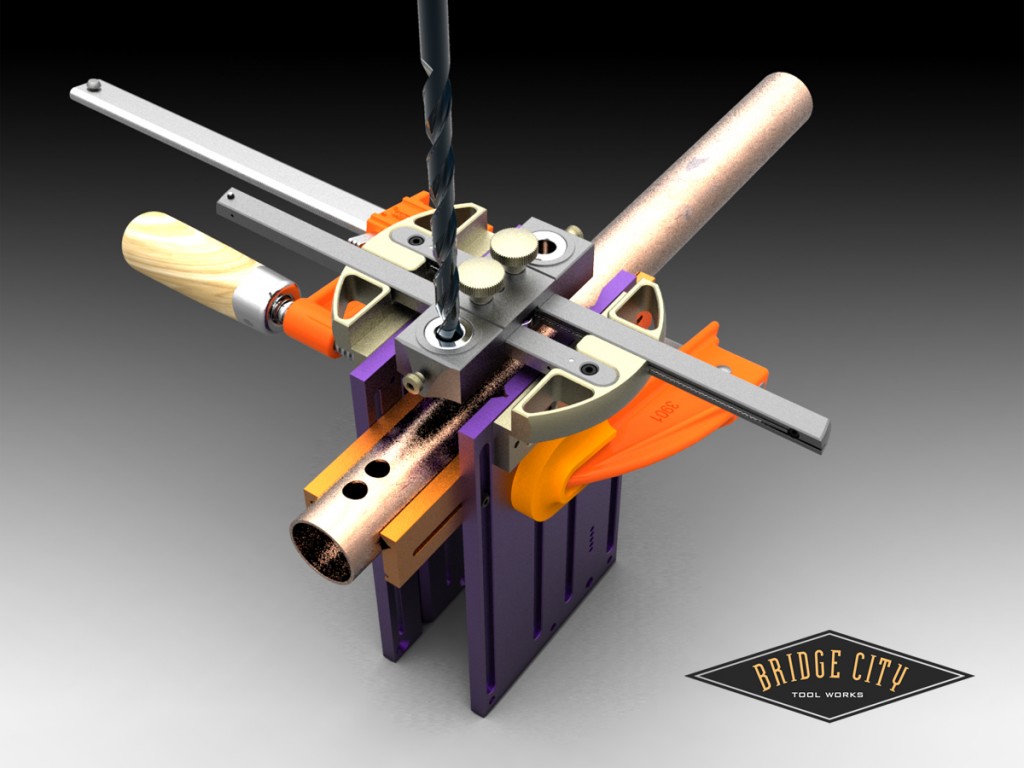
Center drilling round stock/pipe/tubing has never been easier or faster. The difference between the Universal Jaws and the standard jaws is in this case, the orange jaws can be angled or lowered, either increasing capacity or adding the ability to drill angled holes.
………………………………………………………………………………………………………………………………………………………….
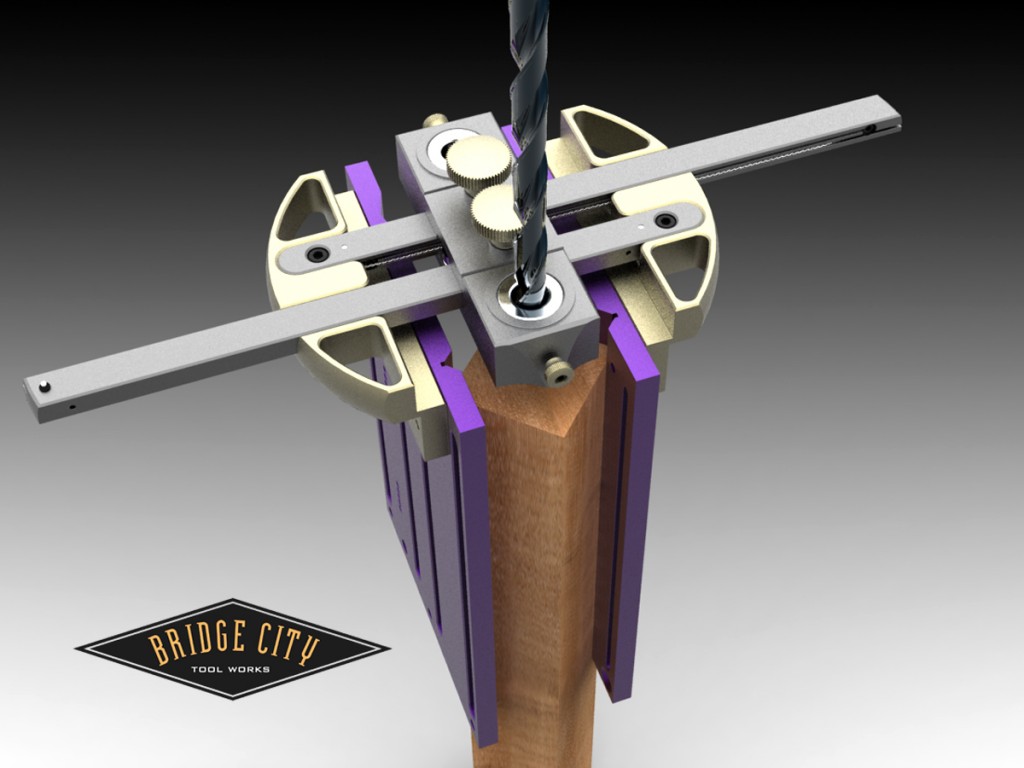
Center drilling square stock, or round is fast and accurate. No layout required as DJ-1 self-centers. The advantage here over the standard jaws is increase stability.
…………………………………………………………………………………………………………………………………………………………..
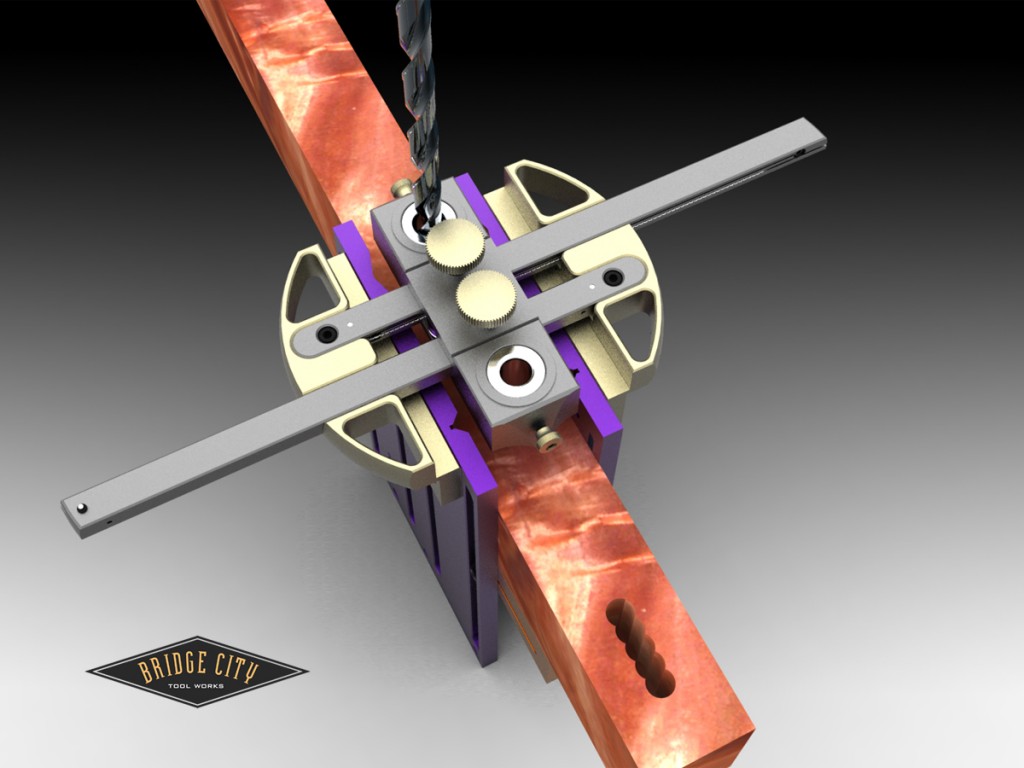
Because the drill is bushed, there is no bit drift if your stock is close to the bottom of the bushing. This means drilling mortises is really accurate and they clean-up much faster. This is not possible on the standard jaws without making custom jaws.
………………………………………………………………………………………………………………………………………………………….
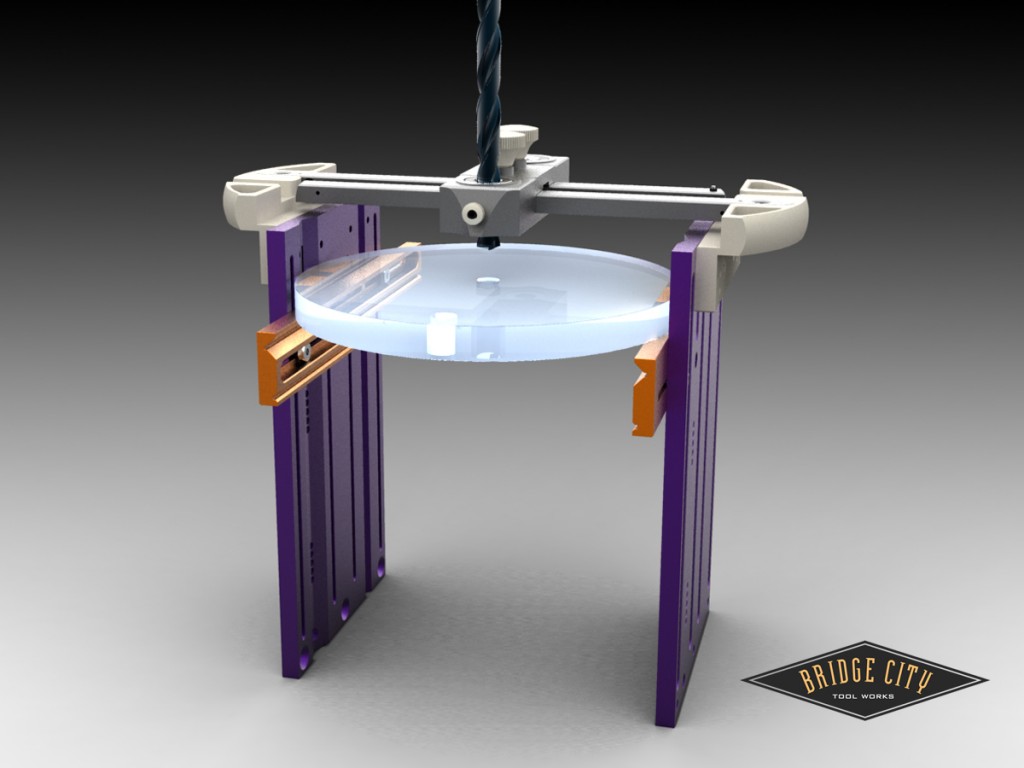
Center drilling axle holes without layout is fast. If your stock will not support itself during drilling, cut a base slightly narrower than the diameter out of plywood and bridge across the orange jaws. This is not easily replicable on the standard jaw set–actually not possible.
………………………………………………………………………………………………………………………………………………………….
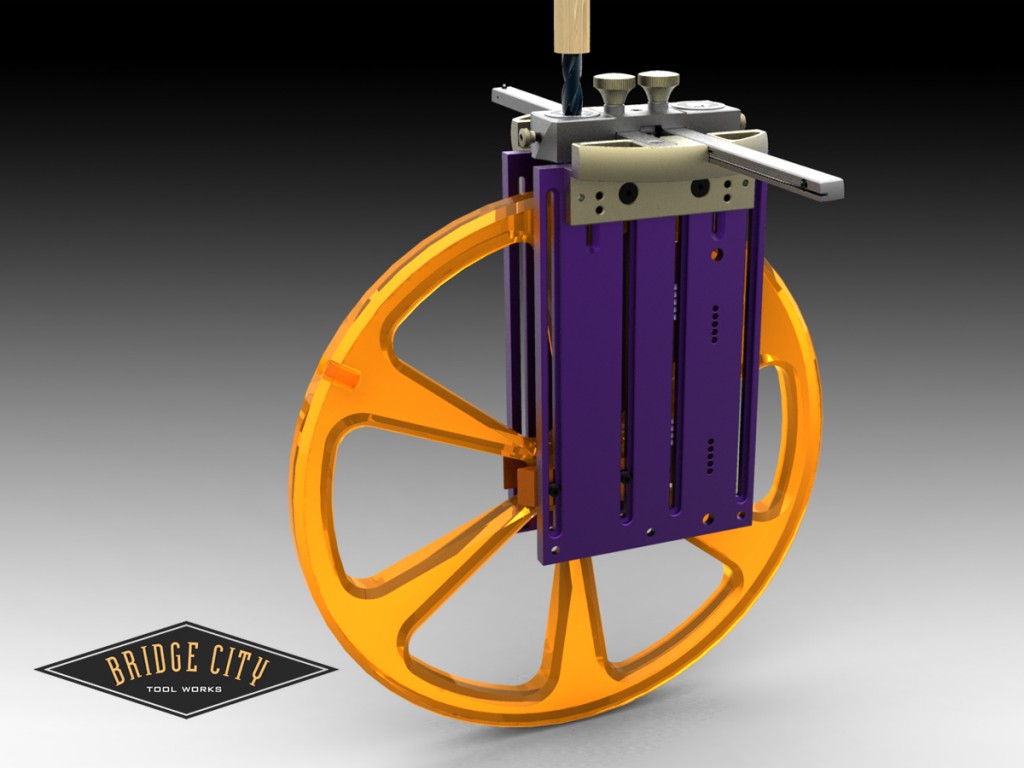
Simple radial drilling can be done with the small radial drill accessory (included with the Universal Jaw kit). You can control depth with easy to make drill stops out of dowel–they take a couple of minutes with the DJ-1.
…………………………………………………………………………………………………………………………………………………………..
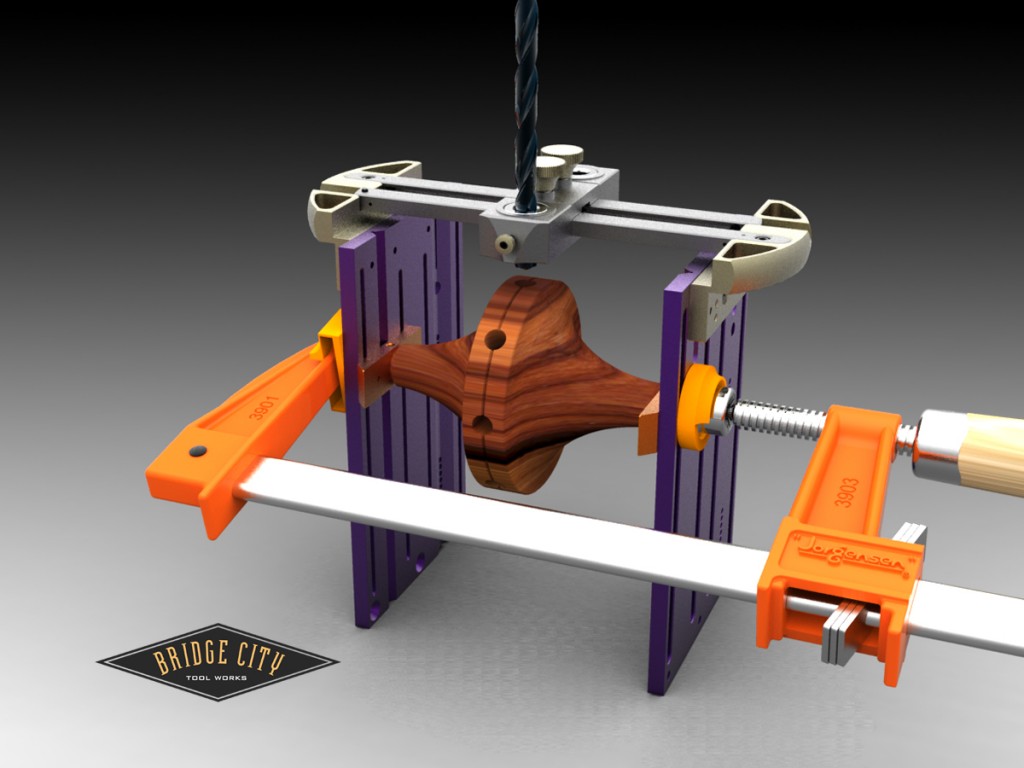
Many cool projects in wood involve hubs and it is now easy to drill spoke holes. It is even easier with the optional index wheel kit.
………………………………………………………………………………………………………………………………………………………….
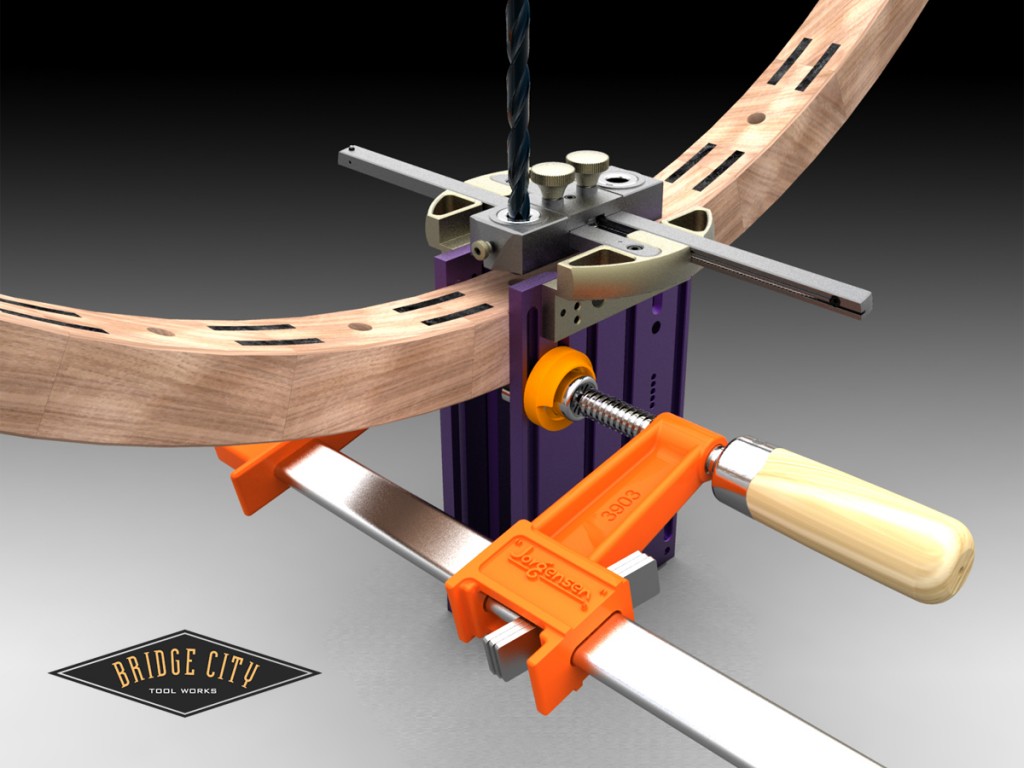
Just about any concave surface can be configured beneath the DJ-1 bushings. Here we are demonstrating how to concave drill spoke holes on a 48″ diameter rim.
………………………………………………………………………………………………………………………………………………………….
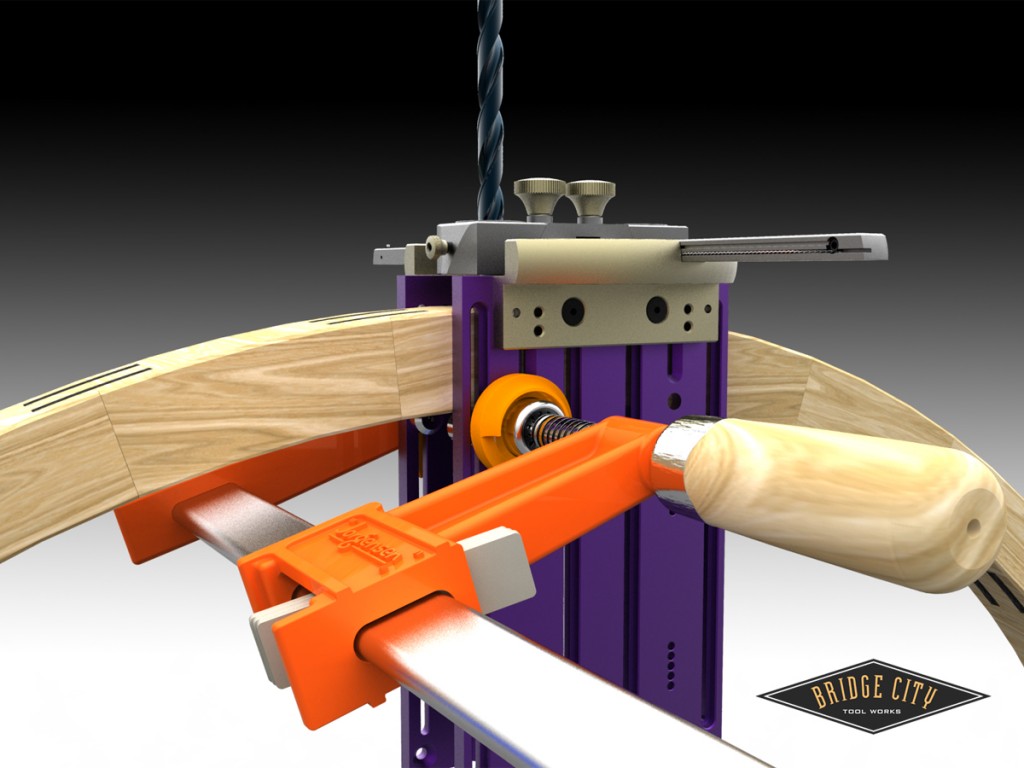
Convex is easy too. There is no limit to the diameter.
…………………………………………………………………………………………………………………………………………………………….
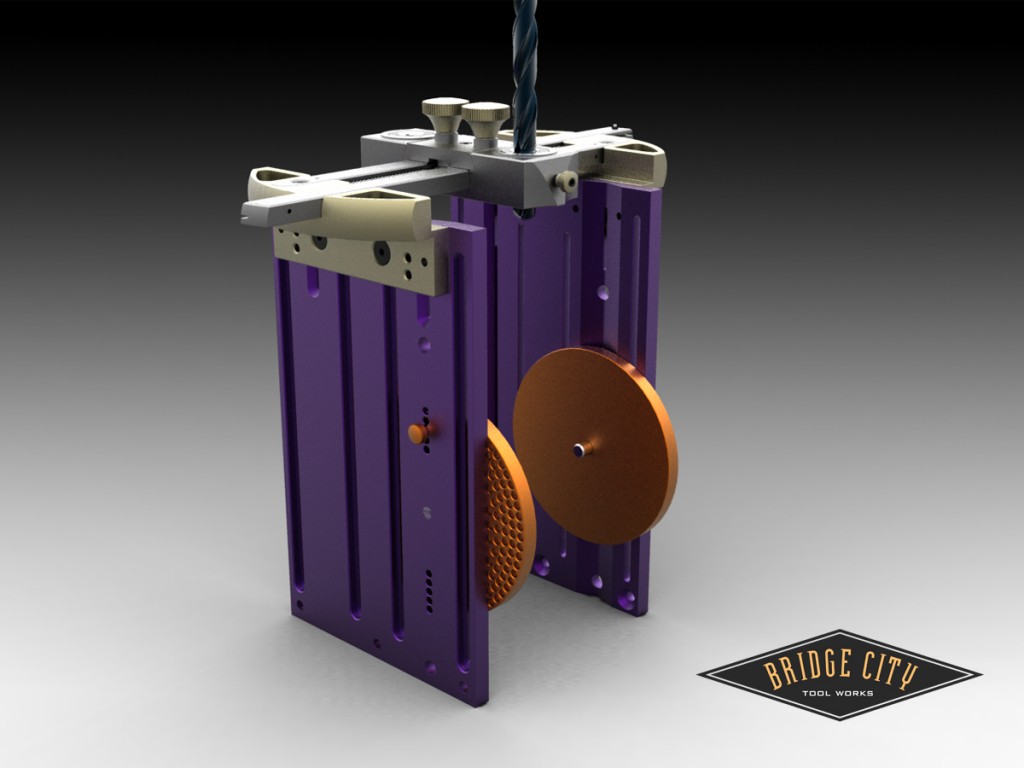
The optional index wheel kit will allow you to make pin gears, and other precisely spaced radial holes. The stock is held to the wheels with double stick tape for positioning during drilling.

John,
I love it, can’t wait to get one in the shop. I still have a couple of cool jaw ideas to build that will compliment these nicely! Just reading the descriptions and viewing the pictures has got the creative juices flowing! Do you have a projected date when one (or 2) of these will land on my stoop?
Thanks, Rutager
John,
What type of depth can one achieve using the jaws at say a 55d angle? Or is there any limit?
Thanks, Josh
Josh,
Maximum drilling depth is determined by two factors, bit length and the location of your stock in relation to the bottom of the bushings.
When your stock is at an angle (non-miter drilling) you will want to get as close to the bottom of the bushing as possible to maximize the hole depth (when drilling through a bushing you lose about 3/4″ of drilling depth).
Lastly, longer bits are available if the standard bit lengths fall short.
Hope this helps.
-John
Angled drilling!!!!
I recently bored 150 holes at a 45 degree angle, and needed a drill press….
At the start, I got out my DJ-1, and was amazed that it couldn’t handle this simple task! Probably why the DJ-1 is so affordably priced – John finally underdesigned something!
The extras, for advanced setups, would still make it a steal!
I’m getting this add-on!!!!
Wow! Those look impressively versatile. Well done.
Just out of curiosity, what was the application that required the 150 angled holes?
Sometimes knowing these things gives others ideas–including myself.
–John
Leftistelf,
The new jaws should handle angles very nicely, but you can make custom jaws to set your angle. John shows a set in the Dj-1 video drilling 45 degrees it’s at the bottom of the page.
Sounds like an interesting project, hope it turned out!
-Rutager
John,
could you please post again where we can get odd size drill bushings? Do these come with a flat on them, or do we just need to grind one?
I’m thinking – what the heck, I got the CT-16 and all of the bits….I was using one the other night and realized I didn’t have the drill bushing for it.
By the way, I LOVE the indexing wheel on this attachment. I don’t know exactly why as I don’t have an immediate use for it, but knowing I have it opens doors so to speak….Now I can incorporate indexed holes it into a design!
thanks much,
Dennis
Wonderful renderings, John. I love some of the ideas you showed.
It occurred to me as I was looking at that orange plastic wheel being drilled radially that it would be cool to make the DJ-1 with the jaws so that it could be mounted on a router. Say you wanted to make a perfect circle out of wood. You could rough-cut it on the bandsaw (I know your antipathy to power tools – but some of us use them anyway), mount it in the universal saws, mount the DJ-1 to the base of the router, chuck in an appropriate bit (say a flat-bottomed bit the same width as the material), turn the router on, and slowly turn the disk under the router. Perfect circle every time. You could also use it to cut a dado along the outside of a circle, say, for a tire or banding of some sort.
I guess they have shapers, circle-cutting jigs and other things for that. But I was just thinking of the possibility of doing cuts that were perpendicular to the drill bushing by moving the material under a spinning router bit.
– Peter
P.S. In re-reading this post, I see it is a good candidate for “never push the submit button unless you’re sure…”, but I’m going to anyway.
Peter-
Cutting circles with a router is often a good idea, and not hard. If I read your post correctly, you are suggesting to run the router bit through a bushing? That would be a really big no-no, the heat will seize the bit to the bushing, the torque would be something else if that were to occur.
If you are suggesting self-centering jaws for a router, that would work and the bit would create the circle as the wood becomes a true disc. I have done this making clock gears and it works OK. A flat bottomed bit makes a pretty rough finish (surprisingly).
Thanks for sharing.
–John
Dennis,
Maybe if we all gang up on John, we can get him to offer a bushing set for the CT-16 bit set. The information on getting custom bushings is posted in the community forum under the DJ-1 section. I did this once and if the bushings are stock sizes, they are pretty reasonable, otherwise custom ones can be $40 with the set up fee, which they waive when you order 50 or more, so you can clearly see the benefit of BCTW selling them to many of us! The weird thing is the fractional sizes you would figure would be standard might not be. Must be something to do with the way machinist order them. Putting a flat on them is real simple, hold them in a set of channel locks and lightly touch them to an 80 grit grinding wheel, it doesn’t take much.
John,
I see villagers, torches and pitchforks in your future, how about some bushing sets?
Thanks, Rutager
Folks,
When the pre-order email goes out this week for the Universal Jaws, we will also offer the missing bushing sizes for the Palm Brace. If we have enough takers, we would be happy to buy them in bulk for the discount.
–John
John,
Thanks and rats! I really wanted to try out my pitchfork, Cooter just tuned it up for me.
-Rutager
To swell that head a little farther, the clamp to keep the plates parallel/protect the knob threads on larger pieces or where the piece is farther away is clever. That was actually one of the things I wondered about when I saw the extension design.
If I order this, I’m also going to get the orange Jorgenson clamp from Home Depot–the color coordination of the stock part is pretty.
Regarding the clamp on the Universal Jaw kit–mandatory in most cases. The locking knobs on top of the DJ-1 were never made to clamp the unit to the stock, they are there to anchor the bushing housing (body) to the arms and the nylon threads are designed to fail for those who over tighten (as opposed to ripping out the threads in the body cap).
The DJ-1 without the Universal Jaws was designed to plop down in a wood vise for clamping.
Thanks for mentioning this-
-John
Question-
Do any of you see the need for a set of jaws with a bigger “V” groove for holding larger diameter tube/round stock?
Let me know ASAP!
–John
I imagine clamping for any combination of weight, leverage, potential motion, or machine torque (until that picture, I hadn’t thought of using the DJ for metal pipe).
I hope all the smaller components will be available as spares. A boy gets ideas for breaking stuff…
Didn’t see your last post before my 9:35 PST. Bigger V jaws as an option might be nice.
“Mo’! Mo’! Mo’! Mo! Mo’! Mo’! Mo’! Mo’! Mo’!”-Billy Idol
I don’t own a DJ-1 but wondering since you show it drilling into metal whether the filings interfere at all inside the bushings?
Metal chips could interfere, and I had that experience today. They don’t interfere withe the bushings but they can interfere with the smooth operation of the arms. The internal pulleys are smooth so I removed the top cap and gave it a quick blow and it was all back to normal.
Good question and thanks for asking.
-John
Hey, I have a queston. Does anyone have a good suggestion for drill depth stops that work really well for the DJ-1? Just thought I would ask.
DJ
Make your own! Here’s how-
The DJ-1 allows center drilling on dowels. You can center drill a dowel, cut it to approx. length and fine tune the depth of the drill if you are using a 3 jawed chuck. If you are using our palm brace, you will need to carefully cut the length, OR, cut the length a bit short and shim the stop with washers at the top.
This works fantastic, and the wooden end of the dowel when it touches the bushing does no harm.
In the intro video for the DJ-1 the first thing we make is a drill stop–you can see it here (the video is at the bottom of the page.
–John
John,
Can more then one set be connected together to increase the length? I know that this was important to Roger, and had merit in some very specilazed applications. I’m not sure if I need the capacity, but if they can, some of us might want to get an extra set ordered before production starts!
-Rutager
Rutager;
Yes. There is a left and a right plate. To double the length, flip a right plate upside down and connect to a left plate–this keeps all the vertical grooves aligned. They fasten together with a bridge via the counter sunk holes visible on the bottom of the plates.
The user would need to make the connecting bridge out of wood, or other suitable material. If there is sufficient interest, we can offer aluminum connectors.
–John
I’m for the extensions.
Dennis
Dennis;
Do you have an application in mind? Edumacate me please!
–John
John.
I can see needing the extra length if you were to be drilling holes on something wide like a 2 x 12 stair stringer, but only if you needed to do so at an angle. I could also see it used with the index wheel for larger diameter pieces.
-Rutager
I was hoping for the orange bars to be offered separately. With an extra pair, you could limit vertical motion of the board–the jumping as a bit hits it and sends things flying.
I get it that the pretty orange clamp does that *some*, but extra bars would augment it and allow less pressure from the sides. I’m imagining the aforementioned bit making initial contact with the board, and the board skittering out of position, or something inside the board with inconsistent density making the motion through the piece perilous. Or the bit kicking back and knocking things out of whack. I think limiting motion above the board would help.
Did I mention how good I am at breaking things?
John,
First Thanks for “unsticking my eyeballs” on the drill stops….”I knew that”…Is the reaction I got when I read your response…
Second, Rutager hit really close to home on my thoughts regarding the extensions (he is always ahead of the class it seems). The uses “percolating” in my head are related to combined use with the indexing wheel. I’m not sure if I would need extension arms, but one of the reasons for my (really) love of your creations is the value of removing limits on how to do work. I like to turn things in my shop – sometimes big things as in 24″ diameter, etc. I was thinking about combining the DJ-1 and turnings to incorporate the combination of a lathe turned piece, indexed holes, and carving elements. by creating a larger piece turned between centers (leaving a round tenon protruding from the bottom of the bowl), you have a good place to mount the index wheel, and then subsequently position the DJ-1 for piercing the piece around its cercumference in a very “indexed” way so to speak. Once the Piercing is completed, you can chuck the bowl by the bottom and quickly remove the center tenon, then work the carving elements around the peirced holes as reference points. The same can be done on an even larger flat outboard turning (>24″ diameter)where you might wish to add an element on the circumference.
Dennis
that is “circumference” – I never was a good speller….
Regarding the extra orange bars to stop negative feed…why not employ the pin stops that come with?
We will offer extra plates but at the moment I am in Atlanta goofing off at IWF by demonstrating the Jointmaker Pro in booth 7073…
The index wheel is going to create some really cool projects…did you know the first gears were wooden pin gears? Hmmm……
-John
As a matter of fact….Yes I do – Old flour mills incorporated pin gears – really cool! they were actually quite strong if made well and the gears could be replaced if the darn thing jammed up! Ships wheels were sort of a derivative of that design. I can seeing a design which would make Rube Goldberg proud of me …..Maybe I could use your site for a naming contest when I get it built? DJ
You can use this site for any cool idea that doesn’t land ANYBODY in the gray bar hotel!
-John
In Atlanta the whole show?
In Atlanta the whole show?
Yup.
–John
I witnessed John’s unlisted, but above-noted presence at the IWF Atlanta show. Like every other shopkeep at IWF, he looks lonely and forelorn–like the Maytag Repairman. In a fit of pique, he tried to hurt my inattentive hand with the Jointmaker-Pro, but failed. It truly is safer than a Sawstop.
There’s a prototype of something else, if that’s incentive for people to have a fun day or two looking at machines.
John,
Have you had a chance to figure out a bushing package for the CT-16 bit set yet?
Thanks, Rutager
Rutager,
No, not yet. I will be back in the office on the 5th and will give it a go then.
-John
John, I drilled 150 holes when building my wife’s embroidery rack. She has a commercial machine, so she uses 15 6″ spools at a time. She has over 120 spools, and needed a place to hang them, so I cut 4″ strips of birch ply, drilled holes on a 45 degree angle every ~4″, inserted dowels, cut/sanded the backs flush, and hung the strips using a french cleat. I used my dad’s drill press, which we set-up a jig to maintain a consistent angle and spacing. Would have been great to do this using your system. Will be placing an order ASAP.
Leftistelf-
Thanks for sharing your project details.
It is fun to learn what others are doing!
–John