____________________________________________________________________________________________________
“The scientific theory I like best is that the rings of Saturn are composed entirely of lost airline luggage.” –Mark Russell
____________________________________________________________________________________________________
A couple of weeks ago we launched the Precision Fence System for the Jointmaker Pro and SW. We also offered a kit for table saw owners. Everything you are about to read is applicable to both systems.
If you recall, I designed the fence system for me–I have projects in my brain that will never come to fruition on my JMP without this fence. And then it happened…
I couldn’t sleep.
One of my ideas involves using this material from Midwest Products (FYI, their stuff is AWESOME and a huge time saver at times). I realized that pivoting finger stops would be useless with thin material. That is now fixed (@ no extra cost), a pic of the revised stop is below.
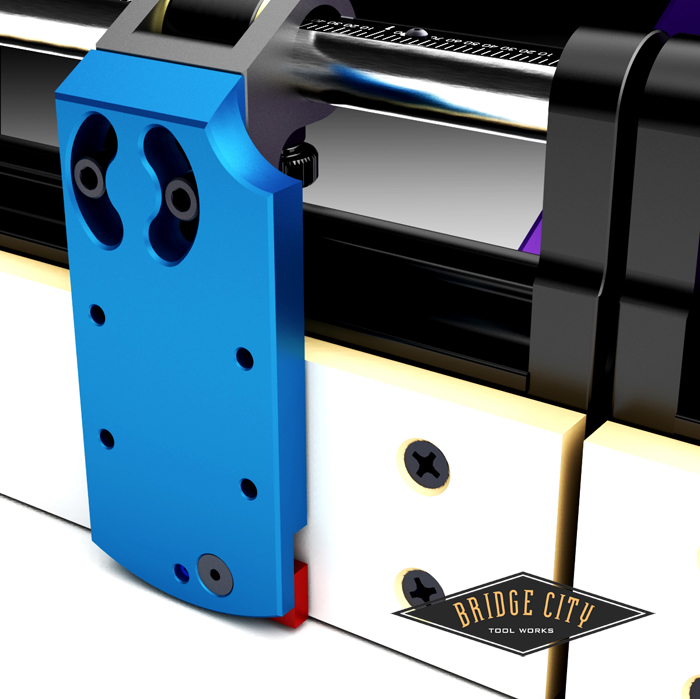
Here is an image with thin stock firmly stopped prior to cutting (you can also see how the red aluminum stop can pivot out of the way);
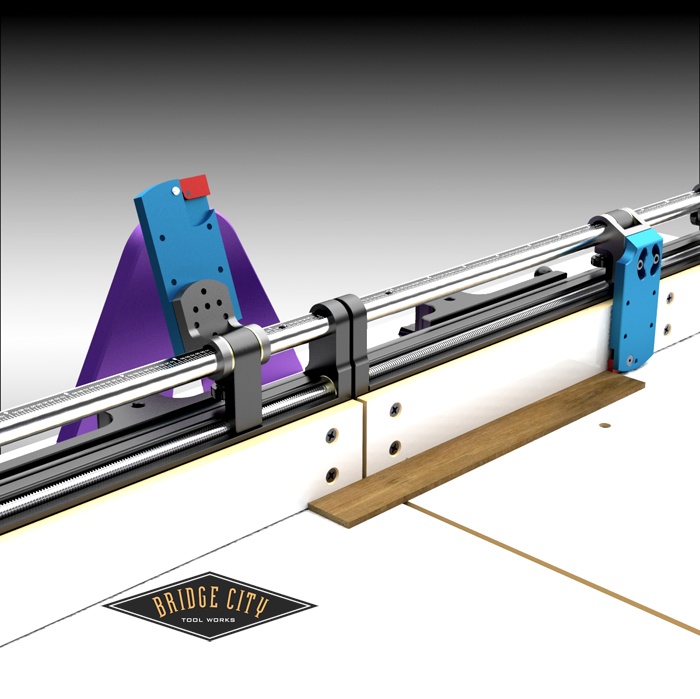
Once that was fixed, several JMP owners inquired if it was possible to make the Table Saw Sled Kit fences pivot. I thought about this for a couple of days and decided to add additional tapped holes into the table saw guide bars. This will allow JMP owners to attach their fence base directly to their shop made table saw sled. We are now going to offer this option to non-JMP owners with the kit shown below–this avoids the routing of an arcuate slot in the tables;
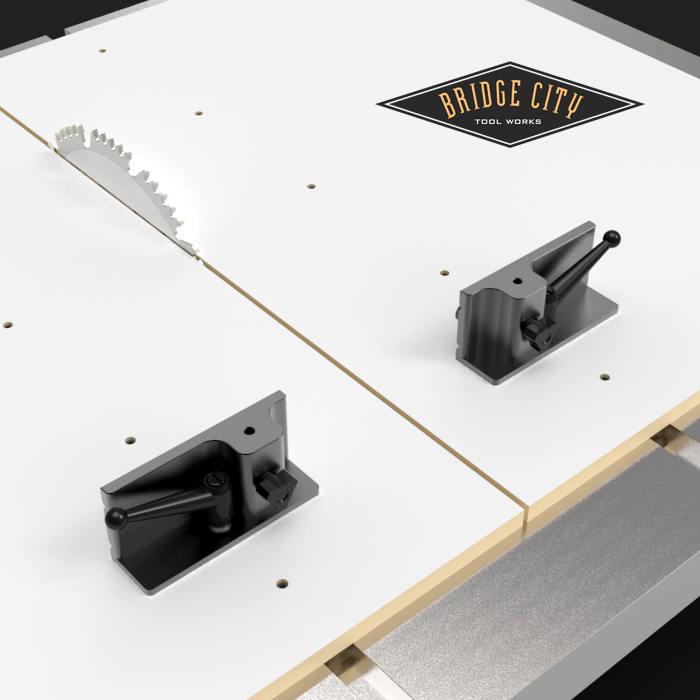
As mentioned, the fence will bolt directly to the guide bars and when fully assembled (the kit does not include the sled substrate material) will look like this (both fences can be angled);
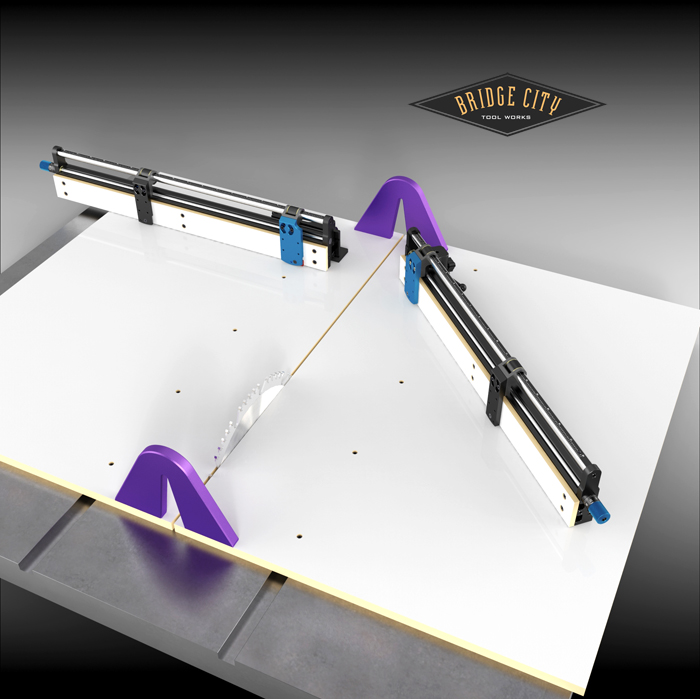
The lever locks will provide plenty of force to keep the sleds in place. But I would be remiss if I didn’t live up to my huckster image by adding…wait there is more!
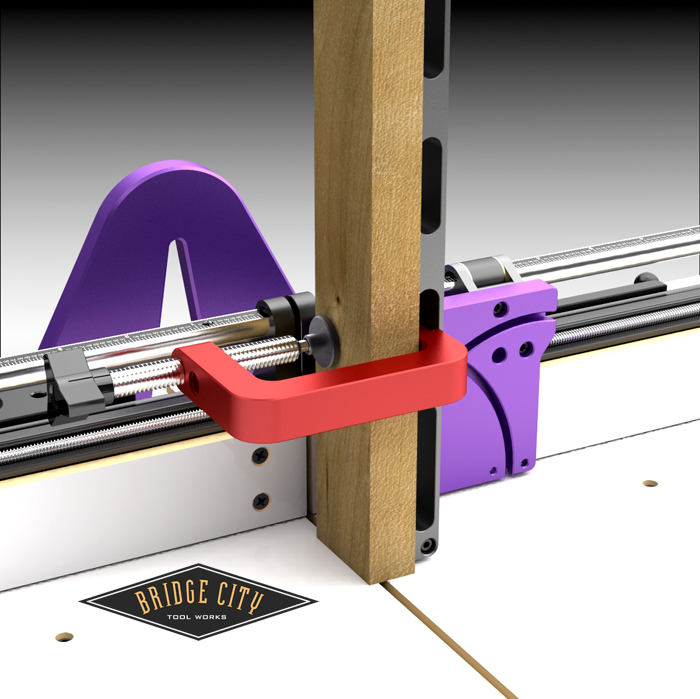
You can now use the bases to attach our articulating clamps as pictured below;

These changes precipitated some minor changes that are not worth mentioning. But this next image is a big deal; When you set one stop, you can use the opposing stop as a clamp–to make cuts like the one below–you will most likely need to still hold the stock front to back (not on small stock however!);
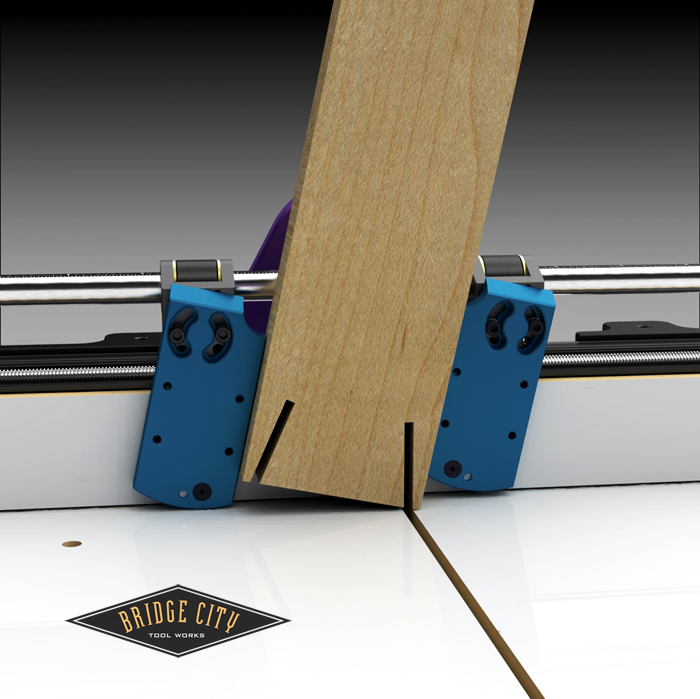
We are changing the color of the integral clamp to red. This is a subtle reminder that there are cuts you may want to make and that you cannot put this clamp in harms ways. As cool as this system is, it does require at times that the user engages the organ residing within the cranium.
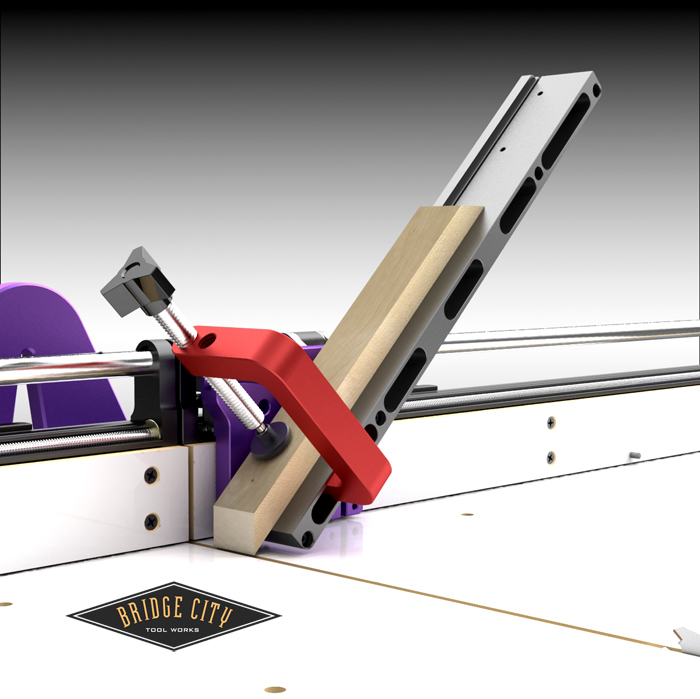
What this sled allows you to do is make many of your angled cuts (not all) without tilting the blade. And now that the fences tilt, this includes the ability to make some compound miters without tilting the blade as well. Because of this, we modified the protractor plate to allow compound miters without intersecting the pivot arm. This also required more slots for the integral “C” clamp. This is way cool.
The bias arm allows angled cuts as shown below, as well as a way to firmly hold round stock;
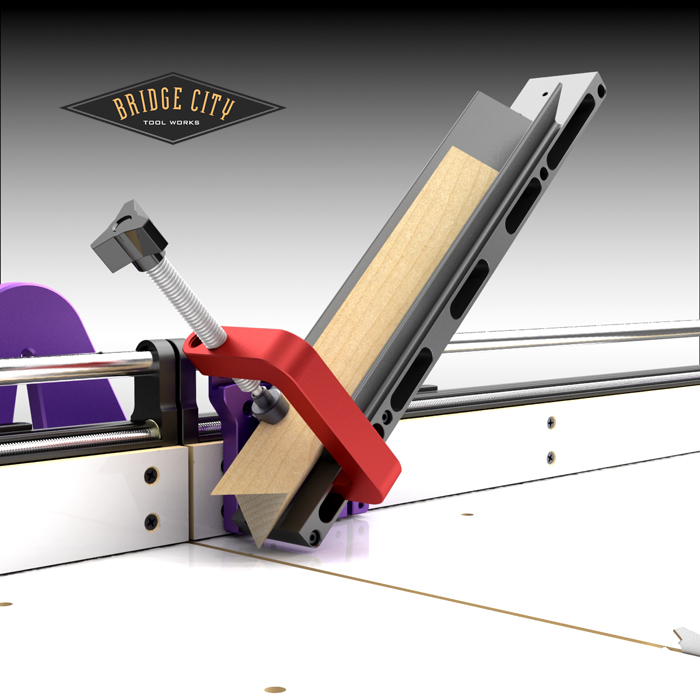
This is a typical tenon cut set-up. What is not easy to see is that you now have the ability to move your stock using the micrometer adjustor…0.001″ increments.
If you are a JMP or JM-SW owner and have placed an order for the Precision Fence System, you need do nothing. If you ordered the Table Saw sled kit and you want to add the pivot bases, you need do nothing UNTIL we announce their availability via email next week.
We believe both of these products are game changers. They are also our last offering for 2011 and we will close the order window on December 30th for a March/April delivery.
So…if you are a typical male and when asked what you would like for the holidays and your stock answer is “nothing”, and then get depressed because your wishes were granted, we hope to hear from you the week between Xmas and New Years! 🙂
–John
PS: This is a big shout out to all who participated and commented regarding this system–your voices were heard and we have a better product. Thank you!
PS Again: Our very own Michael Berg, who works in a toxic waste dump of an office, can now be found between the pages of Smithsonian Magazine. He is taking a couple of days off to practice signing autographs.

John,
As usual, I find myself simultaneously drooling over the tool pron and wondering how you form your ideas; there truly isn’t anything else like Bridge City out there.
One question for you; will these be offered semi-regularly in the future? The reason I ask is that I went all-in on the JMP version, but can’t justify the TS version just yet. I’ll be sans-table saw for awhile as the Navy is moving me to an island paradise in the Pacific.
Oh, one other question: are grass skirts like kilts, i.e. no undergarments authorized?
Dave
Dave,
In order of importance;
1) I don’t know squat about grass skirts, and I am sure there is a pun there…
2) Everything you splurged on ports to the table saw. Chill.
3) This fence stuff is likely a once a year run.
4) Thanks for the kind words!
–John
Ah ha! The new pivoting stops are fantastic and completely address my confusion about them earlier.
Can you use the TM-1 against the back side of the tenon / mitre jig? I’m trying to envision a setup that leverages the precise adjustment of the tenoning jig with the measure-free precision of TM-1.
1. Set up tenoning for first cut (as in photo — where micrometer adjustment is a sanity-saver)
2. Set up the TM-1 against the back metal plate of the tenoning jig.
3. Set the black floating stop against the other end of the TM-1
4. Make first cut.
5. Flip TM-1 and move tenoning jig to be flush.
6. Make second cut.
7. Bask in the glory such easy precision.
Can’t wait for order for the JMP2S to open!
Thanks John!
Matthew,
No, nothing about the purple protractor plate relates to the scale on the traverse bar. It does move in .001″ increments however. That said, what you propose should work!
Lastly, we are opening run 4 of the JMP in mid Jan.
–John
Very cool evolution, John.
So if I’ve ordered the fence system for the JMP, is there an ‘adapter kit’ to take that fence and use it on a table saw? I’m thinking two runners and the two purple spanner braces.
Really functional design now. Thank you!
neil
I think we’re on the same page. I was not expecting purple plate to relate to the scale. I’m just curious how to pair the TM-1 with new fence.
Both the KM-1 and the TM-1 will work superbly with this fence system. The outboard stop (black) does not engage the lead screw but does lock to the traverse bar–this is the stop that you would reference as your base before you flip either of the “makers”. At that point you traverse whatever is attached to the purple protractor plate for the second cut.
-John
@Neil, the only thing a JMP Fence System owner needs to movee the fence from the JMP to a sled are exactly as you noted, the bridge plates (wood shop made bridges would wrk fine) and our steel guide bars.
I apologize if this has been asked before but what does one need to buy/do to use the 18” fence on a joint maker pro? Or is this a bad idea?
Charles,
Next week we will offer the “Works” bundle for the sled kit. This bundle will port to the JMP sans the sled bridges and the guide bars.
If you have the shop space, the 18″ fences will work fine, but look a bit out of proportion. It is a personal choice that will maximize the system for two different saws.
You are not alone, several others are doing this. My JMP is in a back bedroom and I don’t have the room for the larger fences.
Hope this helps.
–John
I can’t wait, though I’m still more than slightly confused as to what I need to order….
I’ve already pre-ordered the Table saw Sled kit, tenon jig, and each one of the clamps. There was no “Works” bundle at the time I ordered so I’m wondering if I’ll be able to cancel and re-order. (I think I was able to take advantage of the no-shipping fee offer at the time, however).
In addition, I now own a JM-SW, so I’m wondering whether the TS Sled kit will fit on the JM-SW (other than the out-of-proportion comments) and what, if any, adapters I’ll need to get….
Chris,
We will post all these details on Tuesday. We will amend existing orders and those that nabbed our free freight deal will be fine.
John
Would the 18″ fence need a larger base plate?
Charles:
The fence bases are identical for both fence lengths. If one does not want the table saw fences to be angled, then the fence bases are not required at all–unless one wants to use the articulated clamps.
–John
John.
Beam me up Scotty!
Love the new changes.
One question does come to mind at the moment, in the next to last photo as I’m looking at the slots in the “bias” unit there are four holes spaced along the slots – could they be used to attach another bias sled to itself in order to double the width capacity yet still use the sexy red c clamp? If not with those holes could u c another way to combine them side by side?
…..well, looking at it again the sled would have to be flipped around due to that ledgy rise on the back side. Are there slots on the side we are not seeing as well?
Hmmm, still waiting on that 360 degrees view thing. 🙂
…. Ok, looking closer I see there is only a “rise” in the rear of the bias bar if u wish it – otherwise it’s flat, so one does not need the slots on both sides.
Just a way to attach two bias’s side by side. 🙂
Roger-
No way to attach arms side by side–not saying it can’t be done, but I am done!
Now, about the 360 degree view–I have the software but my hardware can’t keep up–
So, in 10 days or so my new dual Xeon workstation arrives and thanks to YOU, I am $10K poorer!!!
But it will be fun!
–John
Always glad to be of service!
Can’t wait to see next years offerings in 360 view! Does your new workstation offer a 3-d application as well? That way we could just reach out and “touch” the new designs. 🙂
.
Regarding the double bias option, will there be ( or will there be the possibility of) supplying the backside of the bias sled with a couple of threaded holes so one could attach a shop made thin-ply bridge in the back in order to double up on the bias sleds?
Roger:
I think you can use the existing through holes with a washer and nut on the side you can see in the images–yes/no?
The workstation is a beast, so is all of our existing software–coming to San Diego in February for the SolidWorks convention, looking for a way to speed up the printmaking process for our suppliers.
–John
I really like the flip down tab on the stops – especially for the table saw. with this stop up, there is much less chance of the famous “saw dust in the corner” problem. I’m anxious to see your ideas on guarding for the table saw sled also. This is a “must have”. I can make my own for the rear guard, but it would be best if there is a designed in set of slots for the area between the arches – I know – I’m repeating myself. Sorry for that.
the RED clamp is also a great thought!
Are you thinking about a larger version of the tilting arm for the table saw jig? This may be a very useful addition. I’m thinking of something that could hold a 6″X3/4″X 4 ft piece. The table saw will be seeing larger pieces vs. the JMP. Together – AWESOME!
Also, if I’m seeing this correctly, when pivoting the fence, I would choose the appropriate hole to hold down the fence to the metal guide, use my AMP to set the appropriate angle and tighten down the one screw. Is this enough to hold it firmly, or am I missing something? On the surface it looks like there should be a second hold down on the outer portion of the fence, but perhaps it is not needed?
One other question: I received my AMP just before going to Japan and haven’t had much of a chance to use it. It is set up, but alas, I do not have an i-pad nor do I have a computer in my shop. Is there a way to print off the tables somewhere so that I can have these handy in the shop?
thanks!
Dennis
I think I just had an inappropriate dream of bolting this directly to an erika push/pull saw…
hi john:
I have ordered the table saw sled and will order the pivot bases when you send the email. i was communicating with Michael about wether or not the purple arches were sufficient to hold the sled bases when you pick them up. He assured me they would be .I was mentioning it because it seemed if not attached to sled runners would put a lot of stress on the arches. thanks for designing the sled cant wait to see it in person.
Steve B.
Steve-
The sled bridges are .5″ thick and the thinnest width is 1.25″. They are attached to the sled via 1/4-20 bolts, 4 per bridge. If these bend they were dropped from an airplane onto concrete. Plenty strong-the table material is weaker if made from wood.
Email announcement is slightly delayed because we don’t think the JMP fence bases are going to work on the table saw sled-we are testing next week. (the hole locations for the JMP create an issue for single bolt locking to the table saw guide bars)
-John
Hey, great blog, but I don’t understand how to add your site in my rss reader. Can you Help me please? Joeri
I don’t even know what a RSS feed is! But I do have someone looking into your request.
-John