___________________________________________________________________________________________________
“Those who believe in telekinetics, raise my hand.” –Kurt Vonnegut
___________________________________________________________________________________________________
Well now…
Before I get to the FINAL VERSION of the DJ-1 Offset Kit, you should know that the little AS-24v2 run is now sold out.
Today we opened up pre-orders for the DSS-6 Double Square. This too will be limited to about 300 units. This is my square of choice when I get time to play. I am guessing they will all be gone in a week or so.
Thanks to all for the suggestions in making the DJ-1 Offset Kit the best it can be. Couple of points regarding how it works…
The DJ-1 needs a 3/32″ hex key to remove the orange jaws so the Universal Jaws can be attached. Because this cannot be changed, we added a pocket to the house the hex wrench in the offset kit. All of the tightening screws use the same wrench. No room for cam locks, or knobs.
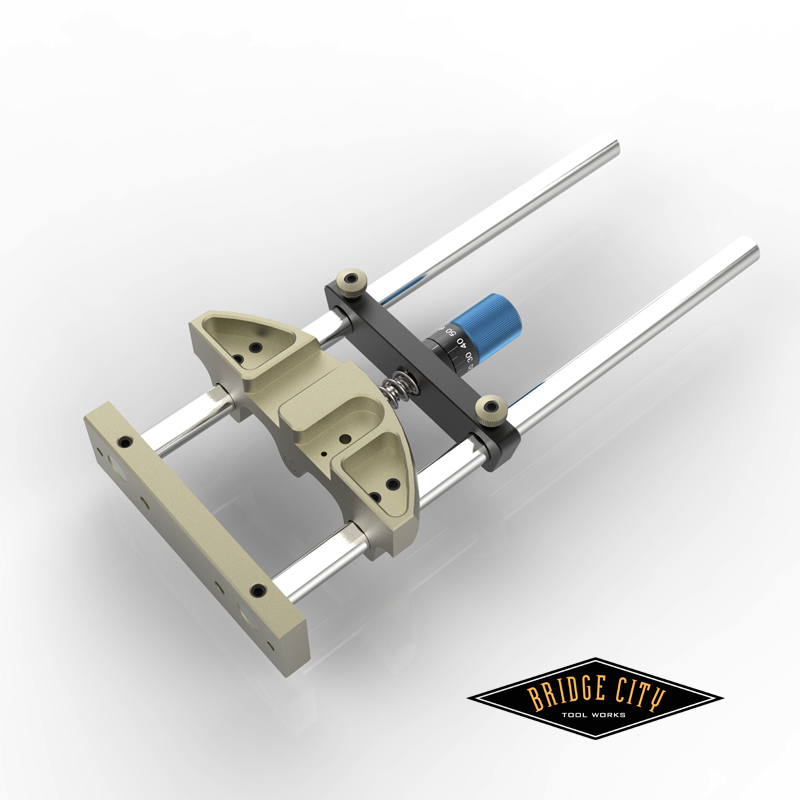
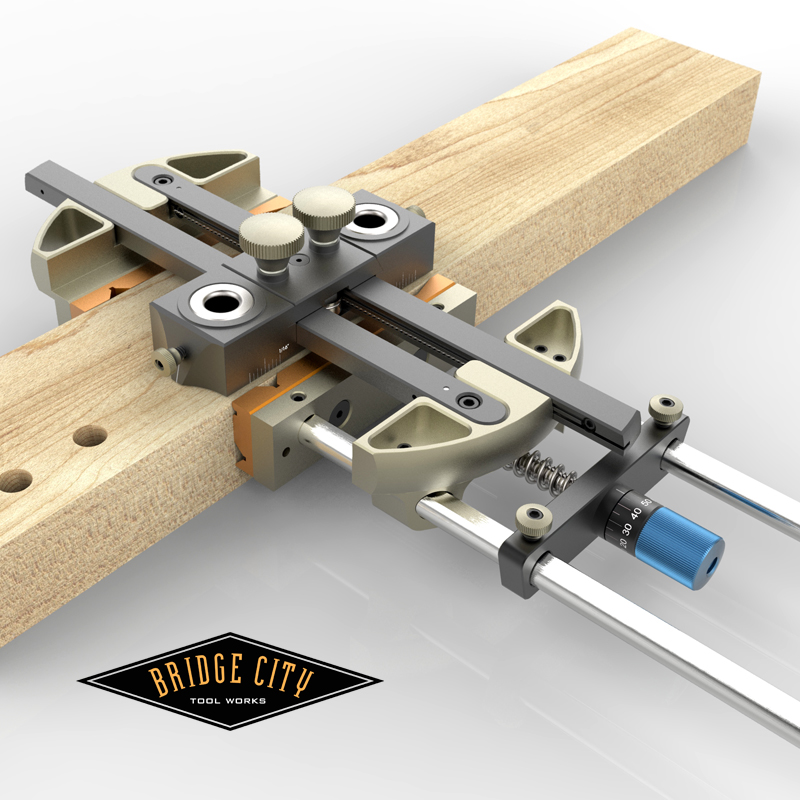
Here is the finished kit, it attaches with one screw;
The micro-adjuster is a sensitive little bugger-it moves the bushing center-line .100″ per rev. The indicated grads are .010″ splits with .005″ indicators in between. Now you can have one last say on this design…
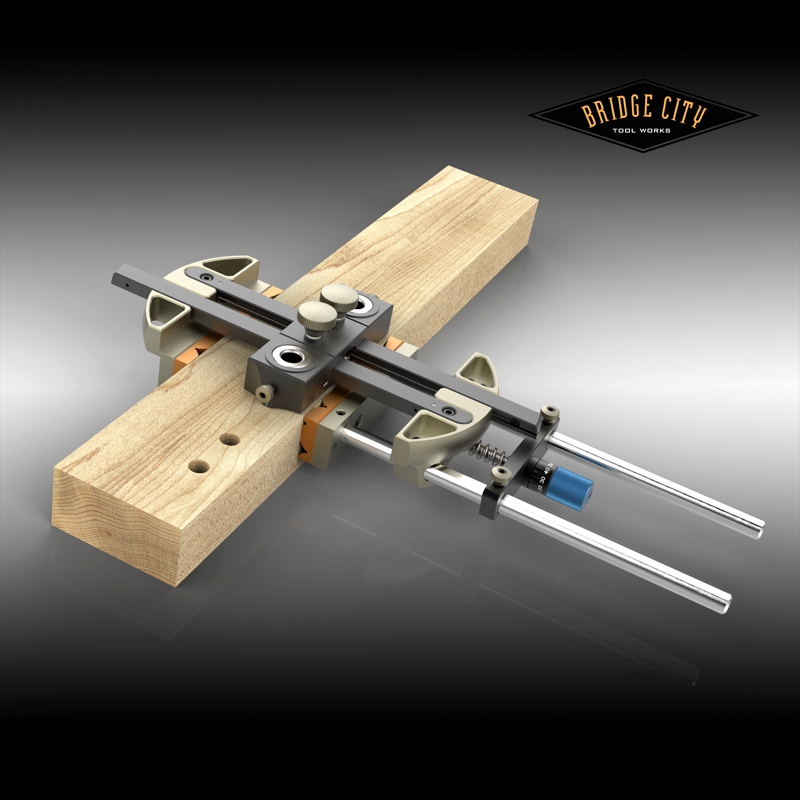
Look at either image where the DJ-1 is on the maple board. Notice the location of the holes. Let’s say you want to drill holes even closer to the edge than in the image. Which direction (either clockwise or counterclockwise) would you expect to rotate the blue adjuster (looking at the end of the adjuster) to move the bushings closer to the edge?
The young whippersnapper here disagrees with your Tool Potentate so we are going to let you, the DSN decide. Don’t screw this up!
–John


I forgot to attach the shim to the static outrigger–will do so tomorrow and re-shoot.
–John
John,
.
Is this one of those trick logic questions?
.
Counterclockwise to bring it towards the user.
.
roger
Btw,
It’s beautiful!
John,
I would expect to rotate the blue adjuster clockwise (looking at the end of the adjuster) to move the bushings closer to the edge?
Do you already have a way of spacing holes (such as shelf pin holes) evenly along the length of a board?
Chris
John,
I can’t thank you enough for designing this all the way up to awesome.
You’re not going to like my answer to the rotation, because I’m also one of those young punks who are better seen than heard and I talked to said whippersnapper yesterday and I think we agreed: CCW is a pulling sort of motion, therefore to move the tool away from the centerline and towards the micro adjust or the edge of the board, it should be CCW. As a reference, think about “most” handplanes, turning CW drives the blade away from the adjuster CCW brings it closer- woodworkers muscle memory is wired that way.
Best,
Rutager
Well, I guess am sort of ambidextrous or some word similar to that (bi-clockwisical?), because today I can see fine both ways. I guess that’s why the HP-8 is the way it is!
John,
Do we get the same choice vote for the direction of adjustment for the Precision Fence as well ?
🙂 🙂 🙂
Intuitively CCW, ….
Logically CW…..
flip a coin….
-Masood
My first thought on the rotation was CCW for moving the bushing closer to you (“pulling”, as Rutager said, above – sheesh, I hate agreeing with Rutager!), CW for moving it away. I can see the logic of the opposite direction, but I’m going with my first impression. CCW pulls the bushing closer to the edge.
Of course, a little experimentation (which I have to do with the microadjusters on my OF1010 Festool router) will show the correct rotation. So who cares.
Awesome re-redesign. I love the inclusion of the little rod-locks. And the micro-adjust looks suspiciously similar to the knob on the JMP fence…
— Peter
BTW, I’m curious what the hollows are on each end of the main head? They appear to have screws or holes in them., but they’re aligned over the rods. What are they for?
– P
I Think in order for the numbers on the Micro dial to work logically, increasing from left to right it needs to be CW. So as the numbers increase the amount of the offset increases too.
Damn it was a test.
Peter,
the screws in the hallows are to look the jig down after the adjustment is done.
-Masood
I mean “Lock the Jig ” . I hate auto spell checker….
-Masood
I agree with Chris… my first thought was to turn it clockwise. Regardless, excellent design… and a design by committee!! Usually those aren’t that successful… look at the duck-billed platypus. :-/
Imagine jig is set to centerline. If we count this this as the default position, I would expect a clockwise turn to move away from the default state.
Clockwise to move holes towards edge.
To use a screw analogy: CW is doing, CCW is undoing.
Also it’s fantastic to see the design evolve over the past few days. This version is an entirely different beast than the (perfectly serviceable ) first iteration.
John,
It seems to be counter-intuitive to rotate the dial CW in order to bring it towards you. But I would be open to be persuaded. Could you please explain your “logic”? (cause almost every cell in my hand is shouting CCW.)
thanks,
roger
John,
Well, it’s 1.45 in the morning and I have one question before I turn in. (Since you still have another drawing to do for the shim on the static outrigger.)
.
Yes, it’s about the “indexing” thing.
I’m wondering whether the set screw that holds the bushing in place on either side could perform a double function.
.
Imagine the head on that set screw being larger, so that after you cinch down on the bushing there is another inset within that hand screw/knob.
Out of that larger knob is a thin metal rod (not unlike BCTW’s depth gauge from an earlier time. That could be optionally inserted. Onto that rod would be an indicator, similar to the angle saver markers on the JMP’s front leg plate.
.
Then u would have an index system that would catch the outside diameter of the previously made hole. It would cut down the measure marks.
Ok, I could be getting delirious now.
G-nite!
.
roger
ps. the indicator on the thin metal rod would be able to slide along it.
I would love this accessory in a metric version (graduation would then allow settings by 0,1 mm instead of 0,127 mm which corresponds to 0,005″.)
Using the Imperial system in a metric environment is really lousy and it introduces an additional potential for error.
John, help making it possible for US woodworker to use the metric system, It’s the sensible way to go.
JMP
Speaking from my experience using machine tools (machinist as well as woodworker), I’d intuit the adjuster to move the offset fence and so I’d expect clockwise to move the movable fence away from the adjuster and increase the offset of the drill guides from the centerline. (gotta love left handed screws!)
John
Actually there is another variable. If the threaded rod move the black Block in order to do the adjustments by pulling the block in or out then it needs to be CCW in order for the numbers increase from left to right and allow the offset to increase as the numbers increase. thus bring the bushings closer to the edge. this is assuming normal threads on the rod “lefty lossy righty tightly..”
So I change my vote based on that to CCW. But if you want CW then we can solve the problem with a left handed thread rod. and still have the number work right.
Am I over thinking this? or should just stick to day Job?
I push the send to early…
any way the 2nd way is to have the rod screw in to the out rigger. in that case it would have to be CW. This will plunge the black block toward the out rigger and increase the offset and pulls the bushing in toward the edge. but it would require to have the numbers on the dial to go right to left. if we want to be consistent with increasing the offset by increasing the number thing.
So John,
Is the black block threaded or the out rigger?
Do we care if the numbers go from left to right. because if we do I think there is only one way to go.
Sorry for the very bad english….
Dear John,
.
I think I’ve got it now.
The index system is not part of the off-set jig,
but a separate accessory.
Picture a three sided square that clamps on to the end of the bushing block. (which in turn holds the index marker) In the middle square there is a hole that is directly in line with the hole for the bushing thumbscrew. The hole’s only function is to register the index unit onto the DJ-1. One would simply remove the thumbscrew, insert the unit, tighten the nifty clamp devise and whala! The DJ-1 index system.
.
ahhh, coffee!
Folks, John (and the young whippersnapper) have without doubt, designed a fantastically beautiful tool worthy of the BCTW trademark. Sexy? Yes! Functional? Yes! Expensive? Yes! (but that is probably relative for many here!). I know that you all have heard of the KISS principle. Keep It Simple and Stupid, or some such variation. What John had initially, was still a beautiful functional add-on. It is very evident that the design work and suggestions from the DSN on this product over the last couple of days, has made it even more functional and desirable, but also added to the complexity and cost. With the initial design, I would have purchased it without much thought as to the price. With the second design, I’ll probably still try and purchase it, but I’m sure I’ll catch heck from my wife (she fails to understand how a tool can be sexy, but she likes to fly fish and she understands basketball but barely tolerates my tool expenditure, so I count myself as being lucky!). I certainly don’t mean to dampen any enthusiasm over this tool, but I’m not sure if it’s really necessary to have a tool to move a drilling jig .005″ for a woodworking project. Extending the lip lower and providing a shim for the other side might have solved the clamping problem (still no micro adjuster though).
If micro-adjust is important on one axis, why is it not important on the other?
Rodger,
“Dampen enthusiasm”??
Sounds more like a call to arms! :-/
There is spin here.
Just think of the fishing lures you will be able to make for her.
.
Hmmm, John
All this imagery of fishing lines brings to thought of it’s time for Bctw’s to come out with an updated version of a chalk line. Even one that rolls out two lines at once – and they are adjustable between them.
.
Cheers,
Roger
Which also brings to mind the subject of “tackle box”
And the hp plane series and the storage system u spoke about a while back. Have u considered using Protool/Festool like boxes as a possible “system”
.
Sexy black versions with die- cut foam inserts. Hmmmm.
.
The Dj-1 collection could fit into one !
Tim-
I remain unconvinced of the micro-adjustment myself–
That said, our niche addresses the fact that so many tools have been dumbed down that they don’t address the needs of a more serious user, or a user where time/efficiency is an important component to their work flow.
I am going to approach this from another angle…
–John