________________________________________________________________________________________________
“When we engage in what we are naturally suited to do, our work takes on the quality of play and it is play that stimulates creativity.” — Linda Naiman
________________________________________________________________________________________________
The next two weeks I will be in Indianapolis teaching two classes; Creative Thinking/Design and Toolmaking 101. I am really excited about both of these classes and always enjoy my time at the Marc Adams School of Woodworking. I am also bringing a couple of my helicopters because there are plenty of places to crash on the school property.
I really like the quote above–most days I can’t believe I have earned my living for almost 30 years by playing here at Bridge City. Speaking of which, I have three major R&D projects going, all of which I am really excited about. One however is keeping me up at night: an accessory fence system for the Jointmaker Pro family of saws.
I want to do so many things with this tool that set-ups need to be easy, fast and off the charts accurate. The new fence system will allow you to move a stop in 0.001″ increments and get the heck out of the way in a hurry if need be. More important, I want to be able to cut gears, and this system will be the foundation for that attachment next year. We have also found away to add the clamping system to the fence (way cool) and I should be able to share images when I get back at the end of the month. We are also anticipating doing something really rare–and that is for those who purchase this system, we want to buy back your original fence (The metal components, knobs and lock bolts). We will strip and re-anodize the aluminum for the base fence system of future JMPs. I hope to have a working prototype to demonstrate at Woodworking in America at the end of September.
My personal shop is now in a back bedroom of my house. Space is limited, and these three new saws are going to be very welcomed in my cramped working space. (I would have more room if I did not have to share this space with a female shoe collection that would make Imelda Marcos proud…fortunately, Louie dog has, and will continue to whittle the collection–he just needs more help with his stealth techniques). Here’s the skinny…
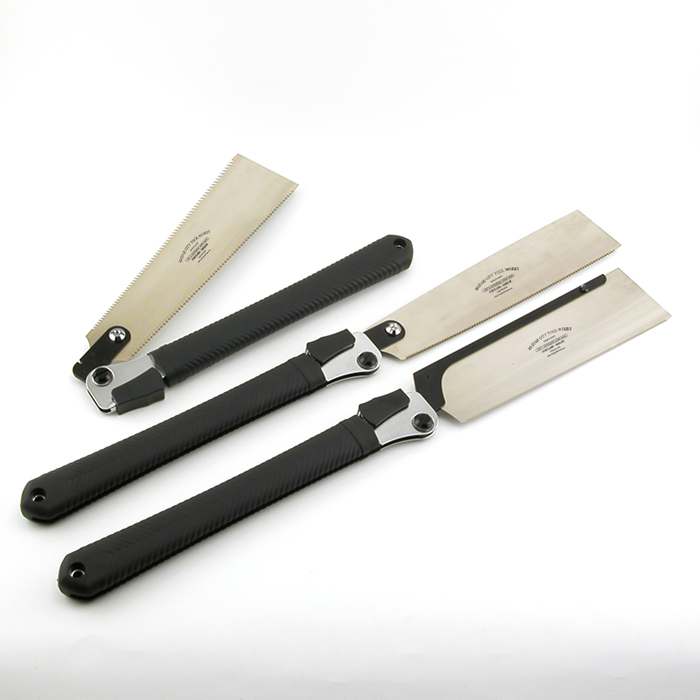
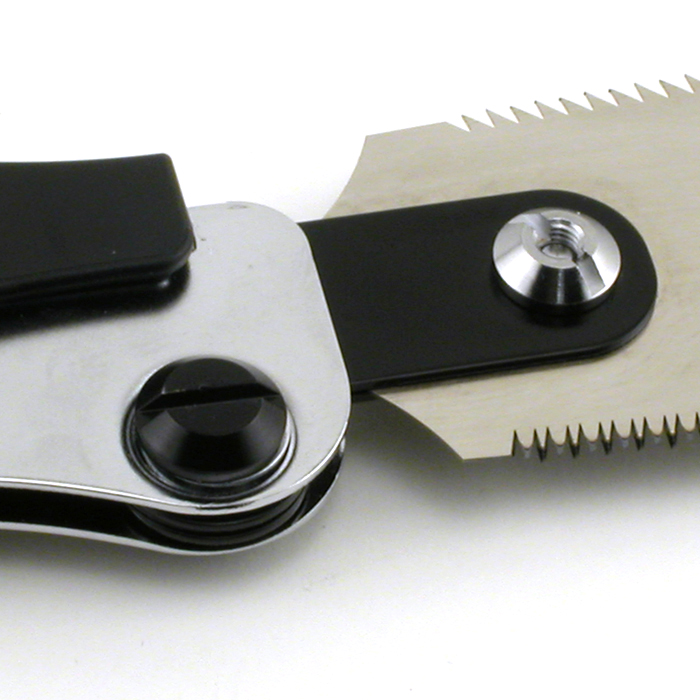
The most popular of all the Japanese saws are the Dozuki, Kataba and Ryoba. Because of their traditional length, they have always been tough to store. No longer, as these fold and the handle becomes a blade guard.
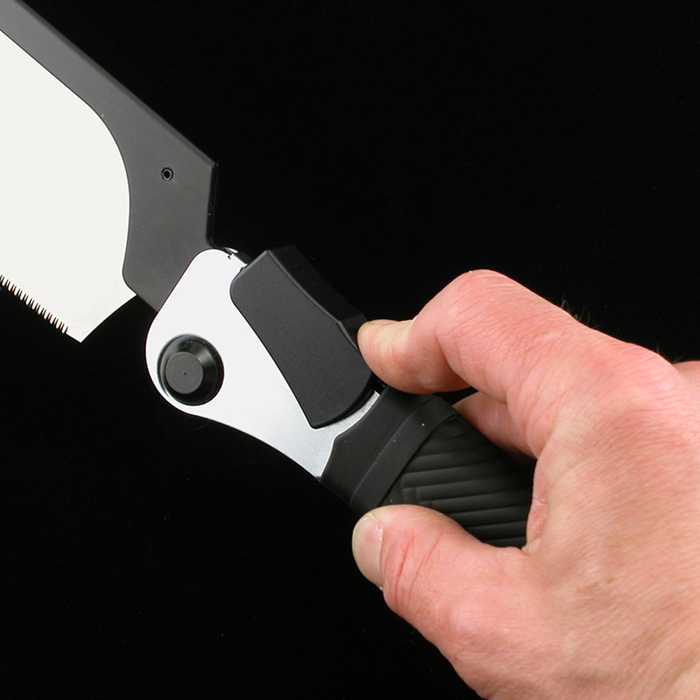
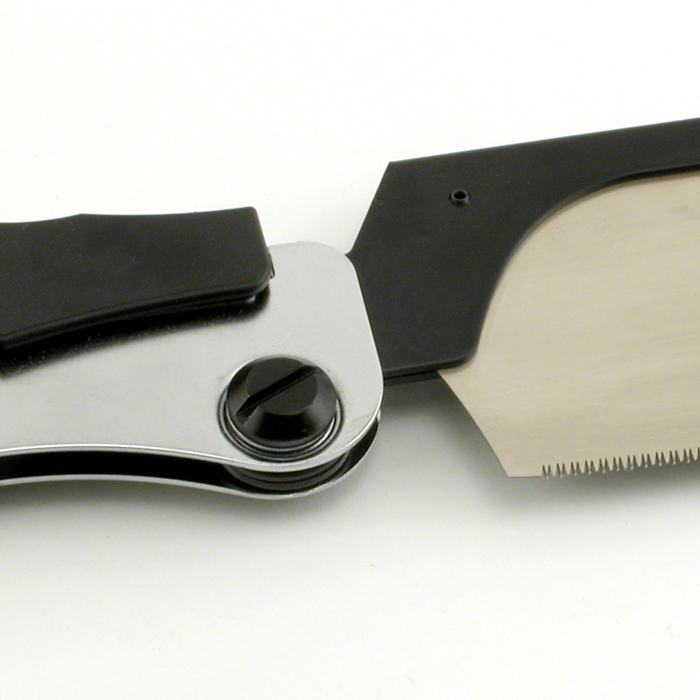
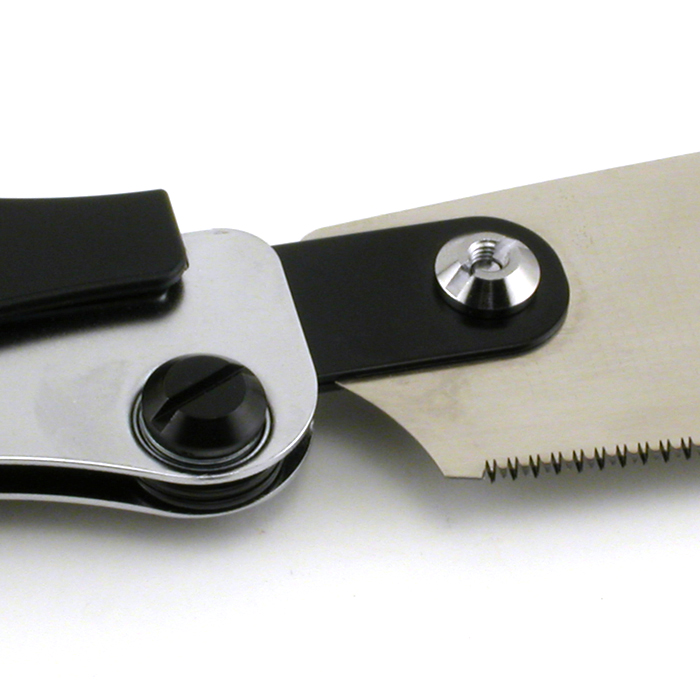
The locking mechanism is fast, rigid and intuitive. Why even a caveman…
The 28 TPI Dozuki blade is .012″ thick, (.33mm) and leaves a kerf of approx. .020″. It is faster than our JS-1 and I really like that I can fold it and put it in my back pocket. OAL is approximately 24″.
The 20 TPI Kataba (below) is a deep cheek cutting saw–and is perfectly suited for tenons and furniture making. The added mass of the handles makes controlling these saws a breeze–they fall under their own weight during cutting. (It is easy to spot the induction hardened teeth.)
Below is an image of the Ryoba–the utility saw for crosscutting and ripping. The fast cutting crosscut (16 TPI) is the saw of choice when you need to cut a large board in half across its width. The 12 TPI rip is used for…you know…ripping! (There is an included guard for the exposed teeth of this saw when folded.)
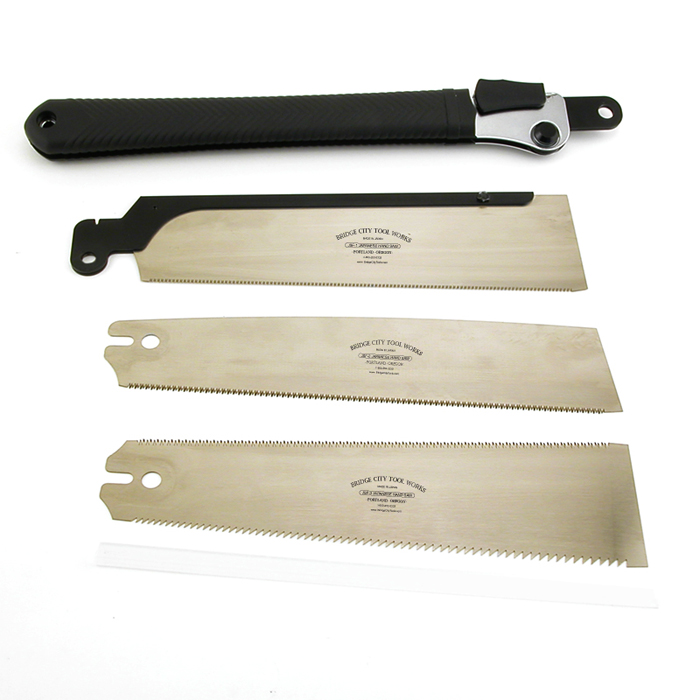
Here they are together;
The handle is common, and the blades are replaceable so one option is to purchase the kit version of the saws…
We are still working on pricing (and the value of the dollar is not helping) but check this out; Handle plus three blades will be around $140. Add one set of spare blades and the total will be under $200.00.
It will take three months to make them, and we will stock spare blades but not complete saws or handles. Offer coming to your inbox next week!
–John

I like the idea, John. I’m curious if those blades are the same as the replacement blades for your existing Japanese saws. I have the existing ones.
The JMP fence attachment sounds fantastic. I’ll admit to using the ‘pencil-line stop block’ too frequently 🙁
That’s a very sweet set of saws, John. Niiiice!
– Peter
FYI: This is a completely new handle/spine system. None of the blades that fit in our traditional shark cord handles will attach to these articulated handles.
-John
I’m disappointed that this new blog entry didn’t include another Megan shot. I now have to scroll down to leave her on my screen. 😛
Will the new fence system be for the Jointmaker Pro only, or will you include the Jointmaker SW? I certainly hope you include the Jointmaker SW as I also have been thinking about ways of attaching the new DJ-1 Universal Jaws to the Jointmaker SW to also cut on the round, with gears also a possibility. To cut the gear profile I have been thinking about abrasives on a gear profile in place of the saw, similar to a ceramic tile round saw blade.
Geoff: We won’t forget about the SW!
Like your ideas…I design clock movements on the side, and making both involute and cycloidal teeth interest me a great deal. I want to do it silently. Involute teeth are totally doable on the Jointmaker (roots cleaned out via chisel), cycloid teeth are only partially doable.
You know, it is possible to clamp plates in the spine instead of a saw blade and once it exits above the top, all kinds of stuff can be fastened to them to take advantage of the linear table. Trust me, I am working on all this stuff and not sleeping much…it is really fun and fascinating.
–John
If you had a system that rotated a shaft as you slid the table on the JM, you could machine helical gears. Just put the cutting surface (maybe some abrasive stuck to a saw blade to make a groove as wide as the teeth that would engage the gear) so that it was parallel to the tables, and set above the tables enough to engage the piece you’re cutting. Then as you moved the table away from you, your piece would rotate over the abrasive, cutting a groove. If the piece were angled relative to the abrasive-covered blade, it would cut a helical groove as the piece was moved/rotated over the blade.
I wonder if something as simple as a string attached to the JM frame at each end, and then looped over the piece to be rotated would work? Kind of like the old bow-drills. If the piece were allowed to rotate on a rod that was clamped to the table, it might work. Probably not accurate enough, though.
Just brain-dumping here…
– Peter
Peter: Good thoughts. This tool has mind boggling capabilities…I KNEW early on that the gap between the tables was going to be a real issue for alternative ways of shaping wood using the linear tables without power. At the moment I am focused on exploiting sawing ideas, but the gears are turning…so to speak. As was once said, every great idea started out as a ridiculous idea.
-John
I gotta admit…I was hoping for something more razzle-dazzle when you promised easy hand ripping 😛
Well….
Cudos to you John for the new JMP fence! I am VERY happy to see your creative mind focus on this aspect of the tool. I love to be able to just “Use” my tools without making up special jigs, etc. I like to use my creativity on the piece I’m making and not so much on the tools to achieve the result (just my preference.) I love the JMP, but from day one I thought there was opportunity with the fence system to put this tool into another catagory of “one of a kind”. The tool is really designed for small and very accurate work so the accuracy of the fence (system) seemed that it was bound to follow for me. I’m excited to see it!
Now for the saws. I actually have two complete sets of the Japanese saws (I bought one in a large set after getting my own from BCT). You know, there is NOTHING wrong with the original saw set. I love to use them and love the feel of the shark line handles. That being said, I see these new ones as part of your “tool making evolution”. These seem to fit into your more modern approach to tool making. They look very practical and also very cool. Is the handle a soft rubber or is it a hard finish? Just curious. I do have one request if you plan to expand this line (which I’m sure you will). The one saw you DIDN’T supply with your last set was a (roughly) 6 inch thicker zero kerf saw. The current zero kerf is great for cutting small dowels etc., but I recently made a workbench with 3″ dovetails and this is too heavy for the thin blade. I found a short, heavy zero kerf that worked very well and thought I would mention that this would be a great addition to the set (you can find the one I used in the hallway to the back room at Marc Adams) You’ve sold at least ONE if you decide to make them….
Have fun at Marc Adams. I wanted to take the tool class, but I was already signed up for two classes and my wife said no…
DJ
Nice saws–do you take trade-ins?
Hi John sounds like your brain is fizzing with ideas at the moment. Forgive me for adding one more to the mix. I teach 7 & 8 year olds what we call design technology in the UK and we use a rubbishy drill press that has a hand drill attached. It does work! I was wondering if you could see a use for a more robust accurate one or can your drilling jigs be used with hand drills? I’m really interested in this powerless woodworking (I’m a bit of a ‘peak oil’ or even ‘peak everything’ considerer) but while being able to retain accuracy and quality. I’d also love to see someone start remaking pedal powered fret and bandsaws.Can I recommend No tech and Low tech online magazines for further inspiration. Keep being creative!
Neil:
If ever there was post where two hearts beat as one…stay tuned!
All hand drills will work in the DJ-1 as long as the bit fits in one of the bushings.
-John