___________________________________________________________________________________________________
“Time is the greatest thief in life. — Kazeronnie Mak
___________________________________________________________________________________________________
Off and on for the past couple of years I have been chasing a way to cut tapered dovetails with our HP6v2 Mini Multi Plane. For the uninitiated, a tapered sliding dovetail just may be one of the most difficult joints in woodworking when attempted by hand.
CAVEAT: I have made thirty or so tapered dovetails in my past furniture making life and none were by hand–all router work. That said, in order for this joint to perform as intended, regardless how it is made, the accuracy required can be daunting.
During the research phase of this project I came across some old “dovetail” planes and none of them work the way we are going to show you. Furthermore, you will find few who claim these planes work well at all. All of the planes mentioned cut a dovetail with the stock horizontal to make the male, and the female dovetail? Well, since I never made one by hand, it appears the shoulders are cut with a saw and then the waste removed with either a router plane or a shoulder plane. I wanted one plane to do both. And in order to accomplish that, we had to invent a new way to make a plane iron.
In addition to the iron, we addressed this project from a series of constraints which include;
1) The male dovetail, regardless of overall width, will always be .300″ tall.
2) The longest female dovetail made with our system is just over 20″
3) We will use either the 3/8″ or 1/2″ wide dado kits for the HP6v2 to remove the bulk of the waste.
4) The included taper will always be 1/2 of a degree
5) Joint layout will always involve the centerlines of the male and the female without fretting about stock thickness.
6) The tapered male dovetail will always be made first.
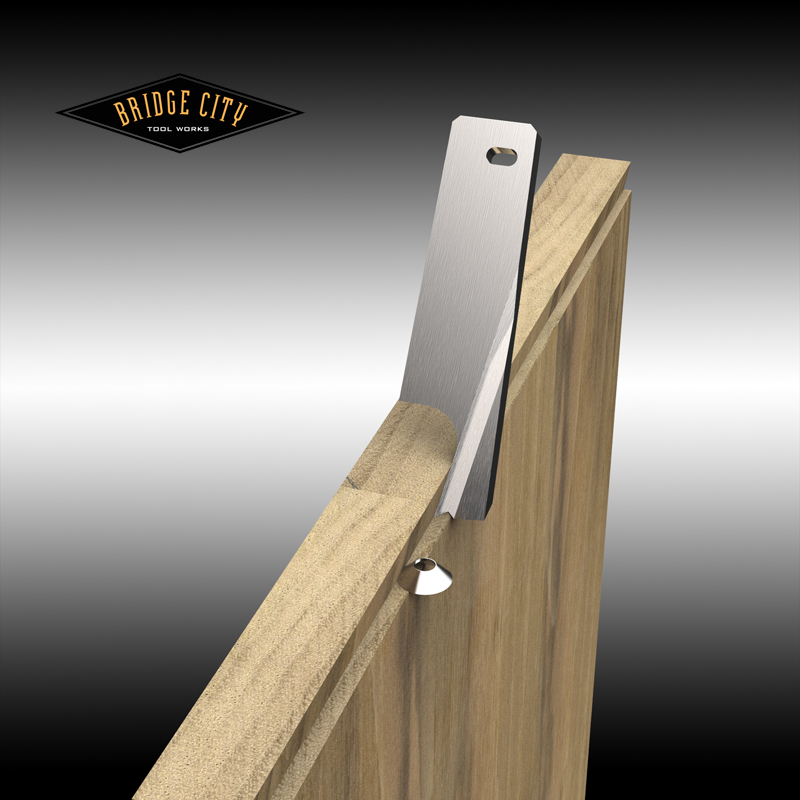
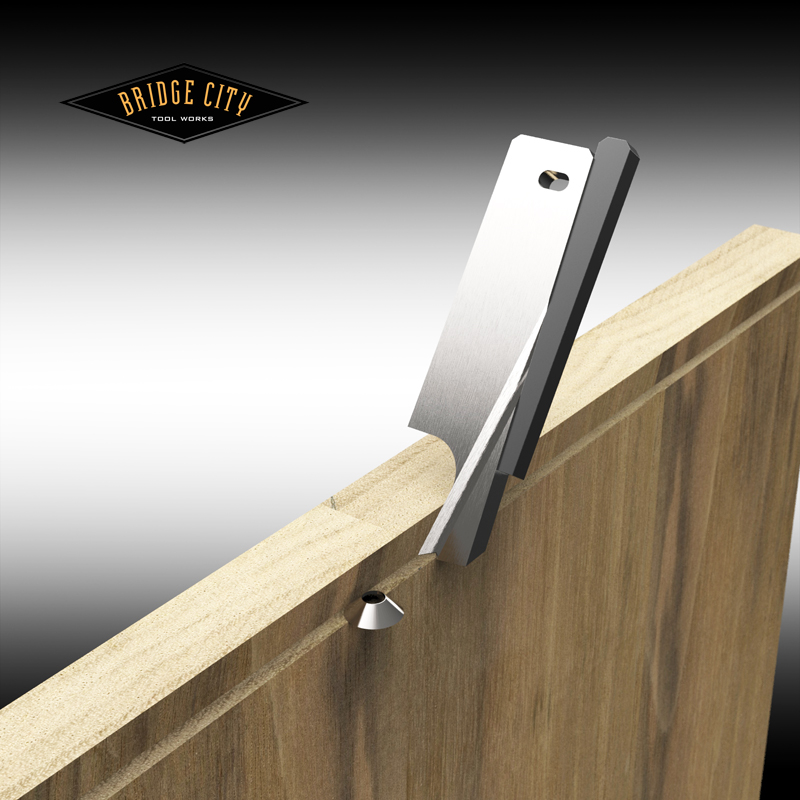
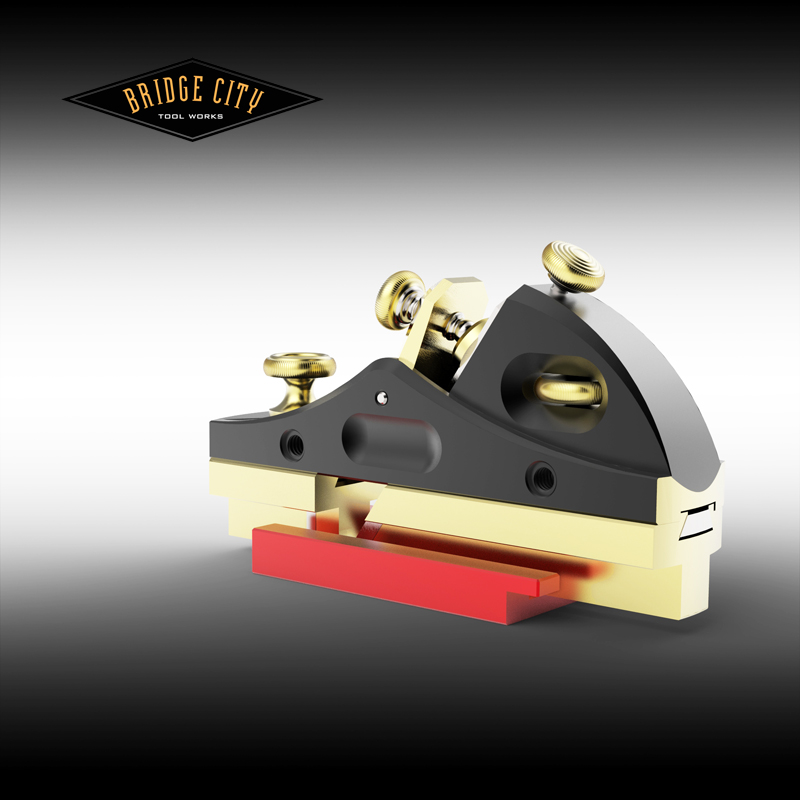
It is the nature of sliding dovetails that you rarely, if ever, cut with the grain. The male is a cross grain cut, and the female is not only across the grain but is primarily an end grain cut. We needed a new way to make a dovetail iron and the results are illustrated below (without the body or fences for clarity), a circular scoring cutter makes the end grain slice and the iron shear cuts the taper (FYI: the bottom of the iron never cuts);
Sharpening this iron is ridiculously easy–hone the “V” groove on the corner of your sharpening stone. Lateral adjustments are made possible by a tapered wedge (pictured below) that uses the side of the plane body as an anchor–up and down movements will move the iron left or right. In practice, we like the iron set to take a cut in the 0.002-005″ range. Because the cuts are light, multiple passes are easy.
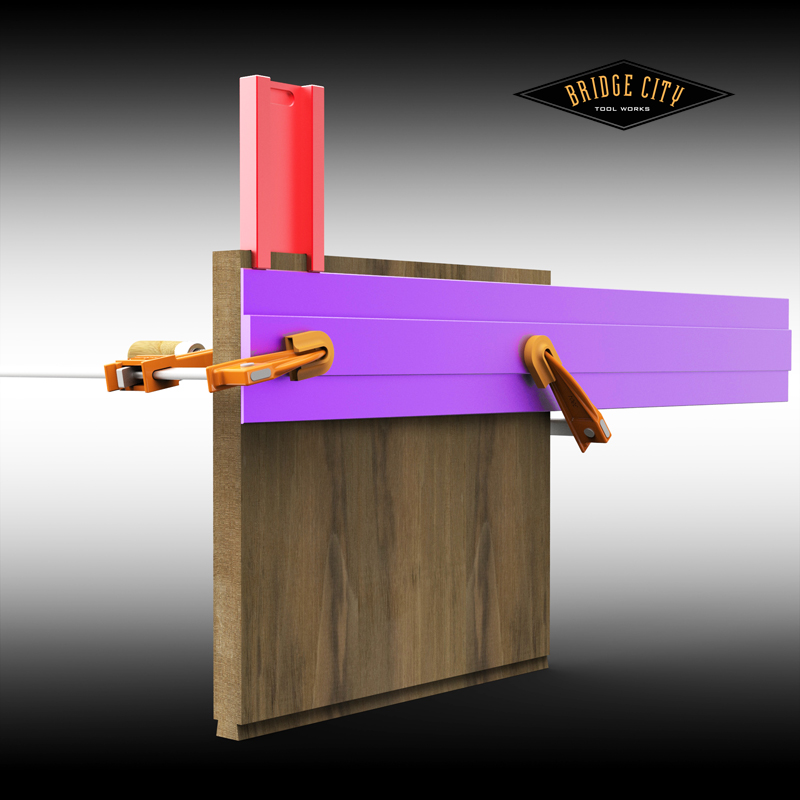
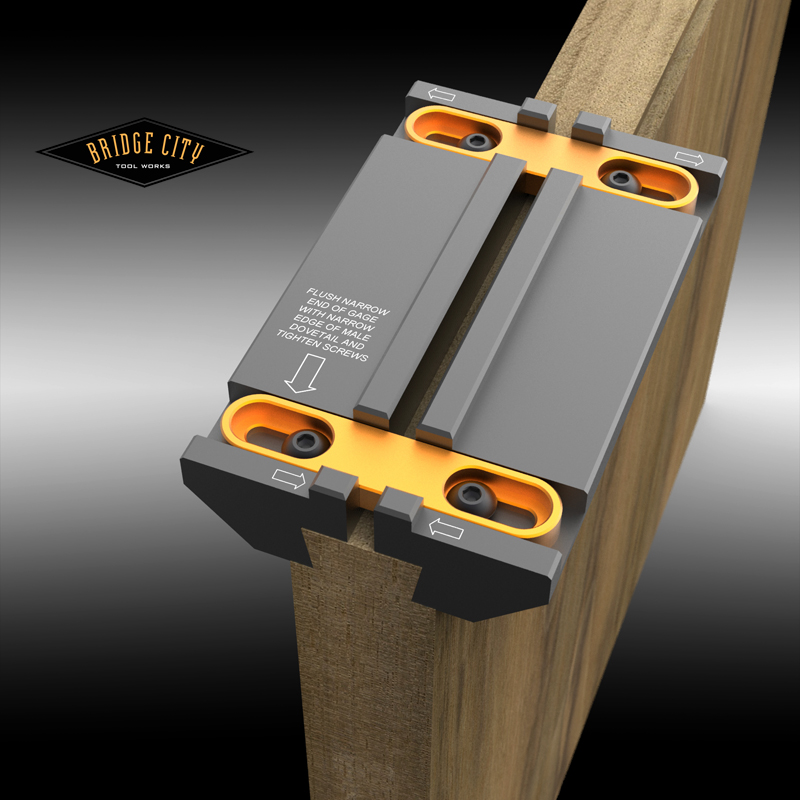
The depth of the male dovetail is fixed at 0.300″. To cut the taper, we are making a “left and right” aluminum guide that has a 1/4 degree taper–the combined cuts make a 1/2 degree tapered dovetail. In the image below you see this guide being set up with a depth gage–this is important to prevent a compound cut. In addition, you will always “flush” the edge of your guide with your stock to keep the dovetail centered on the stock. (You can still make off center dovetails if you choose).
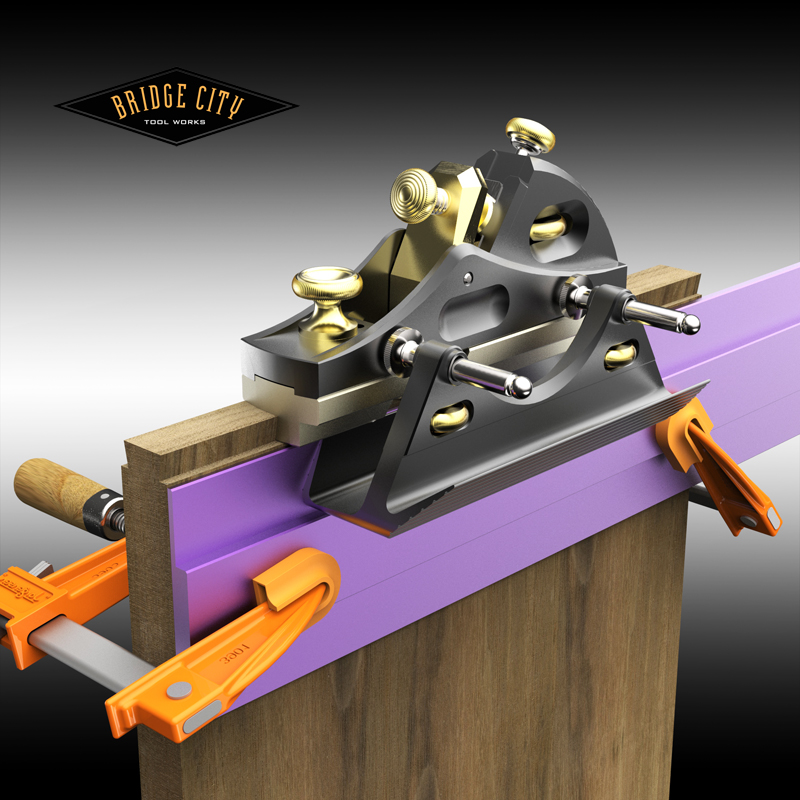
Once the fence of HP6v2 is all set to remove as little as possible material at the widest point of the dovetail (we really like anti-friction tape on the fence face!), it looks like this :
As long as the tapered guide is set flush to the edge of the narrow end of the dovetail for both cuts, your male dovetail will be perfectly centered. You make as many passes until it no longer cuts and repeat on the opposite face–use backing boards to prevent blowout on the exit cuts if important.
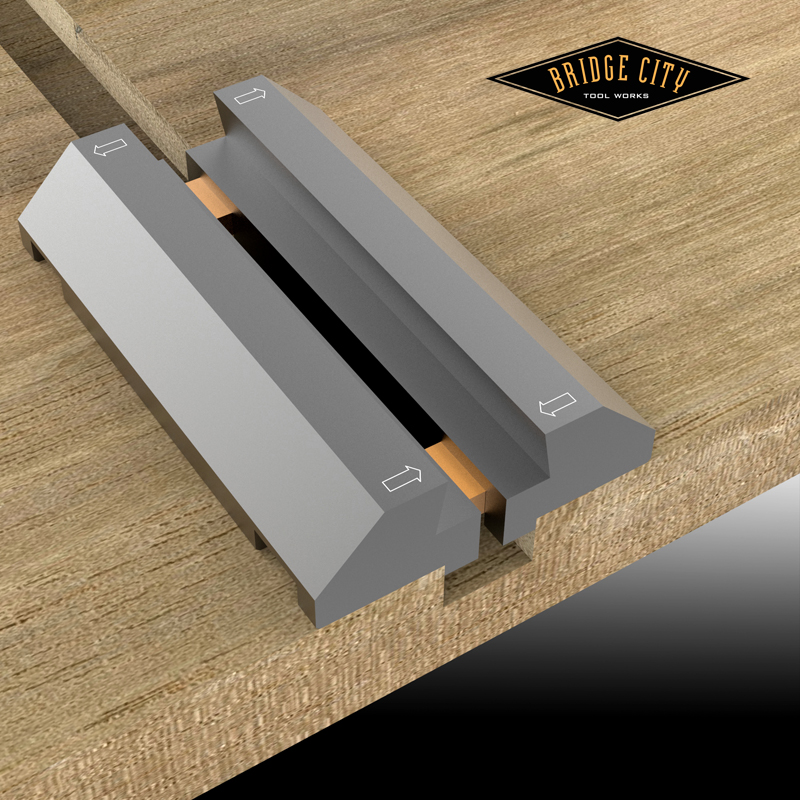
The heart of our system to create flawless and perfect sliding tapered dovetails is the dovetail gage. This device literally measures the tapered dovetail width at the narrowest end. The vertical flanges on top of the gage represent the ideal dado width and can be measured with a dial or digital caliper. This will require the bare minimum of wood removal to create the female dovetail. Again, this tool needs to be flush set the the same edge.
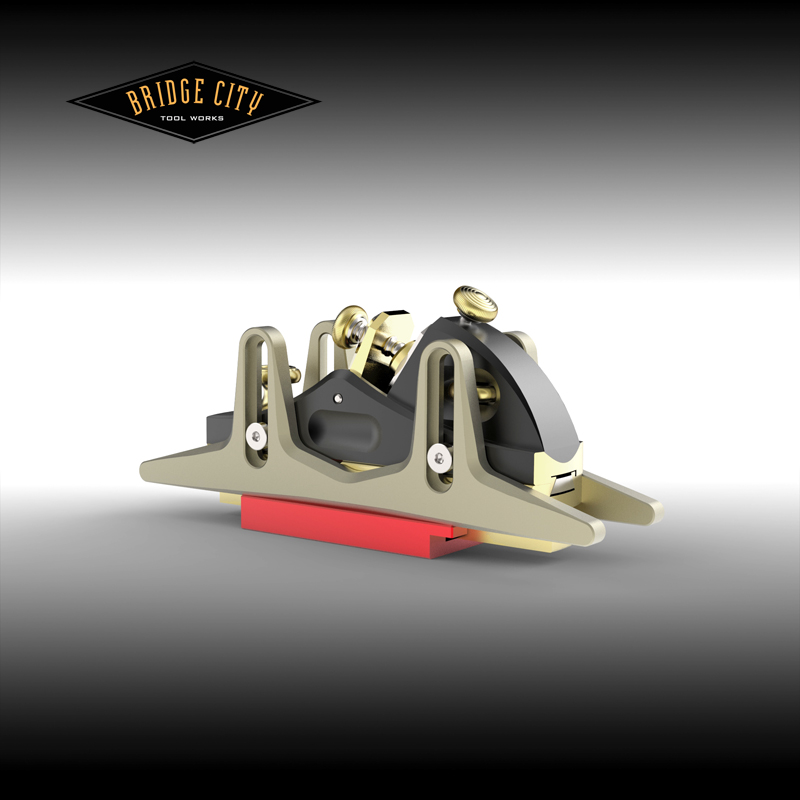
As mentioned earlier, you can use either the 3/8″ or 1/2″ dado kits for the HP6v2. We are using the 1/2″ here and the first order of business is to retract the blade and set the tool in the depth gage as pictured below (there is a relief cut in this gage so you don’t have to retract the nicker);
Now we can attach the new depth fences to the HP6v2 so they rest perfectly on the top of the depth gage;
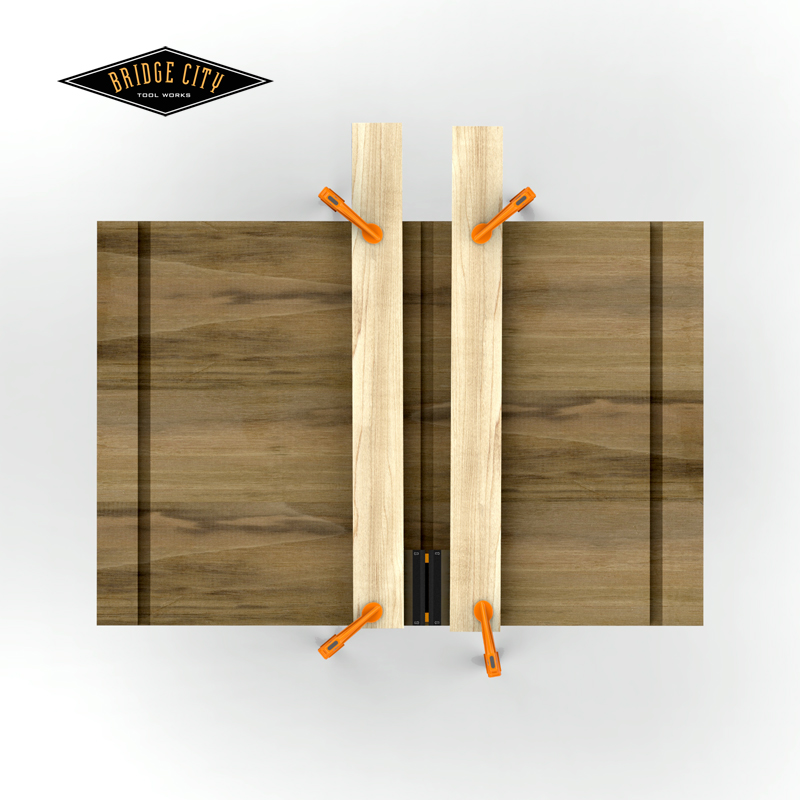
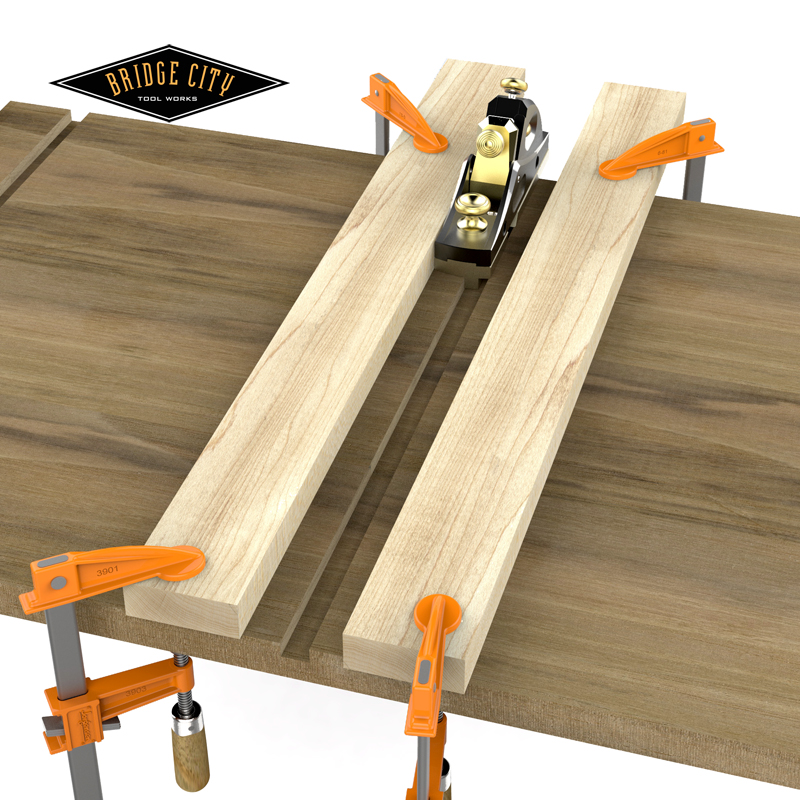
Your next step is to layout centerlines for the female dovetails and then set up shop made guide fences 1″ away and parallel to a centerline. For this illustration, the flanges on the dovetail gage measured exactly .5″ (this will NEVER happen, but bear with me…). Once the dados are cut, flip the dovetail gage upside down and into the dado making sure the narrow end is where you want the narrow end of the female dovetail as indicated by the arrows.
Our project looks like this;
The outside edges of the dovetail gage are each tapered 1/4″ of a degree. We will now use these edges as a guide for out reference edges;
With the dovetail gage removed (lift up or slide backwards) the female dovetail can be cut–up one side and down the other using the EXACT same setting used to cut the male.
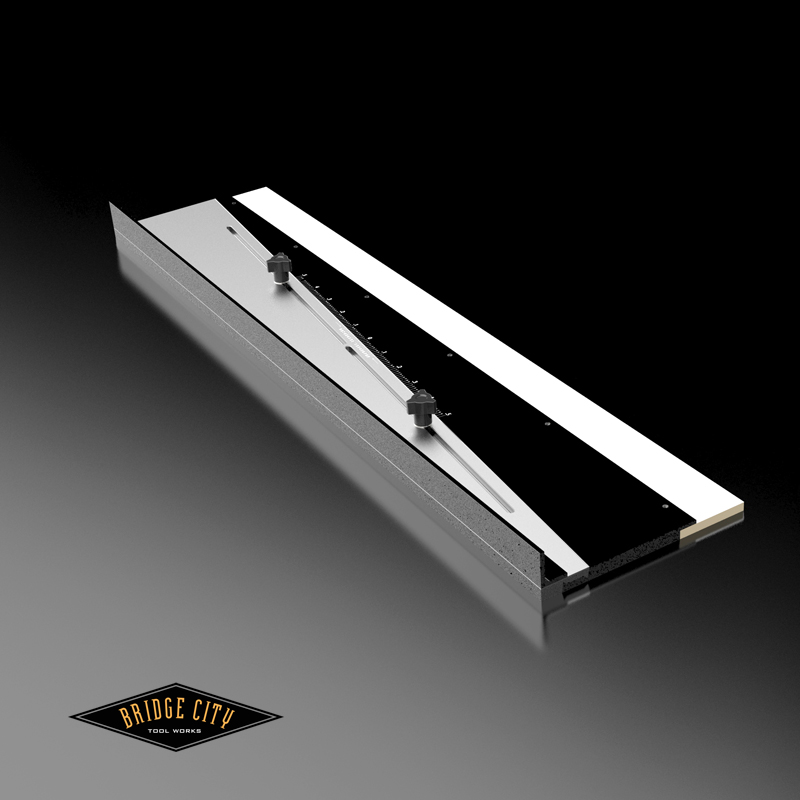
The results will be dead on. Now back to the dado width… each and every dado you will need to cut will likely be different because of stock thickness variations. Which is why we will offer the coolest adjustable fence that will allow you to dial in any dado width you need…
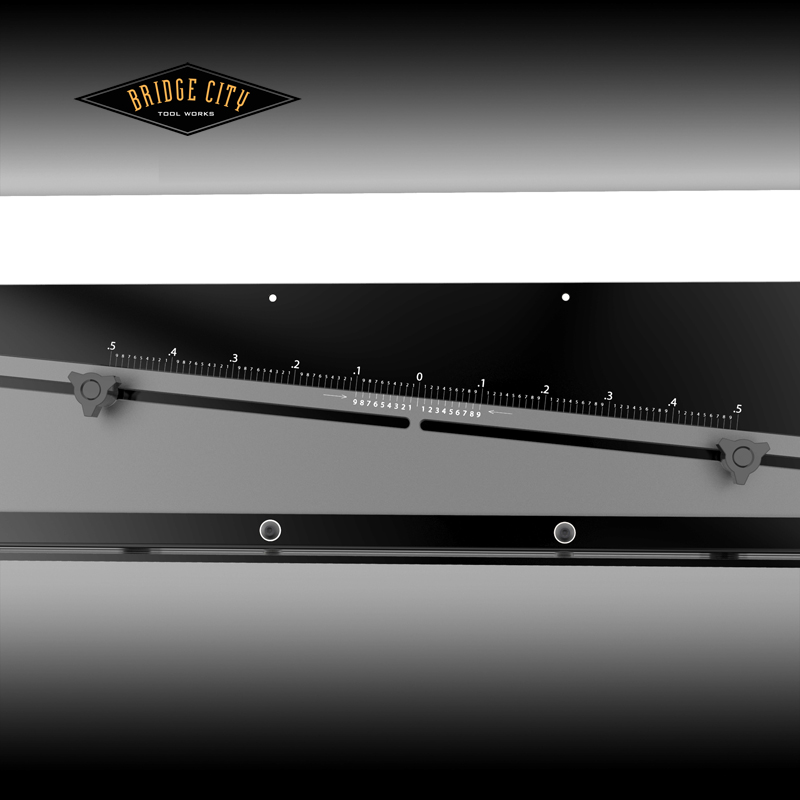
The white strip on the outside edge is MDF so you don’t have to bugger up the aluminum clamping to your stock. Once clamped, you can adjust the width in 0.001″ increments using the built in Vernier;
This adjustable fence has lots of uses in the shop other than sliding dovetails–it is darn cool. Let’s say your dovetail gage indicates you need a dado that is .524″ wide. Set the Vernier to zero, lock the fence down 1″ away from the centerline. Now adjust fence 0.012″ and make your first plow cut. When complete, adjust the fence back to zero and then another 0.012″ for the final pass. Viola! …524″ dado.
Remember when we set the dado depth fences with the blade retracted? To make the dado you will need to advance the blade 0.002-0.004″ which will make the female ever so slightly deeper than the male–this is a big deal so those flat surfaces do not interfere with each other–your shoulders will suck in tight. So there you have it…
I am betting very few (or maybe zero) of the Drivel Starved Nation have ever made a perfect tapered sliding dovetail by hand. Now you all can–how cool is that? Let the dialog begin!
–John

Okay: wow!
My mind is reeling. First at the thought of how much effort and ingenuity went into all the pieces here: the blade and nicker, the guides, and the whole process. Second, I REALLY want to try this! It’s not a joint I’ve ever used, mainly because a) it’s hard and b) dados worked fine, thank you. On the other hand, dados were not nearly as secure as sliding dovetails would have been.
Pretty much, the whole concept blows my mind. Yow!
Okay – practical stuff:
How do you hold the HP6-v2 with that depth fence? Is there anywhere to put your fingers?
Is the guide long enough to get the angles right on your fences for cutting the female part?
Even though it’s a rendering, I’m not very fond of the purple fence. I think black would go better with the HP6-v2.
Where do you get low-friction tape? I think I need some.
Awesome!
— Peter
Peter-
Thanks.
6305A11 is the SKU @ McMasterCarr
This stuff is fantastic.
–John
John, what a brilliant beautiful solution. Please, please tell me that you have this out as a sample as I have a need for it right now. As you know I am going to be attaching a beautiful piece of ebony with a sliding dovetail to the tasmanian pink myrtle as my chop needs to be raised a bit. 😮 😮 If it is not ready yet, first will you have a couple of samples and if so when might they be so? I am extremely excited about this profile. Just another home run by John E. 😮 😮 Thank you so much, Fred
Fred, not available for a couple of months–sorry.
Thanks for the kind words.
–John
John,
“How cool is that?” We’ll need to use the Kelvin scale for this tool. I’m reading this at 3:30 am, and am only slightly able to process all the information- it’s coming to me slowly, a few more reads in daylight and I should understand it. Amazing train of thought, the rest of us are barely at the station.
-Rutager
I was talking to Rutager last night about how I was like a kid waiting for Christmas for your new design to be announced. Now I have to wait all over again for the ordering window to open.
I think you’re showing off with this one. Brilliant!
Very clever. In the spirit of the recent less-is-more approach if the DJ-2, I’d respectfully suggest that an infinitely variable approach to stock length might require more moving parts than might otherwise be necessary. If one worked from the assumption that all milled stock is .75″, could a set-up be made that cut all males the same width (accepting the taIls would be slIghtly narrower than wIder boards) so that all females were the same wIdth, a versIon mIght be possIble wIth less cost and less chance for user error?
I haven’t completely wrapped my head around thIs, so forgIve me If the questIon Is dumb and ImpossIble
Stock *width*. Oops.
By the way, with or without sliding dovetails, that fence system at the end of your post is DA BOMB! I can see so many uses for it. Very cool!
— Peter
John,
Of course the DSN can’t leave well enough alone, so in that spirit, how about putting a groove in the dado fence with some included clamps to make for an easier clamp down?
Best,
Rutager
Rutager-
The fence system consists of a single extrusion that is cut and flipped on top of itself to create a slop free sliding joint–the constraint we are facing is the extrusion die diameter, and right now, we are at the max hence the mdf clamp strip.
You have clamps, and quite frankly we really don’t know what will be clamped to what (your stock on top of a bench and all pinched together?) so the flexibility of using clamps of the users choosing makes more sense to us.
Keep thinking!
-John
PS: We think this adjustable fence is going to do just great as a solo tool– 0.001″ adjustability!
John,
Very good point, clamping to the bench for hand planing will be almost mandatory.
After several reads and some on bike thinking (I do a lot of figuring of stuff while riding- mind seems to work better,) I believe that I completely grasp the whole concept and it is amazing. I bet Michael thanks you almost daily for the honor of basking in the glow of your brilliance- guy probably can’t wait to get to work each day.
Just thought of this while typing, would there be a way to set the fingers of the dovetail gauge into the dado gauge to get the right width rather than measure, similar to the way the Kerfmaker works?
Thanks,
Rutager
Rutager-
First, we make the male dovetail-it can be any size within the capabilities of the tool which is 3/8″ up to 8/4 stock. It is tapered, so we need a way to find out the narrow end, and we have that way.
From that we need to know the ideal dado width so we are not wasting time removing stock for the female–we want the dado cutter to do the bulk of the work. So no, I don’t see a way to “Kerfanize” this system.
Regarding Michael–he does enjoy working here and brings me presents all the time. I never open them because I always hear ticking inside.
https://www.bridgecitytools.com/blog/wp-admin/edit-comments.php?p=5071&approved=1#comments-form
–John
John,
The depth stops look a lot like the planing skids on the CT-18; can they be used in the same manner, and what is the approximate thickness range?
Thanks,
Rutager
Rutager-
Correct, they are identical in function. Depth is always iron width plus a little extra. They can be used outside of making dovetails, but will allow precise depths for all of our dado soles which is really a nice feature.
-John
John,
We just came back from a trip to Sequoia and Yosemite (with a stop at Paseo Robles wine country),,,,,, an “un-named” source here recommended that I visit your blog.
.
Well, I’m stunned, and at the same time I need to hunt around the forest behind my studio for more brain matter so I could absorb it all!
.
back to you tomorrow!
.
roger
Roger–
DON’T DRINK ANY COFFEE!!!
-John
It’s just not fair! The past several days I’ve been thinking e-Bike now you drop this on us!!!
This is an absolutely brilliant approach to a tricky joint.
Ron,
Tricky joint? How about almost impossible? Now, almost pedestrian.
Speaking of pedestrian (sorta), next week I will post images of my second e-bike conversion…seems that somebody in my house was aware of how much fun I am having… Isn’t envy one of the deadly sins? That is the power of a LiPo battery! This newest bike conversion is sexy… And that is all I am going to say about that.
– John
If you’re saying what I think you are- Jitter can ride a bike, quit your day job and take that show on the road; you’ll be rich, I tell you rich!
Just an observation:
it seems that in the “towers” on the depth stops could be shortened improving the ability to handle the plane.
Just how accurate is this system? I’m thinking this has never really been conquered. I have made sliding dovetails on occasion and they are an excercise in patience. very small cuts and lots of “fitting” to get them to “lock up” where you want them to. In my mind, the final test is that the joint slides freely until nearly in place and then tightens up and locks into place when exactly in the correct lateral position. I assume you have made one of these by now and it actually does a repeatable job on this point? I’m thinking (as example) sliding dovetails for a book case shelf set. If, in fact, this system delivers it, you have conquered a new frontier!
coincidently, my son is making a Japanese style bed with tatami mat and has done his own design for it. His very first hand fit jointery is making 4 sliding dovetail joints which hold the entire bed together! It is a VERY cool design. I’m proud of him – the joints fit well and lock the bed togther incredibly well. It can be broken down into a pile of boards for moving if desired and re-assembled in minutes.
Nice job (again),
Dennis
Dennis:
The depth stop capacity for these skids is for all of our dado kits, not just this new system. We could make smaller ones for the dovetail kit, but I would need to hear a chorus of “hell yes!” before we do it.
What kind of Tool Potentate would I be if this doesn’t work exactly as described in this totally awesome and worthless blog?
Lastly, a 1/2 degree tapered dovetail does indeed lock tighter than Fort Knox. Well, you get the idea…
This joint has gone from “almost impossible” to a series of basic steps. It will repeat which is why it is sensitive variations in stock thickness, AND, making sure the edges (ends) of both the taper guide and the dovetail gage are ALWAYS flush with the narrow edge of both male and female.
–John
I can just see the first time one of us puts the taper guide on backwards. We probably won’t figure it out until assembly time, and then WHACK! Major head slap. I don’t see how you could make this foolproof, as those fools are pretty danged creative.
Dennis – I’d love to see some pictures of your son’s bed. Any chance of posting them on John’s forum?
— Peter
I would like to see the bed too!
Peter, I have given myself so many head slaps over the years I should make a citizen’s arrest of myself, turn myself in, and then represent myself in court against my physical abuse charges. Once sentenced, I could switch to simply banging my head against the bars…
–John
LOL!
— Peter
John,
Hell yes!
-Rutager
I was thinking about the shelf unit sliding dovetail application (and others). Often you would like to see different thicknesses of material on the shelf vs the sides (or the male vs. the female) dovetails. Is there an offset built in that could be set with a dial caliper? Just an idea to consider – it would be really great to have this ability. This may already be part of the tool and I have missed this.
On another note, I was thinking that it is somewhat fitting that the sliding dovetail attachment for the HP-6 is the perfect tool for making a tool chest for the HP-6. Since our tool potentate will adding to the HP-6 arsenal we can just add layers to the chest via sliding dovetails! How cool is that?
I will see my son this weekend and ask him if he will let me post the bed pictures. I’m sure he will but since it is his design I need to ask.
Speaking of tool potentates, how could I have possibly doubted?
DJ
Dennis:
I would most likely consider making offset male dovetails by using a wooden shim on the fence as opposed to changing the fence setting.
The storage solution for the HP6 is on my list–
Thanks for the comments! We would all like to see the bed if possible.
–John
I’ve been thinking about this tonight while out in my shop. I came to the same conclusion with the exeption that I was thinking there could be a relatively small set of shims which could establish a good sliding dovetail on say: 7/8″ sides and 3/4″ shelves. I’m not sure what the ratios should be, but this would be a real problem faced by users of this tool. They could be magnetic except you have extruded aluminum, but perhaps with an imbedded magnet and ferrous shims…. A few standard sizes could do the trick..
I will see Nick (my son) tomorrow night. I think you will like what he came up with – I have never seen anything like it.