___________________________________________________________________________________________________
“Without tradition, art is a flock of sheep without a shepherd. Without innovation, it is a corpse.”
— Winston Churchill
___________________________________________________________________________________________________
Early this week I posted images of our way to make perfect sliding dovetails by hand. And I do emphasize perfect.
Sliding dovetails have an enormous upside and traditionally have been possible primarily using the powered router. Our approach uses the versatile HP-6 Mini-Multi Plane. Making the male dovetail has never been that hard, although adding a taper complicates things.
The tapered female is a beast by hand, and I venture to say the vast majority of woodworkers have never made this joint by hand. Now it is easy–we use the HP-6v2 dado kits to remove the bulk of the channel and then come back using the exact same settings that we used to cut the male dovetail to cut the female–with this system, we ALWAYS cut the male dovetail first. (If you have two HP-6v2 bodies which of course we recommend…you can do this without breaking stride.)
In order to maximize the efficiency of the 10 degree beveled cuts (by removing as little material as possible), the initial dado cut should be as wide as possible. To do this you need a way to determine the EXACT width of your tapered male dovetail and our new dovetail gage does this in spades. This is really cool.
All that said, when you work using centerlines as your anchor, stock width variations can cause havoc. We needed a way to precisely make variable width dado cuts using a fixed width cutter (in this case either 3/8″ or 1/2″). Hence the AF-26 Adjustable Fence was born.
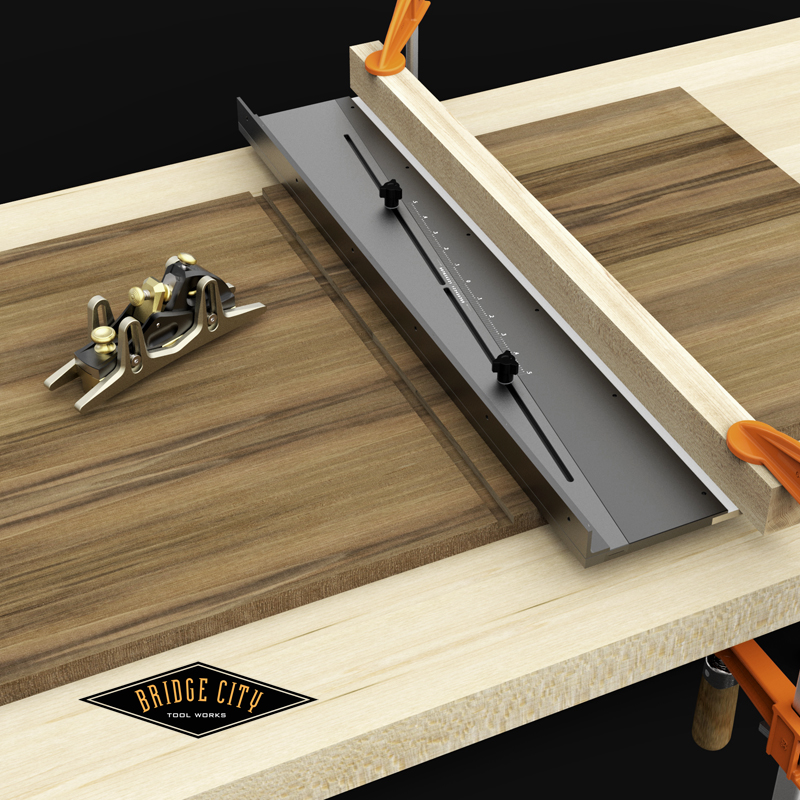
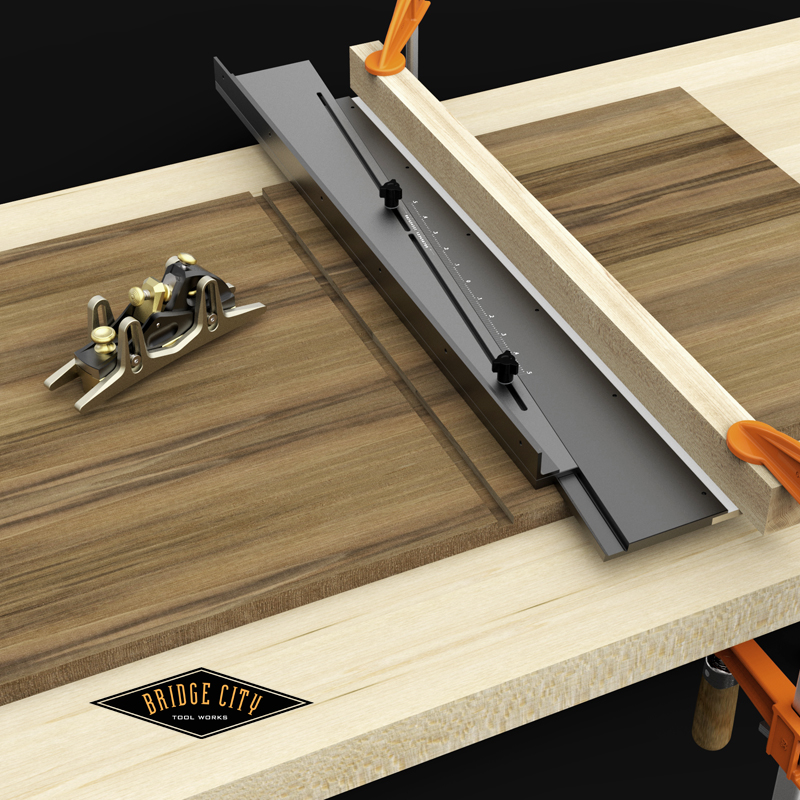
The AF-26 is, 26″ in length and is adjustable in 0.001″ increments up to .5″ either side of zero, for a total adjustable range of 1″.
Pictured below is a routine setup to cut the initial dado cut clamped with a caul to a workbench.
Loosen the two lock knobs and the reference face can be adjusted in either direction as seen below;
These adjustments are fast, accurate and fun. More important, you can come back to wherever you were if need be. I wish I would have had this device 40 years ago–tap,nudge, tap back… what a time waste. The tapered, sliding joint is smooth and solid. Did I mention how FAST this is?
The aluminum base fence is drilled so you can attach your own wood fence which will make this tool useful on router tables, band saws, free hand powered routing applications and many more situations where repeatablity and accuracy are required.
Lastly, there are many misinformed folks out there proclaiming that working to tight tolerances in wood is a waste of time, and I would like to believe they are talking about house framing. Without tight tolerances the tapered sliding dovetail does not exist.
The comments so far–as always–are welcome and insightful. Keep up the good work!
–John


John,
Thoughts, pros and cons of maybe having a 90 degree stop on one end to help get the fence locked down straight?
Thanks,
Rutager
Rutager;
There is a method to our madness…in just a few short days our new AS-24 will ship and it will set this fence dead square…or at an angle. How handy is that?
Keep thinking!
🙂
–John
Very.
John,
You very well may have DSN proofed this tool, my vision is already getting blurry from all the previous thinking. I’ll keep trying until the headache get too painful or I come up with something useful.
-Rutager
Hi John,
It’s late, and I’m brain dead after a very long day, but I’m having trouble seeing how to set the AF-26 to be 1″ from the centerline and keep it perfectly aligned: once you’ve cut the dado, the centerline no longer exists. Do you cut the dado with the fence? Do the depth fences rub against the AF-26? At what point do you use the dovetail guide to get the taper? Presumably after the dado is cut. But (again, sorry for being slow) how do you ensure that the AF-26 is in the right place?
Say your male stock is 5/8″ thick. Would you mind running through the steps again (I feel like a stupid kid in class asking the professor to explain everything again…). I’m guessing you’d start with a 1/2″ dado. How do you get it exactly on the centerline?
(I know there’s going to be a big mental head slap once you explain this…)
— Peter
So John,
Playing along at home here, trying to keep track of tool counts. Let me see if I have this right. In a couple months, a delivery person will drop off a sweet package including: the AF-26; dovetail sole kit; taper guide; dovetail gauge; depth gauge and a set of depth skids and you and Michael will have posted a briilant video on using all of it, right?
-Rutager
John,
I did some more thinking! What if the Taper Guide squeezed on to your stock from both sides, so you wouldn’t have to cut one side and then move the guide to the other, and what if instead of using the depth gauge to set the postion of the taper guide, the taper guide had flip up fingers, and wait, there’s more, the taper guide had the dado depth seting groove built into it, so you would have one less part to keep track of? The other benefit of fingers versus the depth gauge is that with fingers, you wouldn’t be fighting gravity and it would be easier to get it clamped on perfectly without 3 hands.
Thanks for entertaining my crazy ideas,
Rutager
DSN;
I will do a complete step through this weekend. We will make a video but not with prototype parts.
Gone fishin’ today.
–John
John,
The dado set only fits the HP-6v2; same with the dovetail sole, or will it fit on the brass HP-6?
-Rutager
Cool new concept John… Still wrapping my head around this.
On the subject of the HP6v2, you and I talked about an auxiliary handle for it awhile back – idea being that I could have a larger handle at the back to attach to the top of the plane. Are you still considering some type of optional handle? This is the kind of application where I think it might be useful particularly with the new skids on the sides of the plane or the fences as you have shown.
Good stuff!
neil
John,
Just noticed that the blade has an oval slot in it, Im guessing that’s how the blade slides over by moving the wedge up or down; does the clamp pad hold the blade and the wedge tight?
It’s all starting to make sense to me now.
-Rutager
Rutager-
Bingo!
-John