Drive Starved Nation!
First, there is something going on with this blog that is keeping ME out of the loop. So don’t be discouraged if your comments show up late, I am working on getting that fixed.
Second, thanks to all who commented on my Africa pics, I will let some more leak out later.
Tomorrow I leave for Europe for three weeks. This is a publicity tour for all of the new Bridge City distributors and I will be discussing our planes and other tools in the pipeline I still cannot talk about. Yet. Looks like we start in London and visit six countries on this trip. I will be traveling with Jack Xu and Mark Strahler and one thing I will confirm is the exact date for our second epic China field trip in 2020.
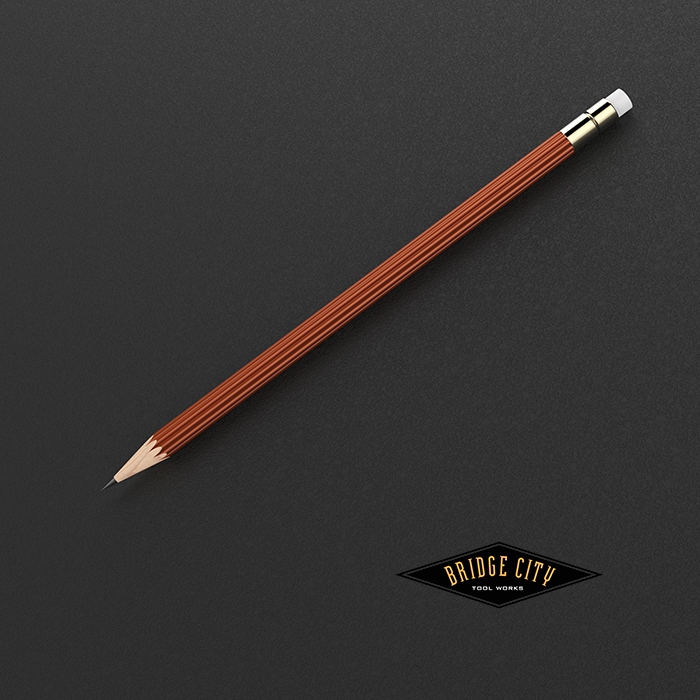
Over the past three weeks I have been doing nothing but making pencils and in so doing I discovered something that was keeping me from getting 100% success with each and every pencil. Heat.
For those of you who have ever cooked your thumb using a cabinet scraper, you understand that making wood shavings generates heat. What I discovered is this heat was warping about 5% of my pencils in the middle of the die rack. Consequently, these warped pencils were not entering the following dies on the same center-line. I won’t bore you with further details, but it is fixed.
Furthermore, I took this opportunity to review every single aspect of this tool and basically re-designed just about everything so an 8 year old can make pencils. This is actually a really big deal to me, it needs to be kid friendly in every way. With that in mind, please take a couple of minutes and look at these changes in the following picture story….
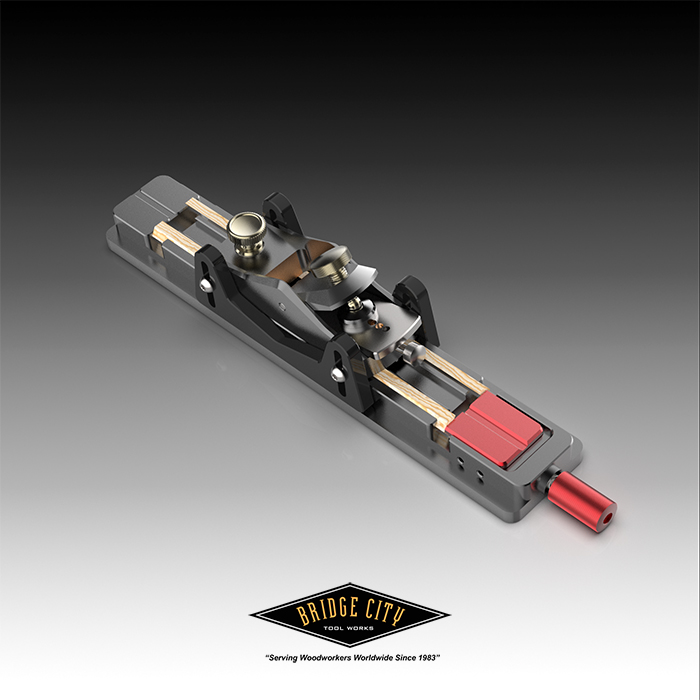
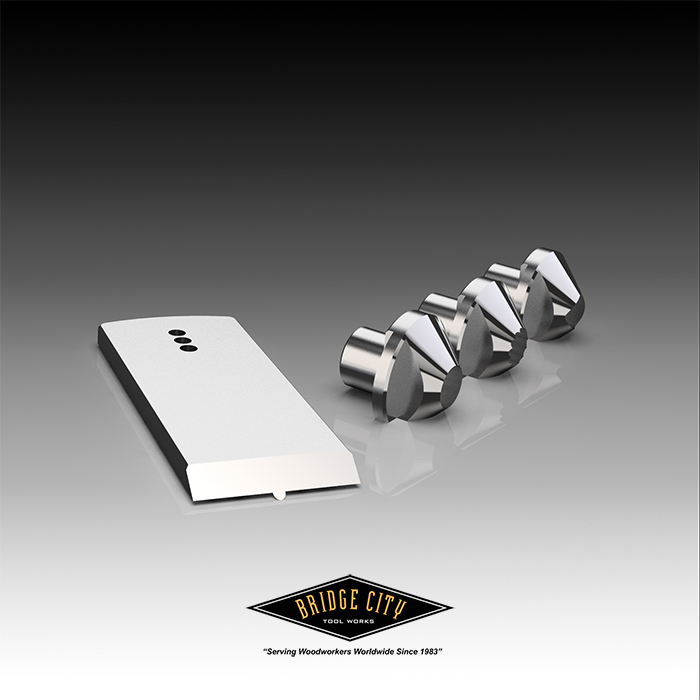
This is the new plane sled, and it is designed to allow kids to make hexagonal pencils without using the extrusion unit. This is a big deal because we can offer this as a stand alone system. The 170mm wood blanks are all boxwood and there will be enough blanks to make 24 pencils. Refills will always be available or you can make your own. It is also important to note that this system is designed to use readily available 2mm diameter leads. We are supplying 2H leads, but other grades can be easily be obtained online, as well as colored leads.
You put the blank in the unit, tighten the clamp and in 4-6 strokes, you have cut a 1 mm radius groove AND thickness planed the blank to the correct thickness. This is the beauty of depth skids on a hand plane. In practice, the unit sits on a provided (but not pictured) anti-skid pad so it stays put and your table or counter is protected.

Once you have finished the above step on two blanks, you insert them into the grooves in the fixture as seen below.
Without changing a thing on the plane, you plane until the skids hit the fixture and the plane no longer cuts. Flip the blanks and repeat to create the opposite edge. When these are glued together you have a perfect six sided hexagon, the standard pencil cross section (keeps it from rolling off a desk).
Clamping needs to be kid friendly and this is about as easy as it gets. Place the lead in one half, brush on some glue on the opposite blank and put the two halves together — the lead will align the two halves perfectly. Stand the pencil on end and slide on the tapered aluminum clamp as seen below;
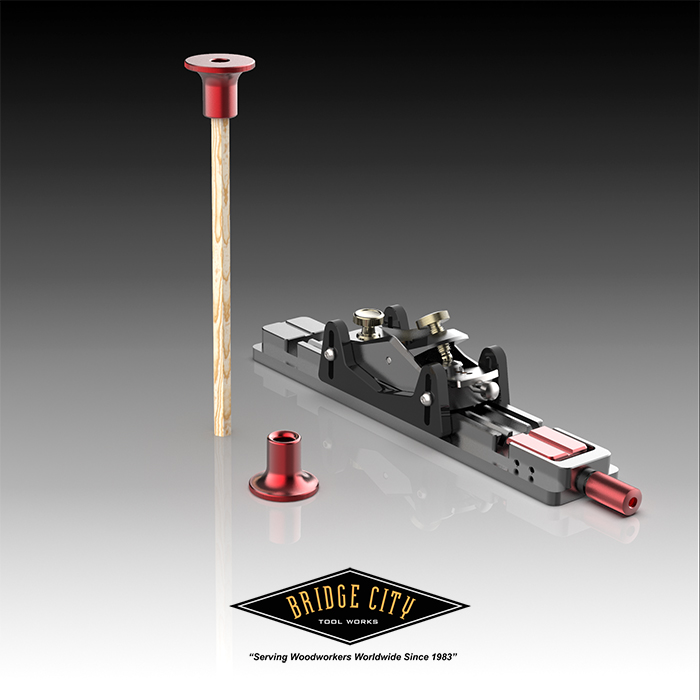
Next, place a clamp on the other end. The major diameter of these clamps allows you to put the entire assembly back in the sled unit for clamping the middle section of the pencil;

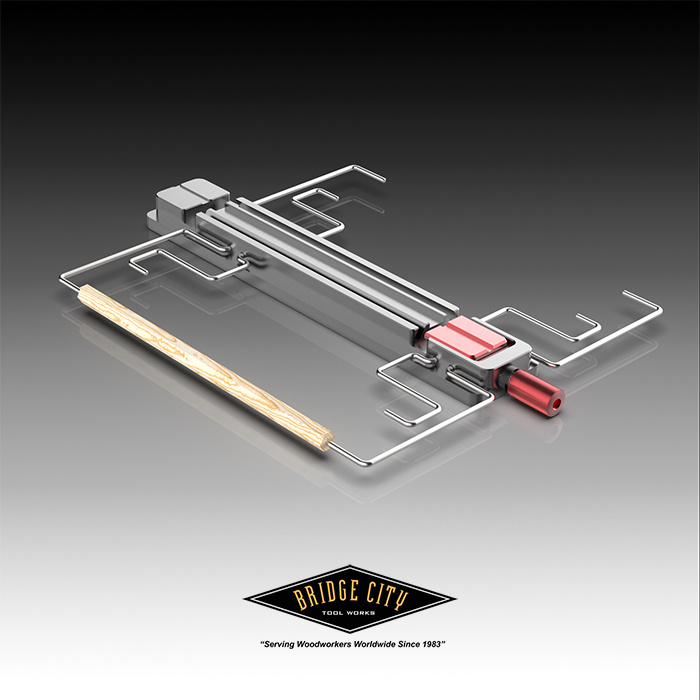
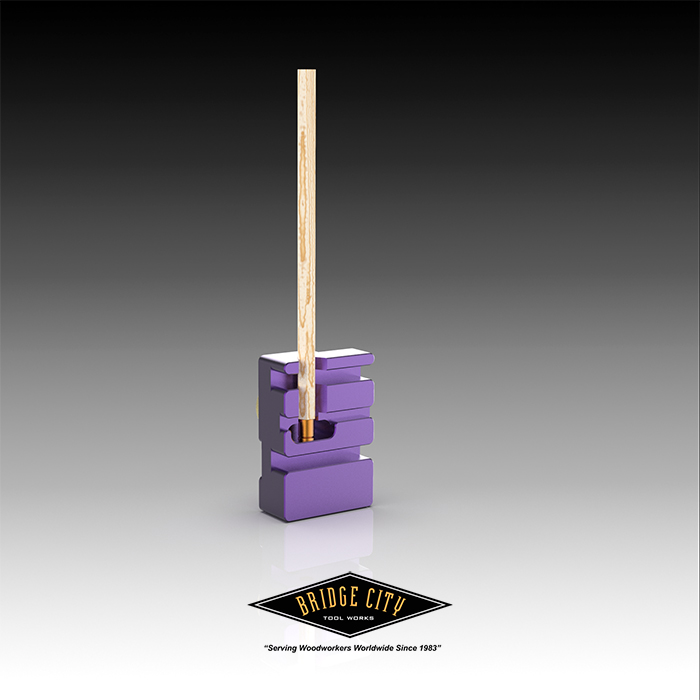
If you desire your pencil to be painted, lightly sand all of the corners with 400 grit. The sled unit converts to a paint rack as pictured below. Since the pencil will eventually need to be sharpened, and most likely will receive an eraser ferrule, you can rotate the ends of the blank with your fingers to paint all six faces without fear of screwing up the paint job. You can paint up to four pencils at a time… That said, I like naked pencils, maybe a little mineral oil, but that is all — naked and oil, what’s not to like? Did I just write that?
The next step is to score the shoulder that the ferrule will butt against. This is done with what I call the “Ferrule Station”. You insert the pencil until it stops, lower the cutter and spin the pencil until the cutter is parallel with the fixture. It is actually really easy.
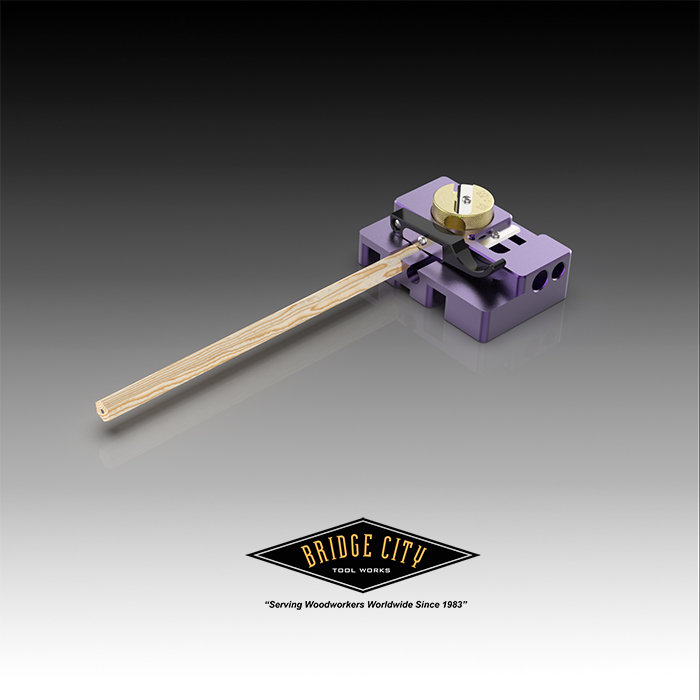
Now we have to create the tenon for the ferrule. This involves putting the pencil in the hole, peel off some wood back to the shoulder cut, retract the pencil, rotate, and repeat. The goal here is not to create a perfect cylindrical tenon, in fact, the irregularity of this helps create a firm fit with the ferrule.
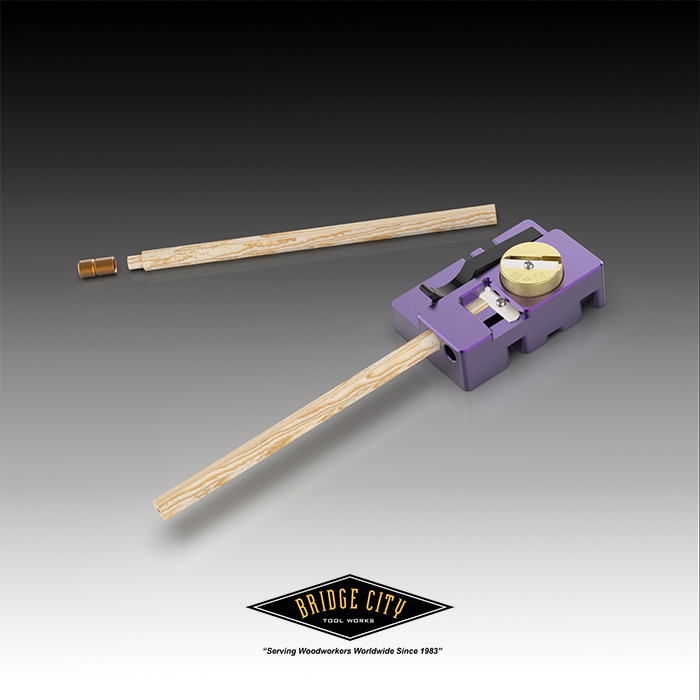
Putting the ferrule on dead straight is almost impossible without some help and we have it. The Ferrule Station can be rotated on end, drop a ferrule into the pocket and hold the blank in the alignment channel and tap the pencil home. Super easy and accurate. (FYI, the three parallel channels found on the bottom of the Ferrule Station are so the depth skids can be precisely set if ever removed.)
From here, you can put in one of the supplied erasers and sharpen with the included sharpener. And here is the shocker, not counting gluing time, or painting, you can make a pencil in under 5 minutes. That is crazy fun!
That is how you make hexagonal pencils. For other profiles, we need to use a different method.
This is the extrusion unit, and it uses progressive dies to make three other pencil profiles;
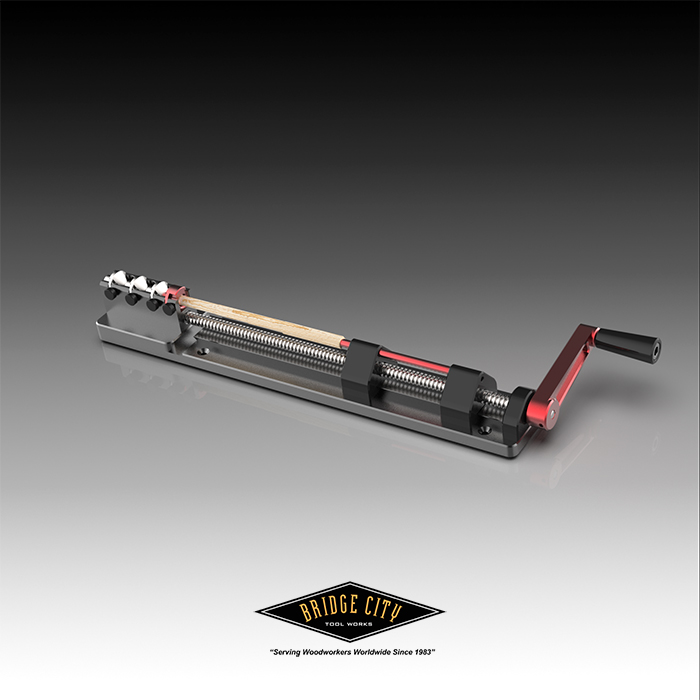
This unit works by feeding a hexagonal pencil into the red aluminum guide die. Forward motion is provided by rotating the crank until the pencil clears all three dies. I cannot tell you how much fun this is. This thing poops pencils!
Here is an image of the alignment die and the the final die of each of the three profiles;
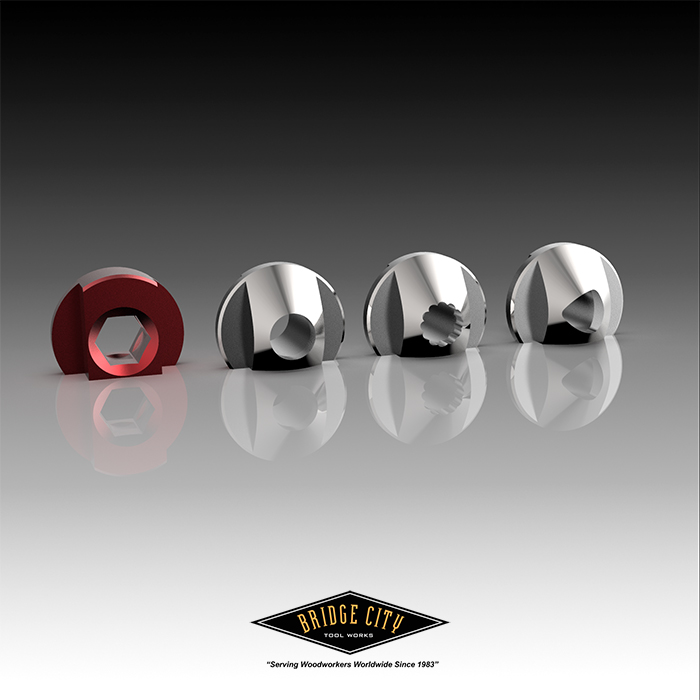
You can make round pencils, beaded pencils and the Reuleaux profile (this is a trilobal shape that fits your fingers perfectly) All but the Reuleaux can be fitted with one of the supplied ferrules.
Lastly, sharpening. The plane iron is sharpened on the beveled face only, and this should be easy for just about everybody. The circular dies can be chucked in a 1/2″ chuck and the bevel can be honed while the chuck is spinning. Again, not difficult.
When I get back from Europe, I will post the 2020 delivery date. This product is my last obligation to my Bridge City customers prior to the transition of the company to Harvey Industries. If you don’t have one on order, you can call Bridge City Tool Works 1-800-253-3332 and get on a wait list.
It has taken me awhile, but not for much longer.
And thanks for everyone’s patience!
-Still Your Tool Potentate
You remain a genius and my woodworking hero! Thanks, John. The world needs heroes…. we’ve run short of late!
safe travels, dude.
looking forward to getting these units. have teased my two nieces about a future christmas present so will be happy to be able to deliver this coming year and not be a grinch.
dave
Dave-
Thanks. I thought making chopsticks was fun, and it is. This is a whole new level of fun.
– John
I am no hero, this I know. But, I do like to be a part of others making cool stuff!
John
John,
I ordered a pencil precision prior to company conversion but never received it. I assume it was due to company transition.
Any way I can track this down?
The use of the flat (non-pencil-groove) part of the plane blade to flatten the pencil sides is genius! And what could be more fun than pooping pencils, except maybe oiling a naked pencil?
How will you deal with tear-out, if the pencil blank is inserted into the fixture the wrong way? Will the cutting angle take care of it? I’m wondering about people trying other woods, and getting frustrated if it doesn’t plane well.
And as an aside, I saw someone on ebay selling a BCTW pencil for $20! I don’t know whether it sold…
Chris,
None have shipped yet. You are fine-
John
Peter,
There are not many options for “other woods” because sharpening becomes an issue. Boxwood is considered the “the grainless” wood. That said, one will know in the first pass if the blank needs to be reversed. This will be addressed in the manual and the video when we make them.
Lastly, eBay is a bit sketchy if you don’t know the seller.
-John
Thanks, John for the response! Looking forward to making my first pencil!