Thanks to a gracious invite from Chris Schwarz and the Popular Woodworking staff, I will be heading out to Cincinnati for a June 19 presentation on “Silent Woodworking”. This will be an informal, up-close and personal affair centered around our new Jointmaker Pro and several new profiles for the HP6-v2 Mini Multi-Plane. These folks are passionate about hand woodworking and Chris and staff are terrific hosts. The event is F-R-E-E and includes a buffet of real food. Everybody is welcome to give the Jointmaker Pro a go before I go–you will be amazed at what can be done without a power cord.
We are limited to the first 60 attendees because the Cincinnati fire marshal just does not get the concept of free food and woodworkers. Dinner begins at six and if you can make it, I would love to meet you in person (Chris too). In addition to a couple of surprises I have up my sleeve, these things have a habit of spilling over to a local bingo hall afterwards for more serious discussions.
RSVP ASAP via email to Megan Fitzpatrick; Megan.Fitzpatrick@fwpubs.com
I hope to see you there!
-John

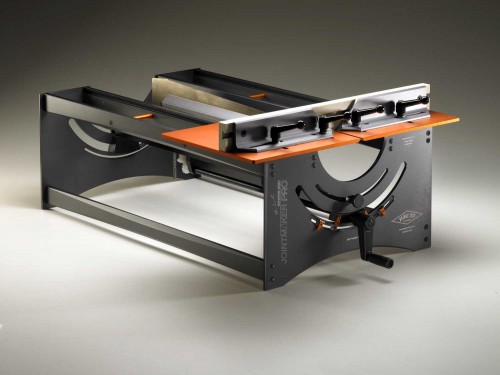
The Jointmaker Pro can do things without power that are unimaginable. It is an impressive tool that you can try yourself on June 19th in Cincinnati.

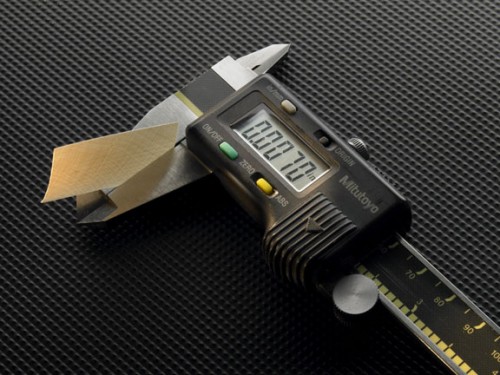
This image vividly illustrates the accuracy capabilities of the Jointmaker Pro. The material is hard-rock maple and was made with 10 strokes.

John, one thing I notice from the top picture of the Jointmaker is that there are no obvious clamping points to hold the device to a work surface.
I’m dreaming well in advance, but I was planning to clamp (or bolt?) mine to the top of a trusty B&D Workmate. I’m not sure if that is practical now that I’ve seen these pictures.
Can you comment on how you expect the Jointmaker to be set up in the workshop?
The Jointmaker Pro has two bottom rails. The bottom of each rail is exactly 3/4″ from the work surface and the rails are pre-drilled. The tool can be screwed to a work surface using these holes. Or, the tool can be clamped to a work surface using the rails, or one can screw 3/4 stock to the bottom of the rails and use the stock as a clamping surface. Regardless of the method, the tool does need to be firmly fastened to a work surface with one exception, it works quite well on a carpeted floor-as practical or unpractical as this may be.
-John