As many of you know, we are wrapping up the best sale we have ever had on the HP6v2 Mini Multi Plane. This has precipitated many questions about sharpening profiled irons. Hopefully this totally awesome and worthless blog will set the record straight.
It has been suggested that the Bridge City profiled hones are not necessary, that one can make their own hone simply by planing a profile in a hardwood, and hone using diamond paste.
True or False?
Let’s start by assuming that however the iron is sharpened, the intent is to maintain the decorative, factory profile over time.
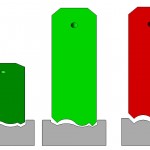
The illustration below is a front view of the same profiled iron. On the left, you can see the relationship of the iron to our custom hone when held in an invisible honing guide at 30 degrees to the hone surface (which is identical to the factory grind).
On the far right, you see the iron pitched at 55 degrees (in the same invisible honing guide). Because the iron was used to create the profile of the wooden hone, the edge of the iron and the surface of the hone are an exact match.
The center image illustrates the difference of the iron pitched at 55 degrees and the hone which was designed for the iron to be pitched at 30 degrees for sharpening. Quite a difference.
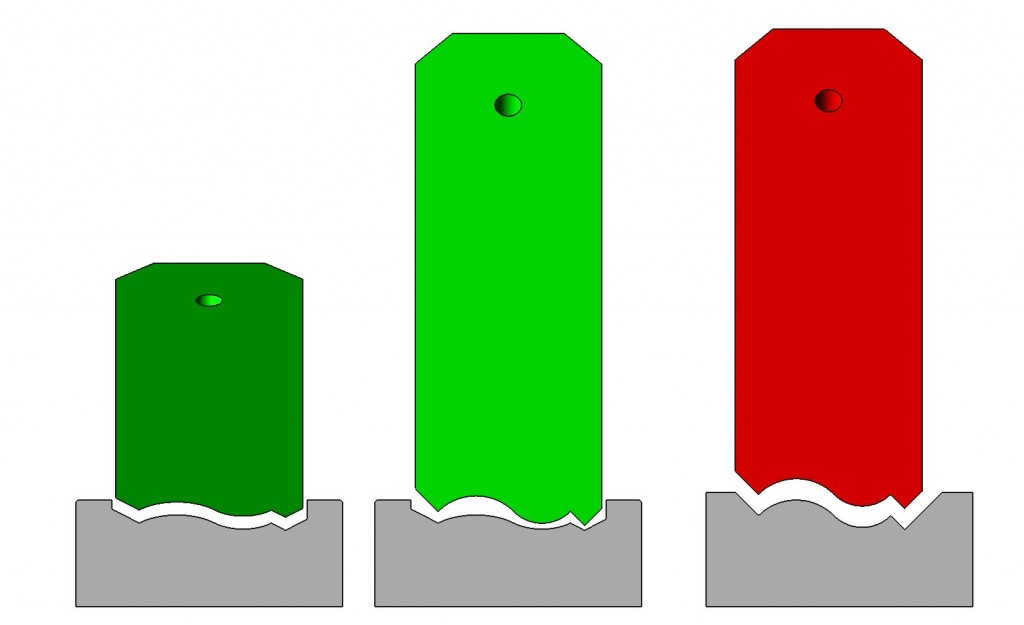
Take a look at the illustration below. The green iron has an attack angle of 55 degrees and the iron is sharpened to 30 degrees. The red iron is also pitched at 55 degrees. Look what happens to the factory edge after sharpening on a homemade hone that used the iron for the hone profile. This iron has been “dulled” 25 degrees. A 55 degree edge is not very sharp.
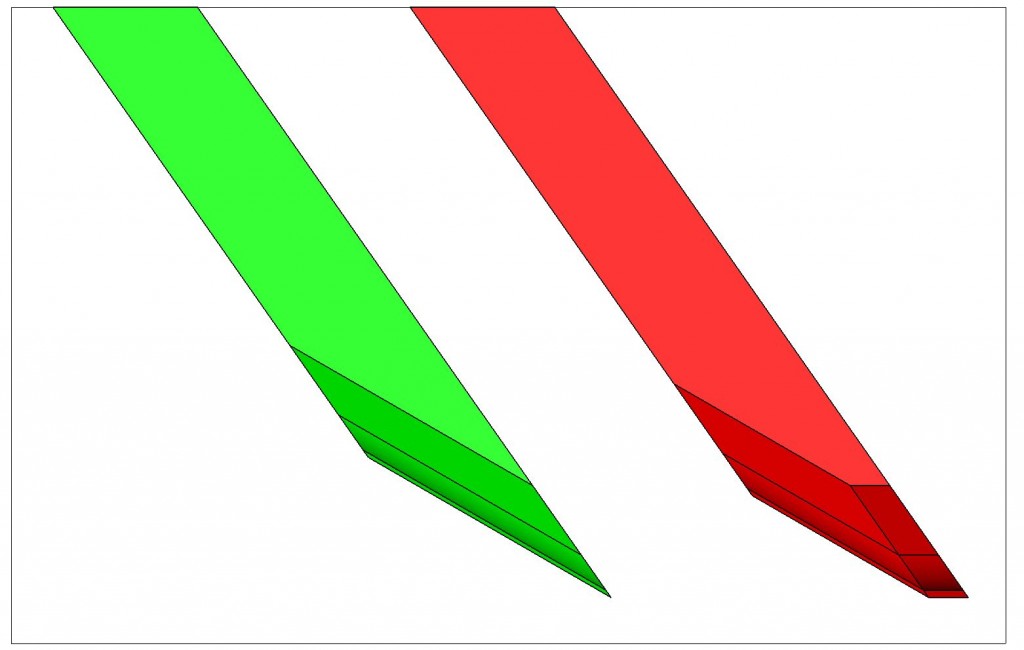
But what does this really mean?
First, the good news: the red iron will cut the exact same profile as the green iron.
But consider this; you will immediately notice the added force required to cut, your cuts will need to be more shallow and you will need to make more of them–obviously.
Now imagine the edge of the red iron over time. At some point (after enough sharpening) the factory grind will completely disappear leaving zero clearance between the cutting edge and the metal that follows (which occurred after the very first sharpening using this method). Zero clearance is rarely good but ignoring that, drag increases (again) and burnishing will occur (burnishing can really mess with some penetrating finishes) but–it will cut the identical ogee profile. It might be reasonable to expect that the edge will last longer because it is not as sharp…but when you factor in the added passes due to the added resistance–I don’t know if that claim is logical.
So–true or false?
I say tr….
Hope this helps.
–John
Behind the Scenes
Behind the scenes at Bridge City Tool Works!
Inspiration is Everywhere…
February, 10th, 2011
First, thanks to all who gobbled up our sale items over the past week. That was fun. There are a few items still available for those of you who missed last Friday’s feeding frenzy.
As a designer, I draw upon many other disciplines for inspiration, and here are a couple that are worth sharing.
This first link is in regards to the yet to be released documentary “Float”. I cannot wait to see this film! Make sure to watch the trailer at the bottom.
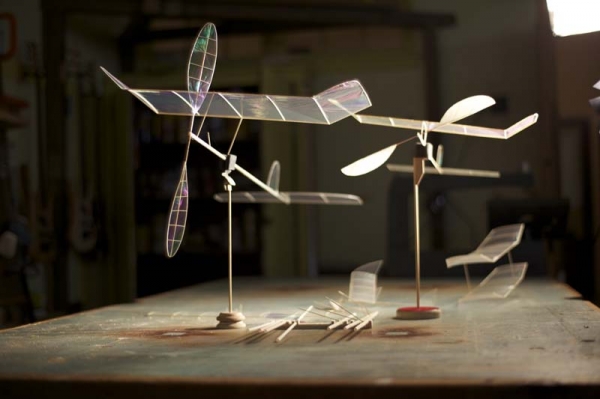
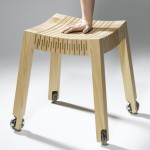
A customer recently sent me this link and thought it looked familiar. I think it is awesome! I wrote to Carol to see by chance if she was influenced by our Squiggle Wood but have yet to hear back. Doesn’t matter, cool don’t you think? Click here for the movie.
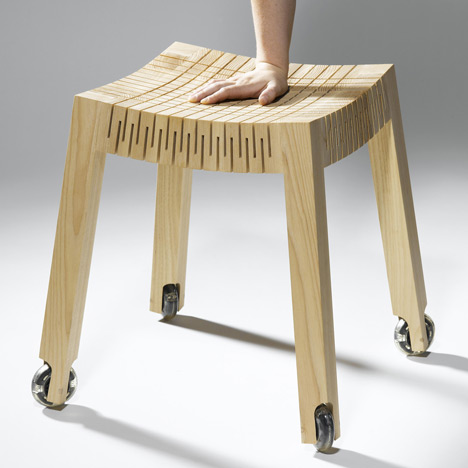
What a fun idea: The Melody Door!
Designer’s own words:
The melody door brings the fun and customization of ringtones to your home. Now anyone announcing themselves with a knock can be as playful as the want to be. Ever wanted to tap out “Taps” to wake someone up in the morning? Or how about chopsticks? One full octave of notes gives you a range of choices, while the design of the door fits nicely with a modernist aesthetic. With melody your knock is as unique as you are.
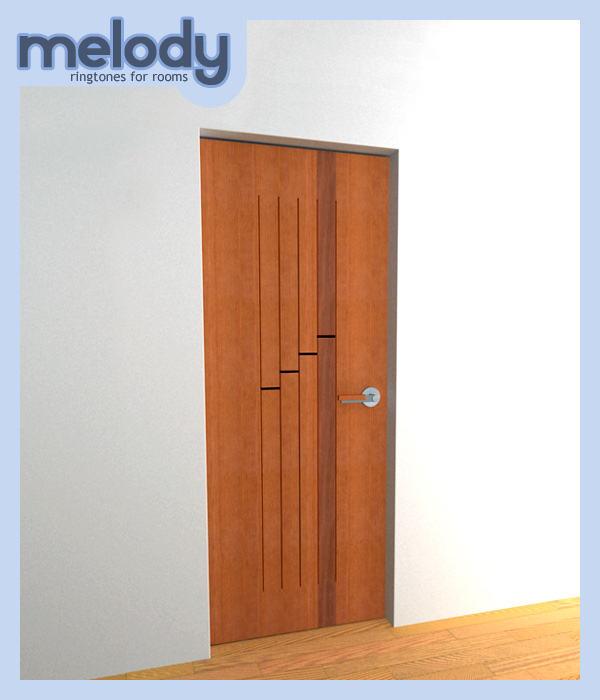
Lastly, look what you can do with your tools;
I hope you are itchin’ to get back in your shop!
-John
A Sneak Peek at the BIG BRIDGE CITY SALE…
February, 3rd, 2011
As mentioned in a previous post, we have a couple of new projects that are at least a year or two away that have to be funded. I thought it might be helpful to share how a new product comes to be…
Using the Jointmaker Pro as an example, we went through 27 digital prototypes before we built working prototypes, of which there were 8. Each of those prototypes were $2500 to $4K each. The patent process ate $24K. There was about 40K in dog and pony shows before we had a single sale. So you see, it adds up real fast. Add in our staff time and the number balloons up to around $250-300K. That is a dinky number for a big company and a really big number for a small company. With our next production run (pre-orders will begin sometime this month) we will break even, three years after we launched.
Now we are moving on to another idea that is almost as complex and as mentioned, we are going to fund it by clearing out existing inventory. And this is why reading this totally awesome and worthless blog may be of big benefit to the Drivel Starved Nation.
When our “ON SALE” page gets updated tomorrow afternoon, there is one piece of information that will be missing, and that is the quantity available of the items on sale.
I mention this because there will be one mother of a deal and that involves an HP6v2 package I am putting together for those of you who have yet to add this remarkable plane to your shop. There will only be 50 of these packages and this is your early-bird tip regarding a nice juicy worm–50 of them to be exact.
Sales are something else. Our very first warehouse sale in the 80’s was unbelievable. It opened at 10 am on a Saturday and I arrived at the shop around 8am to make sure everything was in order. There were already 150 people in line! It was crazy.
We are going to reach a point where sales are a moot point here, we have been building-to-order for the past four years and have no intention of going back to a model where our warehouse is full of tools. So, if you like great deals, and who doesn’t, it all goes live tomorrow, Friday Feb. 4 around 4PM Pacific time.
Lastly, for those of you interested in rare and beautiful tools, we have three of these left–they will not be on sale, #’s 22, 35 and 43.
-John
PS: Oh, I forgot. I promised a Sneak Peek. $65 will get you one of these if you remember to check in early. $15 will get you one of these AND one of these… and there is a maximum $5.95 flat rate shipping for all orders.
New Ideas, Updates, a Great Deal–and Some Fun.
February, 2nd, 2011
I returned from my annual work retreat on Monday and my brain still works–off and on actually.
I have three new products percolating from this creative foray and can’t wait to begin the R&D on all three. One of them is going to cost a bundle in prototyping costs and we are going to fund it by cleaning out our warehouse. Stay tuned to your inbox or the On Sale tab on our website–mark my words. “Best Deals EVER.”
Now For Something Completely Different…
I returned to an email from Marc Adams informing me there are 3 openings remaining in my Creative Thinking class. It would be cool to see a couple more DSN members fill this out. (FYI, several new projects this year) Should be a complete blast–and plenty of drivel.
Also, there are 7 spots remaining in the Design/Making Hand Tools class. Chris Schwarz will be there taking pictures for an upcoming article I am writing for Popular Woodworking. Making tools (when you know how) is as much fun, maybe more fun, than making furniture. I do know all who took the mini-class last fall had a really great time.
Here’s the GREAT DEAL
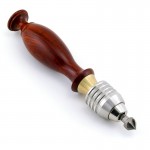
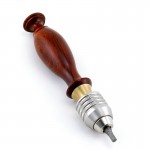
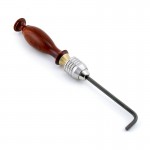
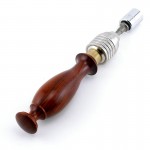
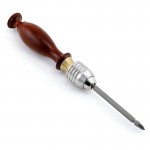
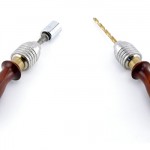
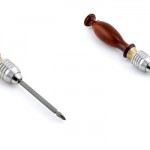
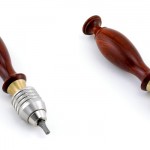
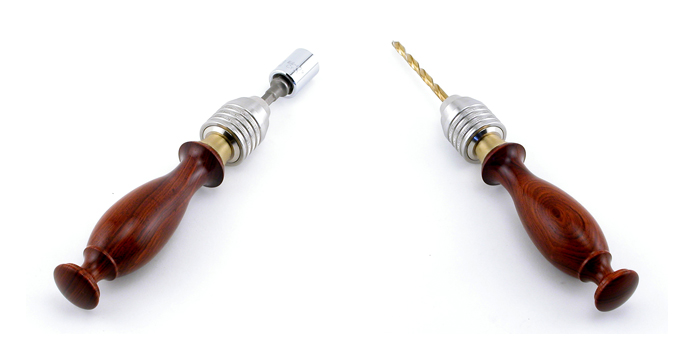
We have in our warehouse 300 or so rosewood and brass pin vises. Over the years we have sold several thousand at $139. These are all going on sale for $59. (No that is not a typo.) But it gets better. Some of you are going to get one almost FREE.
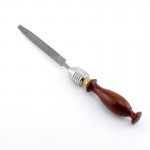
The PV-1 is an awesome file handle (saves space) and locks tight.
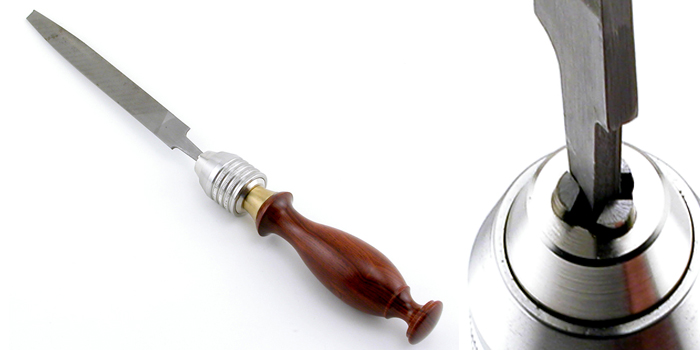
Any 1/4″ Hex Bit will Fit in the PV-1
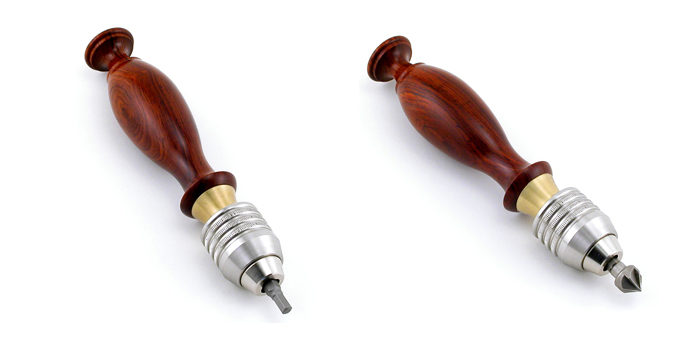
Screwdriver Bits are Obvious, Adding Extra Leverage to a Hex Key is Easy…
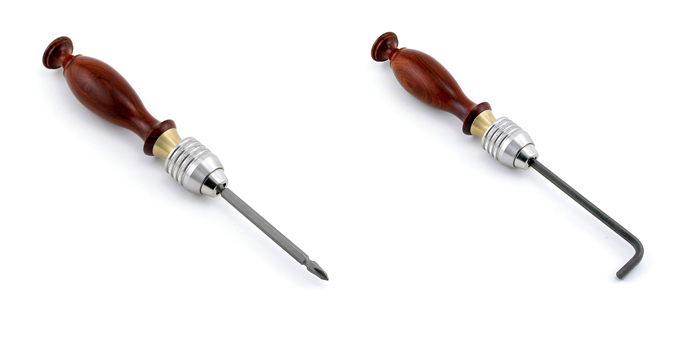
Pin Vises make Enlarging Small Holes Easy. Also, using the PV-1 as a Socket Wrench can be Handy at Times…
Oh yeah, back to almost FREE…here’s how;
If you happen to be the lucky dog who ordered the 50th, 100th, 150th, 200th, 250th or the 300th unit, we are going to send each of you a $60 gift certificate. Just think, if you bought all 300, you would receive 6 Gift Certificates! How cool is that?
But we all know it is the rare DSN member that can actually enjoy almost FREE. We like to earn our tools (as a group that is) and here is how;
Pin vises are metal fingers that protect your inferior, often in harm’s way, fleshy protrusions. In addition to all the functions pictured above, a pin vise really shines when you need to touch off small metal parts (shortening screws/hardware/pins) to a grinding wheel or sanding belt. And who cares if they get hot, the chuck is a heat sink. But wait, there is more…
I never go anywhere without my BCTW pin vise and for good reason. Just the other day I almost tripped over a suspicious package. Like you, I too always carry 3-9 wire coat hangers everywhere I go so I quickly unfolded and chucked one into my pin vise. From a safe 24 inches away, I stabbed the package. No explosion! How cool is that? (Completely unrelated, does anybody know where I can buy a small rodent eye patch?)
One day I chucked a nail in my pin vise and did some experiments on Louie’s brain (dumbest dog on the planet). I think he is smarter now! (Next time I get depressed I am going to fix my brain using this method.)
Last summer at some barbecue, it was me, and only me, with the coolest corn-on-the-cob holders anybody has ever seen. You guessed it, I used two pin vises! How cool is that?
For those of you that have seen me in person, you know I am in top physical condition. The only exercise I do is with my pin vises. Each morning I chuck a length of 1/4″ wire rope between two pin vises and do about 10,000 skips. (Do this away from the house, it sparks like hell.) After barely breaking a sweat, I remove the rope ends and chuck up a pointy thing in each pin vise. Using only my arms, I climb the telephone pole in front of my house. Legs dangling, I stab, pull, stab and work my way up and down the pole about 60 times a session. (Remember how Megan Fox was after me for almost a year?–HINT: she wasn’t after my money.) How cool is that?
Wanna know how I remove a dead mouse from a mouse trap with a pin vise? No you don’t.
Make us laugh (family appropriate please)–you might win!
And at $59 (less than a KerfMaker!) you will be smiling with your new pin vise–even if you aren’t a hilarious, headache inducing tool potentate.
–John
AngleMaster Pro Video
January, 25th, 2011
Greetings from the cloisters version 2011. My annual work retreat expires in a couple of days (I think I might too) and I can’t wait to come home.
While away, Michael has been busy working on the AngleMaster Prov2 video and I am happy to be able to share it with you early.
We have several prototype units out in the field and those folks, if time allows, are likely to share their early thoughts. The first review we have seen is from Popular Woodworking.. Some of the comments are interesting and it might be helpful to add a bit of the “why” regarding this new tool.
As some of you know, I made a living as a studio furniture maker in the late ’70’s and early 80’s. Most of my frustration as a woodworker was dealing with the limitations of tools and equipment, and of course my own limitations. This is also part of the fun, but at the end of the day, my time meant something to me. So tools that saved me time, either directly or indirectly, always interested me. After all, there is no guarantee that tomorrow will arrive.
Spending my time hand fitting things because my layout tools were suspect has always rubbed me wrong. Ask yourself this question; If you demand that your try-square be square within a couple of thousandths of an inch (and it should) what can you expect from a protractor that reads in single degrees, maybe half-degrees? Yikes–a try square that is 1/2 a degree off becomes a really good paint can opener.
Here’s a fun way to determine if your methods work without spending a penny on new tools. Make a five side, compound mitered frame. Here are the only numbers you need to know. Your saw blade needs to be tilted 24.559 degrees off of 90 degrees. Your miter gage needs to be set to 117.192 degrees to the blade. Cut your five pieces to the same length and see if your last joint closes. (The trig for figuring this out is not that hard, so you might want to give that a try since the answers are posted.)
This exercise is extraordinarily difficult if you are using one of the ubiquitous 4″ protractors, but give it a try. And please share your results. Like many things that are hard, people tend to avoid them. There is a whole new world out there that is not ninety degrees and we are pleased to be able to show you how.
The AngleMaster Pro is for those folks who expect their best and value their time. Which brings up an interesting observation; if you value your time, what the heck are you doing hanging around on this totally awesome and worthless blog?
–John
The AMPv2 App–Section by Section
January, 14th, 2011
Here is a brief overview of our AMPv2 app (still in beta) for the iPhone, iPod Touch, iPad. All of this info will also be available via our website after AMPv2 run is completed.
Having spent all day yesterday making angled cuts and testing this and that, and at the risk of sounding like the complete huckster that I am, the AMPv2 is the most confidence inspiring tool that I have ever used. What great relief it was to know that if my cuts did not nest perfectly in the AMP or to t-bevel set to the AngleMaster Pro, I knew it was me, not the tool. This knowledge is powerful because you can chase your techniques and not doubt the tool.
Here are my thoughts section by section as the app progresses.
ANGLE FINDER
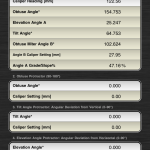
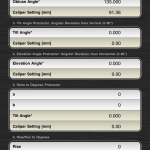
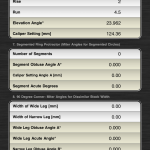
Anytime you need to find either an obtuse angle or an acute angle, you use this section. Obtuse angles read direct, simply align the legs of the AMPv2 to the source needing identification and your angle is there. Acute angles must be pulled using a t-bevel and then transferred to the AMP on a flat surface. This will identify the supplementary obtuse angle, which will identify the acute elevation angle. In this case the obtuse angle is 154.753. The Elevation Angle and the Tilt Angles are deviations from 180 and 90 degrees respectively.
Let’s say this obtuse angle is the angle of two walls and you want to put a handrail along the wall. The app tells us the miter angle for the rail is 102.624 (no, it is not 154.753/2, which is the sum of the two acute angles, we use obtuse for everything with the AMPv2). This is pretty cool. Fast. And mathematically, dead-on.

OBTUSE ANGLE
When you KNOW your OBTUSE angle, enter it here to determine the caliper setting for the AMPv2. This one is easy.
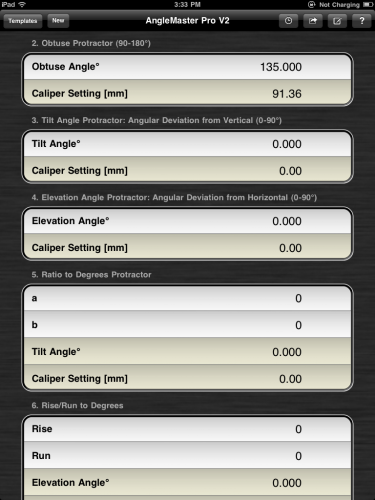
TILT ANGLE
One of the difficulties in developing a clear view of angles and woodworking equipment is dealing with the lack of standards. For example, we have seen miter gages when set to cut 90 degrees the indicator says “0”. Others say “90”. Same with the protractor for the blade tilt. So by using the standard angle nomenclature of elevation and tilt, it clarifies things. Now when you have a set of plans and it says to tilt your saw blade 7.5 degrees, this app will give you the correct caliper reading of 16.78 which is the obtuse eqivalent of 97.5 degrees but you don’t have to do the math.

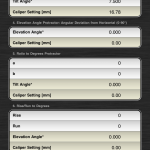
ELEVATION ANGLE
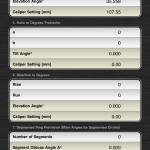
Perhaps you need a skateboard ramp, a wedge, or pie shaped segment that is an acute angle of 35.258 degrees. This is the section you use to help cut your stock.
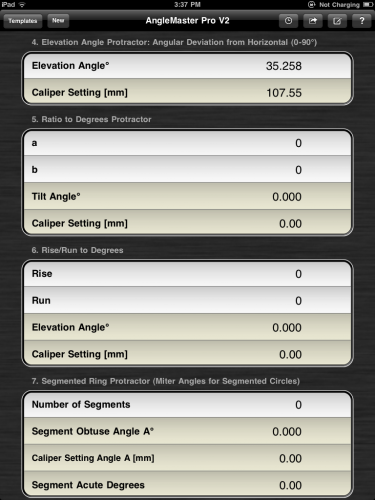
RATIO to DEGREES
Many projects are still discussed in terms of ratios. Rise/Run, and many woodworking angles. For example, if you ever wanted to know what the angle is of an 8:1 dovetail, it is discovered here.
This calculator specifically determines tilt angles.

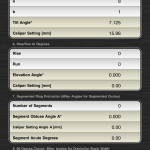
RISE/RUN to Degrees
Very similar to the ratio section but outputs the complementary elevation angle.

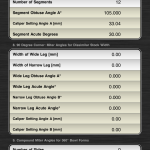
SEGMENTED RINGS
In one of my sessions at Marc Adams there was a class on segmented ring bowl making across the hall. I had a chance to watch how they work and thought, “if only their angles were dead on, they would not have to hand fit the last section”. So yesterday I spent about 10 minutes dialing in an angle for a 16 segment ring and it came out great. Since they were all using chop saws, I don’t think it matters but it would on a table saw. Your work always reflects the quality of your equipment.

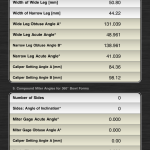
90 DEGREE MITER with DISSIMILAR STOCK WIDTH
I really like this particular calculator as it helps add interest to projects. That said, you may need to make a fixture because most miter gages will only tilt 45 degrees each way. Some of these angles are more acute than 45 degrees.

COMPOUND MITER ANGLES FOR 360 DEGREE BOWL FORM
This is powerful information. “Bowl Form” helps you understand that the top is wider than the bottom. That said, a compound mitered pedestal stand for example, is a bowl form turned upside down. Either case, the math is the issue for most and now it’s not. Nor is the setup. You can only tilt your saw blade one direction (most saws anyway) and we give you the obtuse setting. You can tilt your miter gage either direction, but you can only measure obtuse on one side. There is not much to ponder–or screw up. There is a lot of info in this section and I will add trim angles (if you want your form to either sit on a flat surface, have a lip parallel to the ground or both).

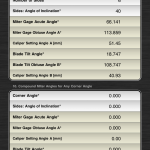
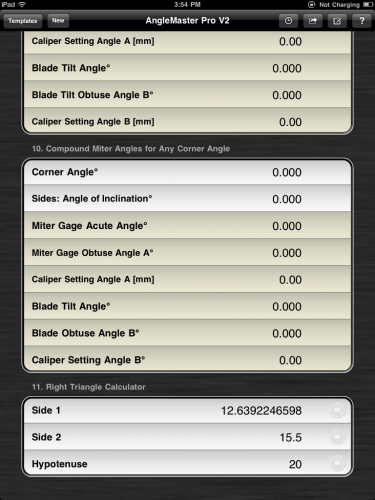
COMPOUND MITER ANGLES FOR KNOWN ANGLES
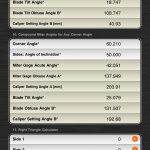
First, the numbers in the image below are incorrect–but that has been fixed.
It was brought to my attention by a DSN member that framing hacks create corners that are not 90 degrees. That is but one example of trying to figure out miter angles for non-square corners. It is pretty cool to know that you can now do whatever you want by concentrating on your cutting set-ups.

RIGHT TRIANGLE CALCULATOR
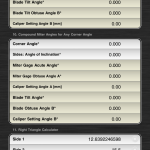
I wrote this section because it is fun. And, there are times where this info can be valuable. I could ad all the angle opposite stuff, but it gets confusing. If you want it, let me know. What I like about this little section is that I can change any of the three legs and then select which leg to change without trig calculations.
Anyway, that is a quick overview of the app. Combined with the AMPv2, there is no excuse for not attempting projects that involve angles.
Think about this;
The AMPv2 is the equivalent of owning 15,240 angular references, each as accurate as the finest machinist square.
–John
Compound Miters, AngleMaster Pro and Other Stuff
Tomorrow is the beginning of my annual work retreat–truly the highlight of my year. I have several ideas percolating that I can’t wait to explore without interruption…. And for those of you who are trying to figure out how to manage you own work retreat, watch Jason Fried explain why the office is the worst place for productivity.
For those of you patiently waiting for the CT-17, we were ready to begin shipping about a week ago when I decided to change the lead screw–suffice it to say that the change is worth us eating the now old lead screws. This tool is now scheduled to ship in March. A similar event occurred earlier in the year when we delayed the Jointmaker Pro run after a discovery led to a major improvement–it cost us a lot of money to do this but if it makes the product better, that is how it has to be.
The Universal Jaws are being made by the same shop as the CT-17, so when that job is complete, on to the jaws.
The TM-1 Tenonmaker components are built, and are being anodized and then off for laser etching. They should ship in the next two weeks or so.
I am often asked, “Why does it take so long to make BCTW tools?” Below is a pic of our FDA approved testing of the KM-1 Kerfmaker. Yes, that is baby Calder working overtime. And, who puts their baby in skull and cross bones gear? Oh, that would be Michael.

HELPFUL TIPS REGARDING ANGLED CUTS AND COMPOUND MITERS
Yesterday we filmed a short video on how we use the AMPv2 to cut compound miters. The cool thing about the AMPv2 and the app is that the math is perfect out to 9 decimals–so math is never the issue, we as craftspeople are the reason things don’t come out light-tight. I hope you find the following tips helpful–these are the behind the scenes aspects of what you don’t see in the video.
- Never rely on a static setup for quality work–we tested this yesterday and the difference between the static alignment of the miter gage/table saw blade and the actual cut was about 1/2 a degree. Always check your cut before you commit.
- Angled cuts, either by miter gage, blade tilt, or both, create forces that challenge your ability to firmly hold the stock against the miter gage. We recommend that the face of the miter gage be skinned with 120 grit sand paper. This completely eliminates the “squirt” effect. (Yes, I made that up, but it’s descriptive) We really like the 3M Stikit Paper rolls for such purposes.
- When a cut requires the saw blade to be tilted, raise the blade as far as possible and dial in your angle with test cuts in a strip of Masonite. This beats cutting 8/4 stock, all the dust, etc, and gives you the longest possible reference edge to check. It typically takes me about 4-6 cuts before my cut is light tight against the reference. Then lower the blade to the appropriate height for your stock.
- Compound miters are a different beast. It is one of the few joints where both edges of your stock are placed against the miter gage. For this joint to be successful, your stock edges need to be parallel–otherwise your joint is doomed.
- A little dry lube in the miter gage slot does wonders.
- Back to compound miters; always dial in the blade tilt first with a miter gage set for a perfect 90 degree cut. Once this is light tight, repeat the process for the miter gage. Again, Masonite strips (about 6″ wide) are a great way to accomplish your intent.
- When you are going to make a mission critical project, mill some identical stock out of something inexpensive (poplar is our choice out here), and test your processes. Nothing beats knowing that you are dead on.
–John
Sneak Peek: New Angle Master Pro v2…
January, 11th, 2011
With many thanks to all who chimed in regarding the new and improved AngleMaster Pro, we have finalized the design.
Here are the features;
- Both legs are now magnetized. This is actually really handy–you will likely agree when in use.
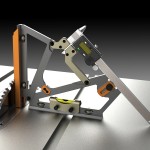
- The level accessory is pictured and it is an accessory option–not everybody will use it, although it is fun to discover angles in space.
- Pictured is the “thin blade” shoe. For those that like static setups, this is ideal.
- Currently, the following shoes will be available as an accessory kit, the thin blade, one non-magnetic hook shoe (use the AMPv2 like a “Speed Square”), and the “V” groove for use on cylindrical shapes (pipe, drill press, etc.). Note: the thin blade shoe also functions as a hook, but you will need two hook type soles if the thin blade is required when the tool is used flat.
- All of the shoes are toolless (we love when we can do this), they slide on the AMP legs and the knurled knobs adjust push rods to register the shoe against the male dovetail.
The video showing the prototype in use will be up by weeks end.
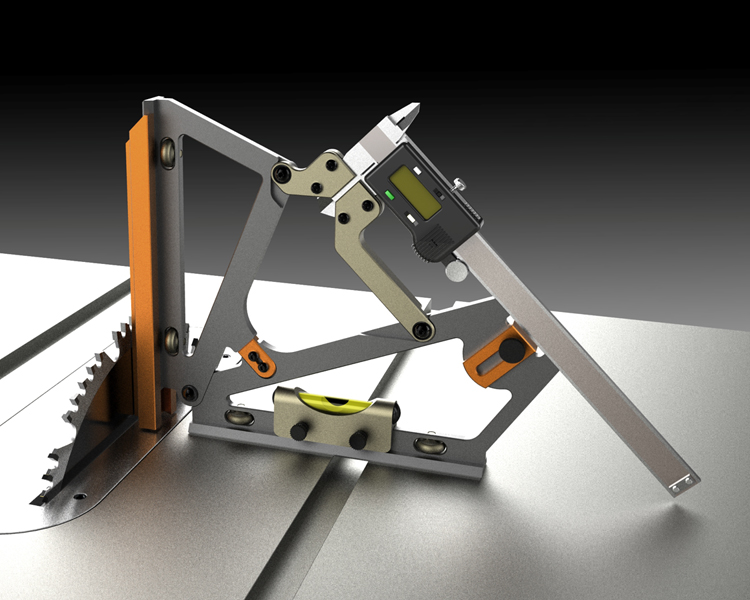
Thanks again for your input and great suggestions. I haven’t had this much fun working on project since the Jointmaker Pro!
Pre-orders will open before weeks end. We expect delivery by June.
–John
PS: We now use the AMPv2 to calibrate our squares–if this is not the most confidence inducing tool we have ever made, I need to find a new line of work.
NEW AngleMaster PRO App from Bridge City
January, 6th, 2011
We made a quick video of the new app for the AngleMaster Prov2 which will soon be released for pre-order and we hope you can help us improve it before we commit.
Since we have been discussing this new tool over the past year, here are a list of improvements over the original, 2001 version of the AngleMaster Pro …
- The AngleMaster Pro v2 does not need a set-up block to align the caliper to the AMP body.
- one leg is magnetic–helps with stability on machine surfaces and allows conversion into a square/miter square with a pocket rule
- one leg features a “V” groove for working with cylindrical references, i.e.; drill press table alignment, pipe rise/run, etc.
- bosses on the back allow the tool to sit flat and function as a transfer bevel
- all ball bearing pivots, tension is adjustable.
- 100% anodized aluminum construction, no rust issues
- common angles are laser etched on back of tool
- dovetailed feet for future attachments
- positive, factory set 90 degree stop
- improved caliper jaw clamp
We are really pleased with this tool and believe you will be too–it now has officially earned our “Bridge City Essential” classification.
A word about the video; this was made for the sole purpose for your review and subsequent comments and suggestions–it is raw, and we will take it down when the official marketing video gets posted.
The app in the video was written for the iPhone, iTouch and the iPad. All other smartphones can access the exact same data set via web link. We are not going to publish a manual but will, on request, provide a PDF manual for those who want to print out 300 pages of numbers.
I look forward to making this app better with your help.
So–what do you think?
–John
PS: Belated Happy New Year!
Digital Calipers Surprise: You Get What You Pay For…
December, 21st, 2010
______________________________________________________________________________________
“Quality is not an act, it is a habit.” — Aristotle
______________________________________________________________________________________
Life around here gets murky at times.
As mentioned in an earlier post, we planned on introducing the AngleMaster Pro v2 last week. And our plan was to include a caliper with each unit. The question; which caliper?
Over the past two weeks we have spent in excess of $1,000 trying to arrange an ideal marriage for our totally awesome and yes you need it Angle Master Pro v2. We bought and tested calipers in all price points…it was an enlightening and frustrating two weeks (I was going to say the best and worst of times but that has been taken…).
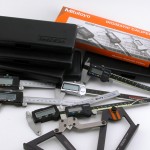
The results are not a total surprise, but we thought you might enjoy the pic of our new caliper graveyard:
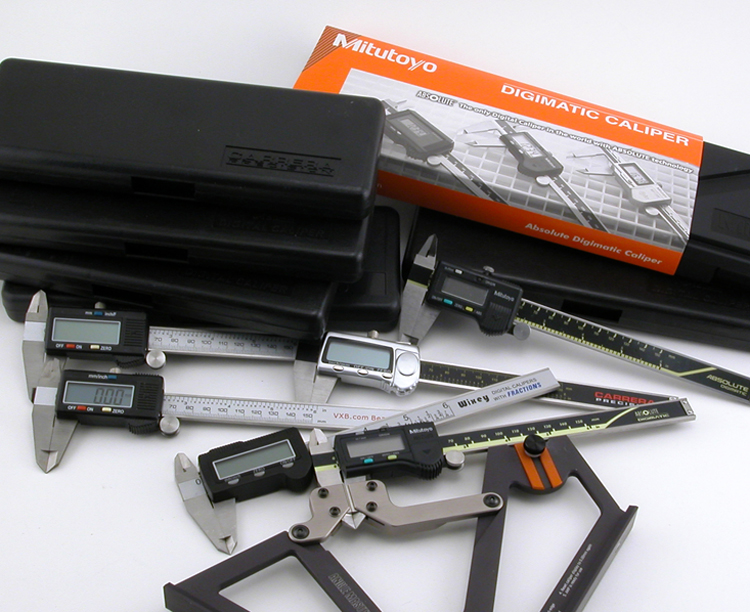
From $12 to $150, we tried a bunch and what we learned was amazing.
All of the calipers we purchased under $50 have major issues. Choppy resolution, sloppy travel, grungy travel, and worse yet, unreliable results–all were very common. Surprisingly they all shared abysmal battery life. And we have been struggling with what to do. To quote Michael, “These cheap calipers blow.” I guess I get that.
We have decided that we are not going to include a caliper with these units. We do strongly urge a dedicated caliper for ease, speed and consistency but we can’t in good faith send you something that you will complain about every time you change the battery. Some of these units needed replacement batteries–some more than once in less than a week! Ouch.
That’s the bad news. Here is the good news. WE CAN’T FIND ONE NEGATIVE THING TO SAY ABOUT THE MITUTOYO 6″ ABSOLUTE DIGIMATIC. It is the perfect caliper for the AMP v2. Here’s why;
Battery Life: How about every two years?
Resolution? 0.01mm with ease.
Operation? Smoother than an encyclopedia salesman in backwoods (pick your state).
Price? Not $12
Here’s the deal; the Angle Master Pro v2 will debut without a caliper. We can buy the Mitutoyo caliper wholesale but not for a lower price than you can!
We found a strange quirk where wholesale is more than retail. This tool can be found on the the web anywhere between $115 to $150. However you can get it here for $98 until the end of December (and I believe it is freight free). It will be one of the best tools you will ever own. I have one in my briefcase, on my home desk, my office desk and have had two confiscated by airport homeland security folks who think I can fly passenger jets… (We bought 6 from this firm and you will soon see them in action in the AMPv2 video .)
Lastly, this is my last post until after the holiday. On behalf of all of us here, particularly those that actually work, you are sincerely appreciated beyond words. We have had an incredible year in really crappy times and it is because of all of you. Drivel is good. The Drivel Starved Nation is AWESOME!
Happy Holidays everybody.
Best-
John and Gang. Michael too.
PS: Full Disclosure: We have no business interest or connection (other than as a customer) with either Mitutoyo or the link posted above. I am sure somebody needs to know this.

