The project I am going share came from a ¾”x ¾” x 18” stick of Eastern hard rock maple—and I only used half of the stock. It was made entirely without electricity.
All four faces of the stock were hand planed and I tried my best to keep them square…more on this later.
With two lengthwise rip cuts (used our JS-7 saw) I had two strips 18” long approx .21” thick. These two strips were ganged in a vice and I peeled off four .21” square pieces. Each piece had two adjacent faces planed smooth, all I cared about was that they were bigger than 3/16” square—my target size.
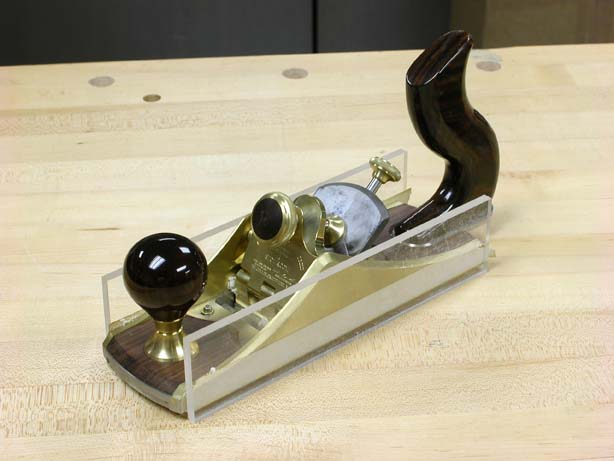
The little system below consists of a base material (I don’t know what it is) and some scrap maple. Took the plane over to our table saw and put two small pieces of 3/16” acrylic on the table and rested the nose and heel of the plane sole on these height gages. Using double stick tape, I fixed two acrylic skid plates to the sides of my plane flush with the table saw top. The “gap” was 3/16”. Actually, this whole setup relies on double stick tape.
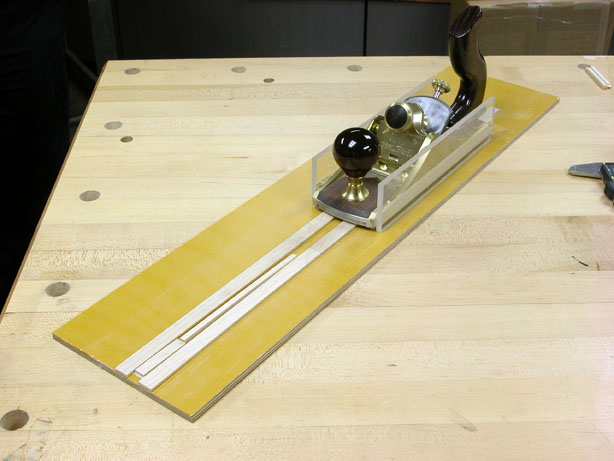
Each stick was placed in this little jig with one good face down, and the sawn faces were planed parallel (you know you are done when the plane quits cutting). The stock needed to be dead square so I took great care to make sure the iron wasn’t skewed. And then the strangest thing happened…
The gap in the fixture that traps the stock from side to side was approximately ¾” wide (I didn’t want to wear the iron in only one spot). I noticed when I began to plane that these little sticks bent (front end of the stick hits a stop) from the cuts. And yet, all four sticks came out dead square!
Apparently, the bend in the stick somehow kept my top surface perpendicular to the sides. I don’t know how this works, but I have done this enough to know that it works. Others smarter than me can chime in if you understand what is at work here…
For those of you that understand the concept of “tolerance stack”, this project was a disaster in the making if I could not control my net sizes. Check this out, after tweaking the iron just a bit, my sticks ended up between .185 and .1865—every one of them. This little planer works fantastic. If you think I am crazy to work to these tolerances, you are selling yourself short…
For this project I needed 34 pieces of wood, 2 needed to be exactly 3.406” L, 11 needed to be 2.33”L, and there were 21 pieces 1.26”. Using the Jointmaker Pro and digital calipers, the pieces were cut, plus a bunch of extras. The net length of all my pieces all were within two thousandths of an inch. This isn’t bragging, the project is not doable without this precision.
The only joinery were corner bridle joints–lots of them. Each stick had a male and female end. The males were cut first. I spent about an hour on setups and about 5 hours to cut all the joints. (The females took the longest [duh] because after the shoulder cuts I nibbled out the center with multiple passes.) Great care was taken to make sure the depth of each cut was perfect—there was no way to clean up the joinery after assembly so I needed net perfect results.
 Not a fancy setup–notice the paper shim on the left to kick the reference face square–all of this was scrap stock.
The little business card strips on top were flip-down shims to nibble out the center portion of the bridle. The scrap dovetail piece had a piece of sandpaper on the end–my fingers got sore holding these little pieces without help. Lastly, there are two rulers stuck to the tables so my parts did not fall through the gap between the tables.
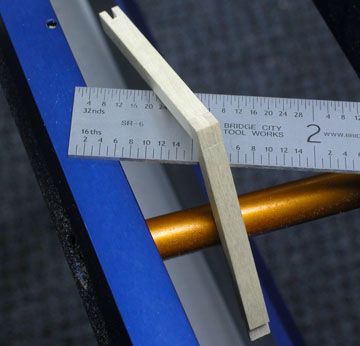
With much care, the setups were finally confirmed.
Once the joints were all cut, I waxed the faces of each stick—this is the only finish required for this project.
Next, I started assembly. So for this project I was fighting, stock cross-sectional tolerances, length tolerances, joinery tolerances, assembly tolerances and glue. The results bring a smile to everyone who has had a chance to hold it….
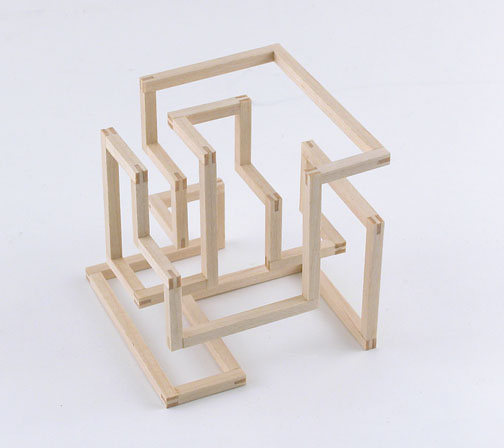
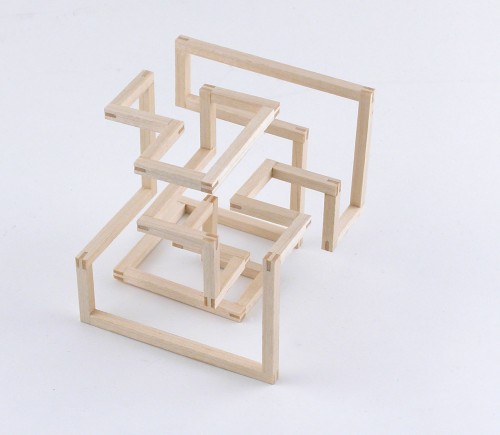
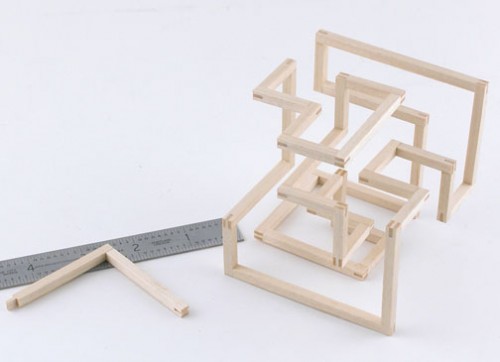
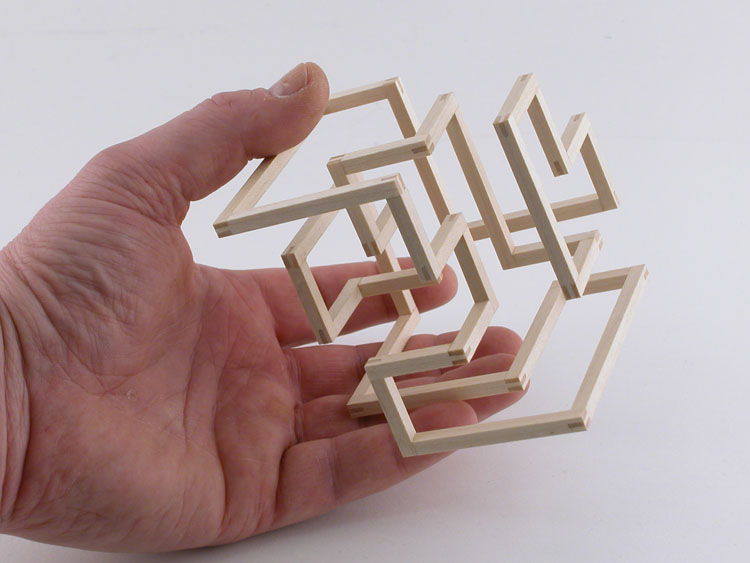
There are six sides to this cube–each is unique. Looking through the piece is joyful exploration. None if it possible without working as carefully as one can–and truly the work was another reward.
So, like most ideas, they have offspring…
–John

John,
The “coolness factor” is off the charts!
What is your method for “nibbling” out the waste? How do you keep the blade from wanting to follow the last cut, do you keep changing the sacrificial fence? or is there some other secrets you can share?
Thanks
Rutager-
With the JMP I always make the cheek cuts first. For the bridles, and you can see in the pic, I made some flip-down shims from a thick business card. Once the cheek cuts were made (stock against reference), I flipped down one shim which shifted my stock and made a cut, 180 degree flip and cut 2. Down came shim 2 (now they are both in play) and made two more cuts. This cleaned out the bridle. So, 6 cuts per bridle, and, I checked for “fuzzies” and dust after each cut. At this scale, there is no margin for error. The tenons were way easier–four net cuts, two with the grain and two against. I used the general purpose crosscut blade (I use this blade for just about everything but lots of dovetails).
Regarding the sacrificial fence, the relationship between the blade and the fence never changes for the bridles as the stock is shifted. But, I did move the sacrificial fence between the tenons and the bridles. Rather than consume the sacrificial fence, I am skinning mine with aircraft ply and that will be consumed. Cheaper and fast–big opening behind it in the sacrificial fence as to not interfere.
Hope this helps.
John
John,
Thanks, all very good info.
I assume, that with such small stock, you controlled the depth of cut by the amount of pitch and each cut was a one stroke cut, correct?
Rutager
Rutager;
This is how I dialed in the bridle joints…
Made the tenons first–fast and really easy. Cheek cut, flip, and cheek cut. All of this is after I verified squareness in both directions with stock that was square to within .001″. Depth of cut came second but I made them short a skosh because the crosscut would take care of the rest.
The secret, if you can call it that, is to have enough extra stock to play with to really dial in your intent. So the crosscuts that liberated the scrap were dialed in using the pitch adjuster, and yes, every cut at this scale is single pass.
I first made practice cuts to determine the precise width of the bridle–at this point depth of cut comes second. I wanted a friction fit without splaying the bridle which would create a joint you could feel–not good.
Once this distance was achieved, I played with depth. The final fit was done by fitting a male to the female end to end (OK, there is joke here but I am more mature than that). When I had an end to end fit where each end grain face touched simultaneously I started making all of the cuts. None of this is possible without digital (or dial–which no longer is an obvious economical choice) calipers.
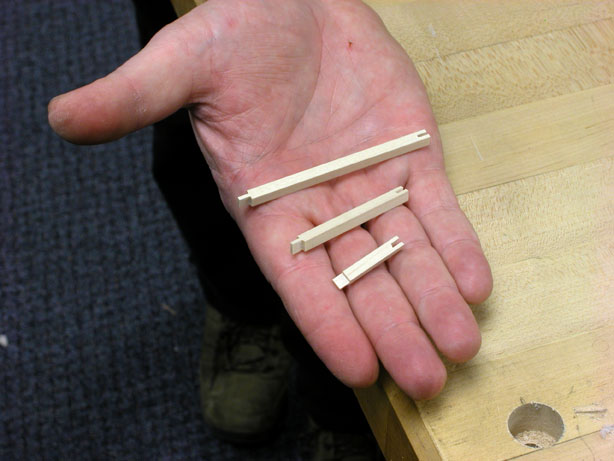
That said, as hard as I tried to be perfect, I am really glad I made 20% extra pieces, because during assembly if it didn’t fit like a glove I rejected the piece. In fact, the image of the three pieces in my hand are all rejects.
Truthfully, the techniques bore me–they are just necessary to achieve the result. The (tolerance stack) really intrigues me and what keeps me up at night are the spin-offs…
–John
John would a sacrificial board healed down with double stick tape replaceing your two rulers work. When cut through it you would have a zero tolerance saw plate (Like the ones you used to make for *power saws). * That bad word.
madbroad
Jay;
As long as the stock was a hardwood and parallel it would work fine–I just happen to have a bunch of reject rulers around here and they come in handy every so often…
John