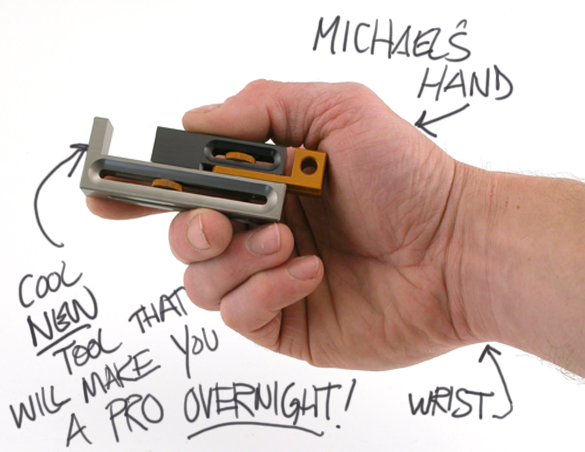
It is not easy inventing a tool that every woodworker in the world will want–but we have done it again (the others you don’t know about yet). Which prompts me to ask this question; Does anybody know of a bauxite mine for sale? We are interested–particularly if the owner is setup to take the Discover card. We are, after 25 years, finally thinking big here–real big.
Our new mystery tool, the tool that you WILL want REAL BAD is pretty cool. Here’s the story.
If I sound a bit amped it’s because I have started making things out of wood (after a 25 year exile) thanks to the JMP (Jointmaker Pro for the acronym impaired). I am also off my meds. Just discovered coffee too.
So one day I am making parts on my Jointmaker Pro and the joints were so small I had a hard time measuring (and seeing) to get light-tight results. And then an idea pooped into my head.
NOTE: There are no typos in the above paragraph.
What if there was a tool that instead of measuring all you needed to do was gauge? So we built a prototype and all I can say is you will want one, maybe two, and this want will hurt real bad until the little Bridge City box shows up on your doorstep. Here’s why…
If you have a table saw, router table, radial arm saw, chop saw, band saw, JMP, or any other tool that makes a kerf 1/2″ or less, this device will blow your mind. Please don’t try to send us any money–they are not for sale yet!

Is this cool or WHAT?
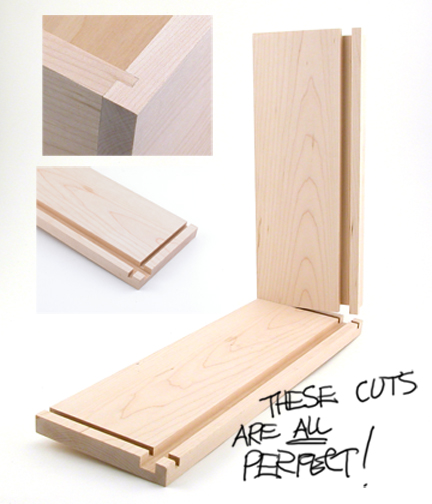
 REAL LIFE EXAMPLE #1: You are making drawers with veneered ply bottoms. Plywood is like snowflakes–no two sheets are the same thickness. So you cut your bottoms and it is time to cut the grooves in the four drawer pieces. Depending on your drawer, you will likely use a router, router table, table saw or–our HP-6 hand plane. Either case, our new secret weapon will work wonders. Here’s how.
All you need to do is gauge the thickness (you DO NOT MEASURE SQUAT) of the plywood with the tool (it’s so easy even YOU could do it), tighten the knob and this creates an offset at one end of the tool that represents the outer boundaries of your kerf within one or two thousandths of an inch of your ply thickness! The tool then lays on it’s side and acts as a flip stop against a reference. The days of widening a kerf by test cuts is OVER. As in F-O-R-E-V-E-R.
We will demonstrate this via video in the coming days. If your drawer sides are cross-grain grooved at the rear to accept the tenons of a rebate cut on each end of the drawer back, it doesn’t matter what the thickness of the tenon–you gauge and cut–no measuring and I GUARANTEE YOU CANNOT SCREW THIS UP!

This is no pre-game seven Stanley Cup boast made by an overpaid, loudmouth athelete–this is a REAL LIFE boast made by an underpaid loudmouth toolmaker–furthermore book it–I guarantee a gallery quality cut. Did I mention you cannot screw this up–ever?
Is this cool or what?

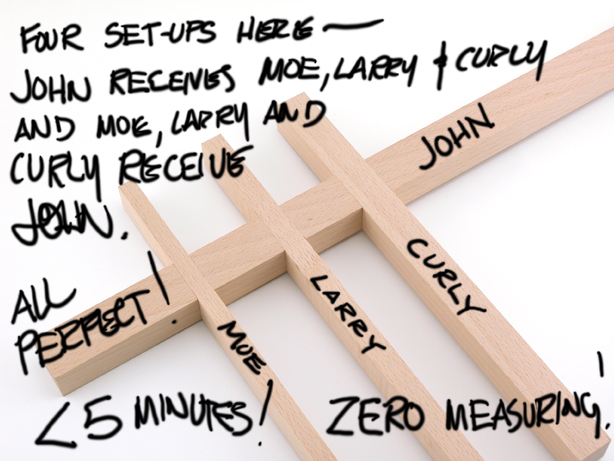
REAL LIFE EXAMPLE #2: Many think I am nuts, and they are getting warmer. That said, I am actually making a gallery piece out of coffee stirrers that I rescue. OK, I steal them–and I ask first even though I am a charm school flunky. This material is approx. .050″ thick and the joint possibilities are limited–primarily cross and half laps. Not easy. Oops, it is now. Film to follow.
There are other examples but the video will spare you from me. Coming soon. –John


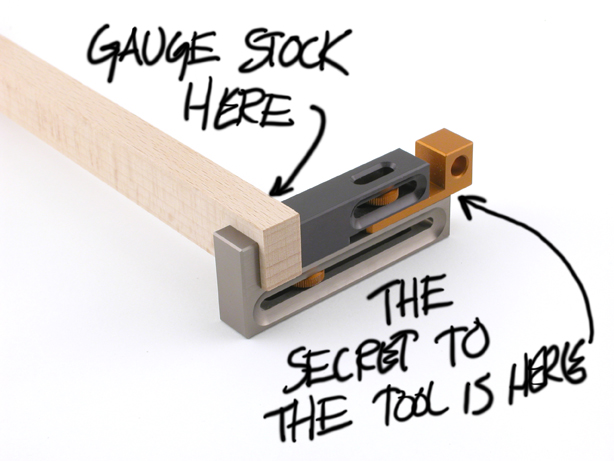
You gage by putting the wood in the opening, and the outside of the orange block pushed against the fence and the black block inside against the outside (from the fence) of the blade. It creates an opening of the material size plus the saw/router kerf. I’d be interested to see the video.
The way I’m guessing you set the kerf is by gaging that first, then the material, and it mechanically “calculates” the total witdh. Pretty clever use of geometry if it’s what I’m thinking.
The video explains it all–but you are spot on. You first calibrate the tool–no tools required–we show you how. This calibration offsets the orange component by the exact kerf of whatever tool you are using against the light grey component–and you only do this once. For example, if you have a table saw blade that makes a .122″ kerf, this would be your offset. The reason we suggest that people may want more than one is to keep one tool for each piece of equipment. In addition, certain router table fences may need to be shifted at each end necessitating two stops. Like we said, we won’t stop you!
Next, you gauge your stock and lock. You now have a flip stop that will allow you to move your stock the exact thickness of what you gauged MINUS one kerf using the two references edges (orange and light grey) . The net result is a perfect groove for whatever you gauged. (Grooves made on a table saw (rip cuts) the stop us used on the back side of the fence–again, we show you how. Sleds work differently but both are easy and fast.
We have had a lot of fun with the blog posts, but this tool is the only tool I have demonstrated where by show of hands had a 100% “I want one” response. Hence the hyperbole.
The hole is an aesthetic addition–a sinus cavity if you will to add visual interest and help contribute to the anthropomorphic appearance. That said, it would help the tool to be hung on a rack too.
-John
I’m relatively new to woodworking and your company (my first order was the drill jig), and I can think of a few kinks in the design in practice, but it’s pretty plain you’re a clever guy.
I’ll look forward to seeing the video to see if it addresses my concerns. Good luck!
Kinks? Please do share. I promise to tell the truth. We haven’t made these yet so if your fears are grounded in reality (unlike me) we need to know.
John
PS: Welcome aboard! The Drilling Jigs will ship in late July–and I need mine real bad–I am making a chess set with the JMP and need to weight the pieces with a brass slug and can’t drill the holes until this tool is done.
So what have you named it?
Steve
Steve: The internal working name is Kerfer Dude. KD-1. It just may stick considering my mood–ShamWow has been taken. Your thoughts?
–John
Kerfer Dude – I now get the clues.
Will have to think on the name some after we see the video. Very neat tool.
Steve
Kerfer Dude is great, and slightly Californian (which might get you kicked out of Oregon). But in the vein of ShamWow, how about KerfPro? Or MultiGauge? Or the ever popular Kerfotron? Or Kerfomatic?
Hi John,
This is a woodworking “version” of the slide rule?!?!
This is really cool!!!
I want mine!!
HB
HB;
I can tell you want it REAL BAD–just like we said! Only one?
Maybe we should call it the Pickett Buster…
-John
Sure John,
I want to order it REAL BAD….
When will it be available to be ordered??
HB
HB:
After we post the video and update our website–next week sometime. Oh, almost forgot, we have to buy a sign from McDondald’s to show how many billions we have sold too.
-John
Are you going to offer a bakers dozen? Buy twelve get thirteen!
Rutager;
Curb your enthusiasm–people are going to think you are my dad.
–John
John,
I believe that Rutager’s enthusiasm if anything is underwhelming. I was thing maybe a gross of them would be perfect. :o) Also, it seems to me that KerfWOW would be the perfect name. Now please put them up so that I may further bankrupt myself on your website. :o)
Fred
Fred;
I like the way you think! And KerfWow made my day-that is funny (to me anyway).
–John
John,
You are quite welcome. I mean why think small. After all you can get 42.4 of them for the same expenditure as the stainless steel shoulder plane. KerfWOW!!!! :o)
Fred