Dear Drivel Starved Nation;
The first production prototype came in last Thursday and I thought I would share with you a sneak peek. As mentioned, this item will be made completely in China and I think you will be thrilled with the quality.
Before we move on to the pictures, I want to thank all who commented on the logo – all my teachers in my life and my deceased parents would be pleased to learn that I do indeed listen.
Here is the new copyrighted logo for the box and the Chopstick Master;

The logo for the ChopstickMaster.com splash page is a little different for reasons that I am too lazy to explain;

As previously mentioned, the production prototype was hand delivered last week and I could not be more thrilled with the results. For those of you worried about quality, I assure you this tool will be as good, or better than if we produced it here in U.S.
Over the last 6 months, over 1,000 pair of chopsticks have been produced with various CSM prototypes and I would like to share the changes that occurred from not only my own mistakes as a designer but from the observations I have made watching complete beginners make their very first project from wood.
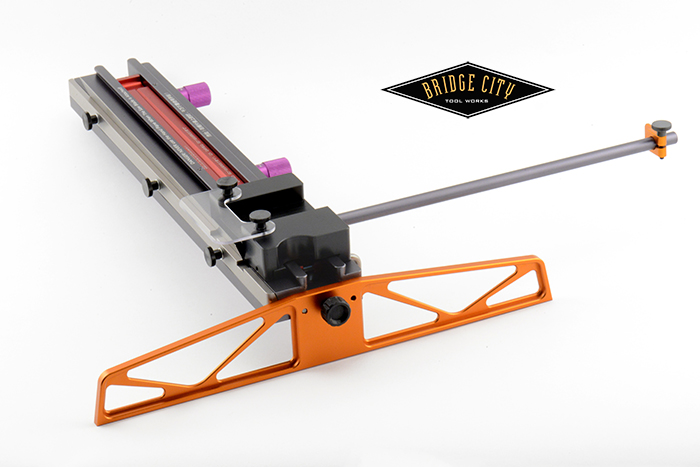
Here’s an overall view of the Chopstick Master from China;
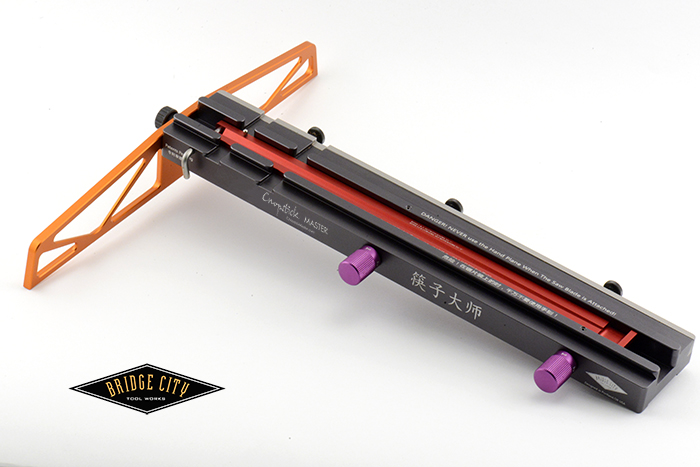
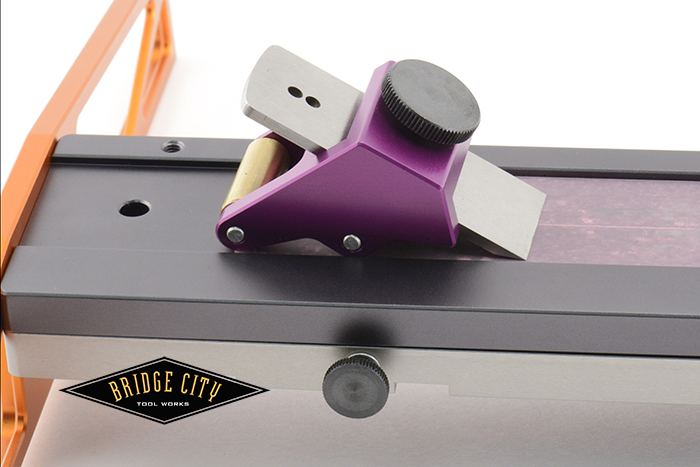
One huge improvement are the purple adjusting knobs; the settings are now visible from the top. Why I did not think of this out of the box is really rather stupid.
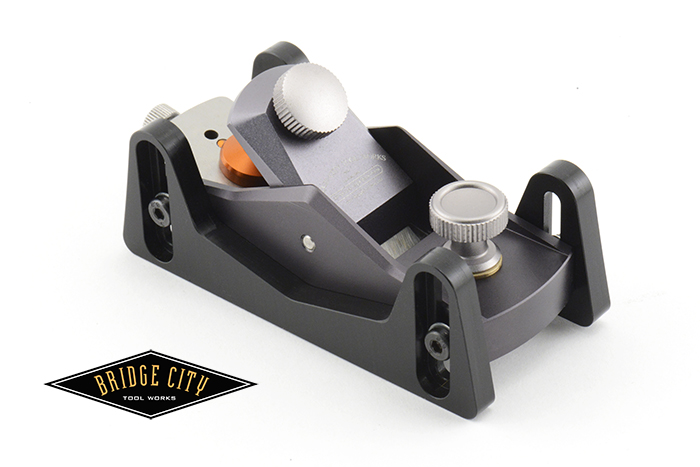
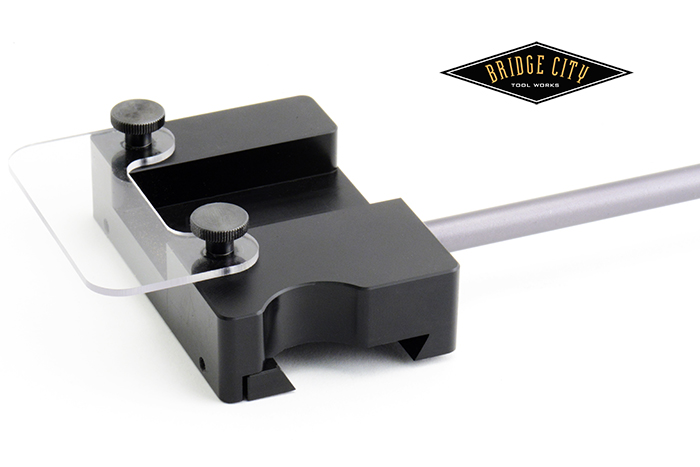
The HP-8 with acetal depth skids;
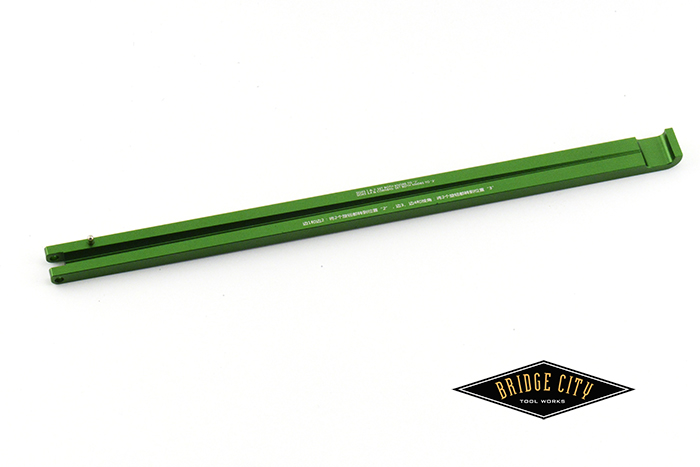
The CSM has the ability to make chopsticks with a 5mm octagon working end, or a 2mm octagon. Here’s a pic of the 5mm arm;

The “V” groove down the center is how we transition the square rear end of the chopstick to a perfect octagon at the narrow end.
Here’s the 2mm counterpart;
This tool was designed for absolute complete newbies. As such, we needed a way to address a dull plane iron. Here’s a pic of the small little honing guide that guarantees a perfect 30 degree micro bevel;
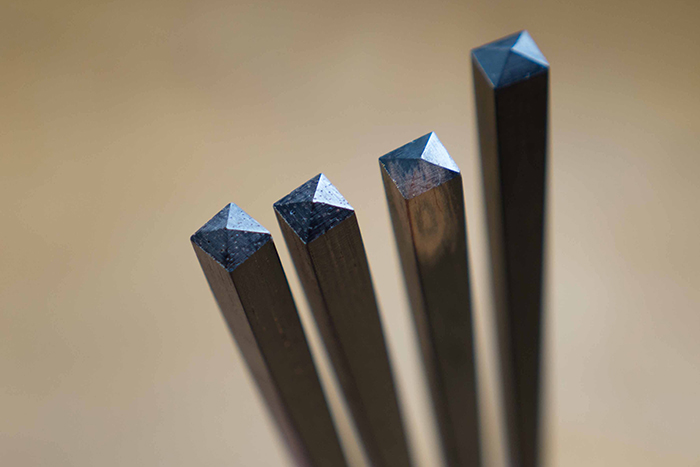
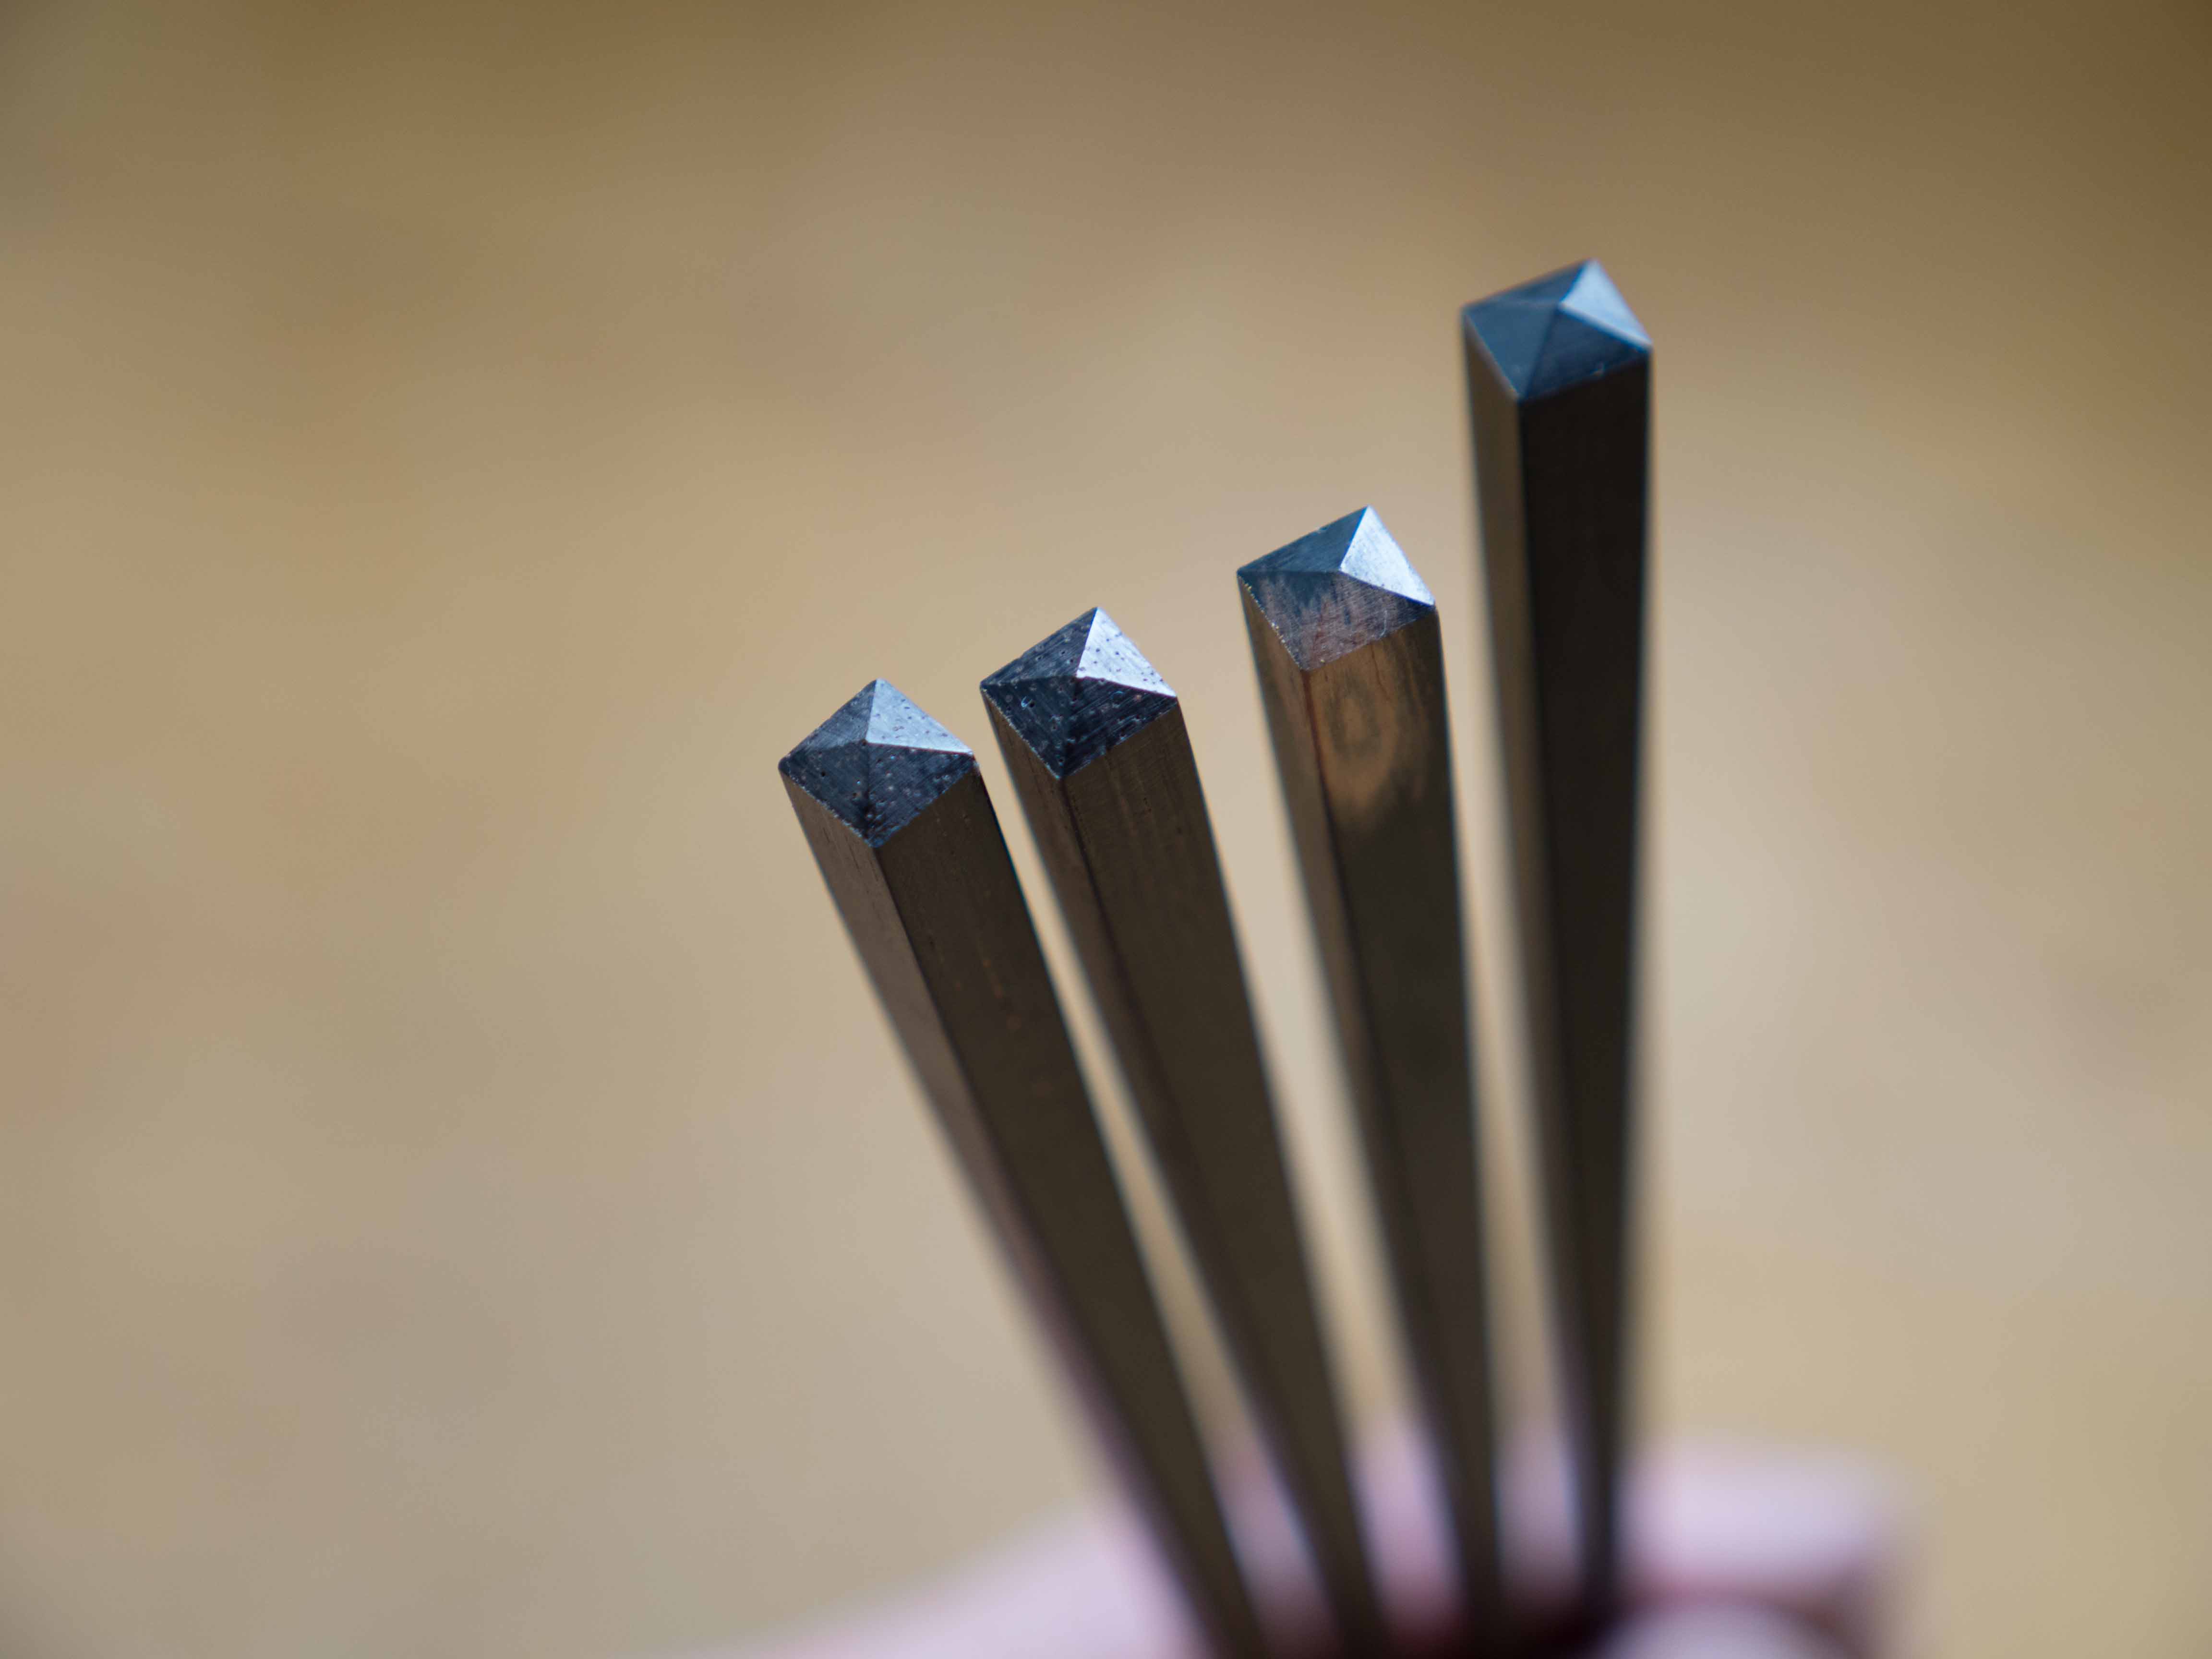
What makes the CSM so much fun is the pyramidal finial. That is cut with this specially designed crosscut saw blade made in Japan;
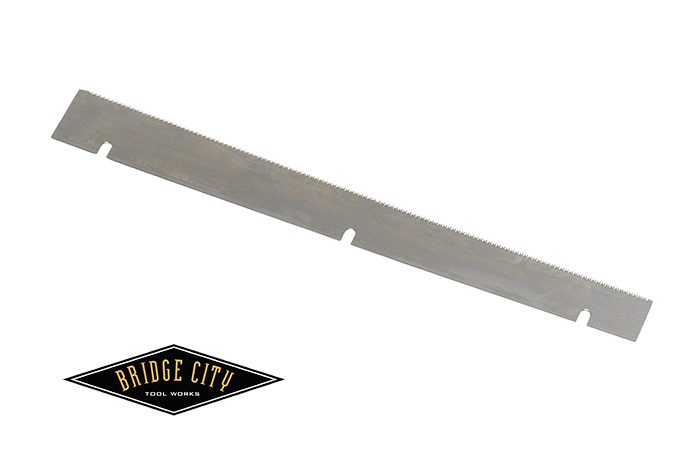
This pic, courtesy of Konrad Sauer who has a beta unit, shows how cool this cut is in rosewood – it takes about 15 seconds to make all four cuts;
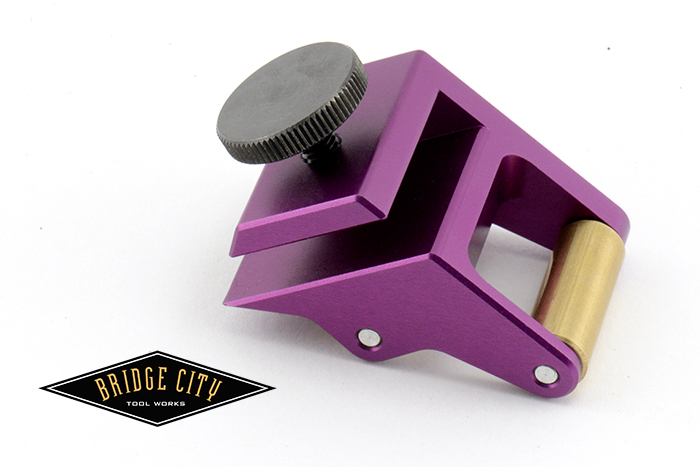
To hold the chopstick dead in place while making these four cuts, we needed to make a mini-Jointmaker Pro. Here’s a pic of the sliding table and the adjustable length stop;
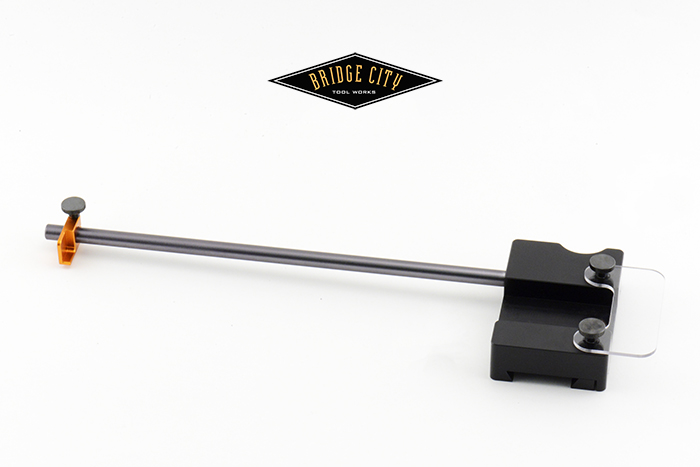
For those of you who participated in the beta-testing, you can see several improvements. The stop bar is robust, and the entire sliding table has been redesigned. There is much more “purchase” for the chopstick and fingers; the thumb cut-out removes all doubt as how to hold the chopstick in place, and we added set screws to the gib so the sliding table does not “wiggle” itself loose. Here’s a close-up;
 The CSM with blade and sliding table attached, the counter hook is now indexed to the body. Here is what it looks like for making the chopsticks;
Here’s what it looks like when you flip it 180 degrees for sharpening (the grit is 8000 grit sandpaper from 3M). The strips are custom made with self-adhesive and can be replaced when worn. DSN members will likely use their own stones. At least I do.
Again, thanks for the logo feedback, it was really helpful. We will open this for pre-orders real soon! The first production run for 2015 has some manufacturing constraints that should be addressed in 2016 so we have a fixed allotment for BCTW this year. FYI.
The only changes that will differ from what you see here are logos added to the counter hook and honing guide.
Here’s a pic of the very attractive box;
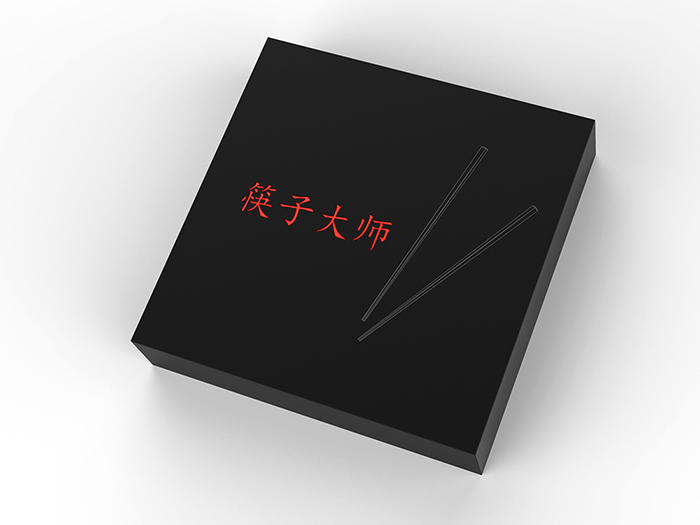
There’s more to this box that what you see, but that will be a surprise.
If you are going to host a chopstick making dinner (they are a blast by the way) you will want to wear one of these to make it official;

(Yes, that pic is me… 40 years ago)
Again, thanks for the logo feedback, it was really helpful. We will open this for pre-orders real soon! The first production run for 2015 has some manufacturing constraints that should be addressed in 2016 so we have a fixed allotment for BCTW this year. FYI.
-John
Cool! I’m definitely going to need one of those shirts – it’ll really confuse my chef-friends at Asian restaurants.
One question: why not make the channel holding the chopstick blank go diagonally down the arm, rather than straight down it? You’d use more of the blade, and it shouldn’t affect the shape of the chopstick at all. Might make it easier to clamp, too…
It looks like a great product! The box is, indeed, sexy – can hardly wait to see what the secret is! Nice work, Economaki-san. (Curiously, that actually works in Japanese!)
Couple of moinor reasons why the groove is where it is and one really good reason.
1) With a diagonal groove it would not be as easy to “roll” the chopstick to each corner.
2) A diagonal chopstick would stop with only one edge against the stop as opposed to the face. The face is a dead stop (face to face), with one corner, force coming at an angle invites slippage. Neither are desirable.
3) The diagonal cut would have to exit one side at the fat end, creating a really bizarre looking part, and somewhat sharp to boot.
3) AND, the big one. That cut and the recess that creates the hook are done in the same CNC setup which saves money vs two setups. This is a huge time concern and cost concern when producing large quantities.
Thanks for the reasoning behind the central groove, John. I was pretty sure there was a good reason (or 3), but couldn’t come up with them off the top of my head. The last one is not one that I tend to think about much. It’s always informative to see what happens when pragmatism meets desire.
I love your epigraph, by the way. I think I’ll put it in all my missives to my students!
Beautiful engineering, John. Maybe a silly question, but will it make anything other than chopsticks?
Beautiful! Love the logo. And the shirt! A tool with a uniform. Perfect!
This is you at your best, unless of course, you’re telling stories while making them!
Question – if you have an HP8, is a unit available sans plane?
Thanks for the update. Getting hungry!
neil
Well, you could cut Greene and Greene plugs all day and not break a sweat, or screw up. The saw blade can be mounted on the outside of the clamp jaw for 90 degree cuts, so you can make all kinds of sticks. But did I mention it makes a really killer chopstick?
As of this morning, the unit comes with the plane. Just wait until we announce the price. 🙂
SLAM DUNK!
Also, that honing guide is too damn cute! Awesome.
John: two items:
1) The new mobile theme for the website is aight, but it loses the quote and the ability to read and make comments.
2) The honing guide is awesome looking.
David-
Thanks for the feedback.
The mobile version is a work in progress.
John
Hi John,
I have probably spent way too much time thinking about chopstick making jigs! I originally assumed that all four sides need to be planed, but am I correct in saying that only two adjacent sides need to be tapered to achieve the desired result? I am either totally wrong or just the last to figure this out! Thanks.
Steve
Steve-
Technically you are correct.
IF you had a blank that had two adjacent sides hand planed, yes, you could taper the opposites and call it a day. This method does skew the center line of the grain within the blank assuming your blank was straight grained at the start.
However, making blanks is a bit of a hassle. For the numbers we are making, there is a power feeder set up on a table saw and blanks are cut non-stop for days on end. Each blank has at minimum, three faces with saw marks, hence we plane all four sides which maximizes the potential for the center line of the chopstick to be true. As mentioned, only planing two sides creates a short grain potential along the entire length of the stick.
-John